I have an antique iron urn that is sitting outside and has begun to rust. Is there any danger to plants if I use it for a container/planter? Does it matter if I use annuals or perennials? I am also considering planting a yucca in it; how do you think it would do?
Your container will work well with no adverse reactions to rust by your plants. However you must drill several large holes in the bottom of the container to allow for drainage. To stop the soil from plugging the holes and restricting drainage, put a piece of screen or weed cloth over the holes. You may have a problem with the existing rust on the bottom—if you place your container on concrete or wood, the rust and water that drains out may stain the surface below. Annuals are always a good choice for planters; they do well in the summer and are not a concern when it comes time to put things away for the winter. Perennials (or the yucca) will require protection from the winter elements (such as putting the container in the garage). The same would be true for an evergreen or shrub. Perennials will also require repotting and division due to the restricted environment in the metal urn.
Archive for the Ask MG department
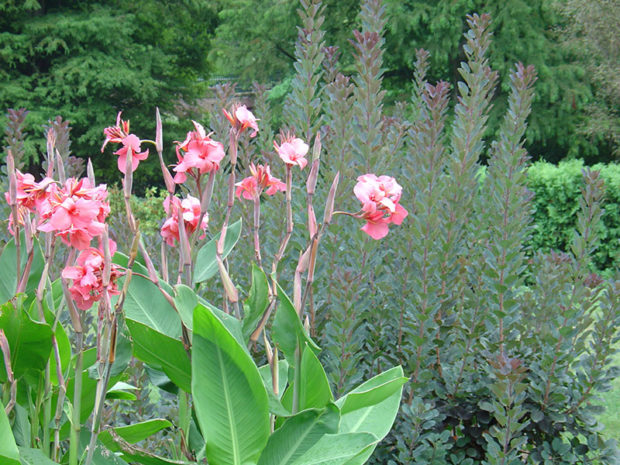
How do I overwinter cannas?

I have been unsuccessful in overwintering cannas; they get mushy or just don’t survive. What’s the trick?
Canna lilies are vigorous growers, spreading and creating large clumps of fleshy rhizomes. Whether in the ground or container, their vibrant colors and reblooming ability make them desirable additions to a garden. Keeping our favorites from year to year is also cost effective.
Using a fork, gently lift the shallow-rooted clumps from the soil and lay them out on trays with newspaper. Separate the rhizomes with your hands, being careful but not paranoid if some of them break. Sort and trim out any damaged rhizomes. If they have been in ground or container soil, do not wash them off. Let the soil dry naturally and brush it off later. If they have been in a pond situation, then clean that debris off. Let them dry for a couple days.
Trim the stalks to about two inches above the rhizomes with a clean knife or pruners. Remember all naked rhizomes look identical. To keep varieties identified, put a label with each group and keep them separate. Once dry, wrap them in dry newspaper or paper lunch bags, and place in open cardboard boxes. Shoeboxes are great for large numbers of multiple varieties.
The key is keeping them dry and cool while you wait to replant them. Cool, dry basements and fruit cellars that don’t freeze are ideal. Do not place near furnace vents where heat can make them sprout prematurely. Check once or twice over winter for soft or shriveled rhizomes and discard. If more than a few are rotting, then move them to a drier location.
Related: Planting cannas in containers
Related: Overwintering tender garden plants
How long to vegetable seeds remain viable?
How long can vegetable seeds be kept? A year ago I purchased many vegetable seeds in hopes of starting a garden last spring. My plans were interrupted and now the garden is scheduled for this spring. The seeds are all dated 2011 and have been kept in their original packaging and stored in my basement. Will these seeds still be viable this spring?
Properly stored seed remains viable for different lengths of time depending on the type of seed. Be aware that seed companies may store seeds up to the number of years of their viability prior to selling them. If you purchased your seed from a reputable catalog or nursery, you can call them to find out what their company protocol is.
Since all your seed was purchased in 2011 and dated as such, you have a fair chance that the unopened packages will be viable. Most vegetable seeds are good for two years with some, like lettuce, viable up to six years. If they have been kept dry and cool in your basement, those conditions simulate dormancy.
To test for germination, sprout seeds between moist paper towels; if germination is low, either discard the seed or plant enough extra to give the desired number of plants. You will know quickly which seeds need to be repurchased.
Related: What are good vegetables to grow in a small space?
Related: Saving plant seeds for next season
Can rabbit manure be used as mulch around plants?
We have a pet house rabbit that is litter trained. Can the manure and litter (made from recycled newsprint) be used as mulch in a perennial bed or around trees and shrubs?
This sounds like a gold mine since rabbits are vegetarians. But it comes with significant cautions. Rabbit manure is higher in nitrogen than even chicken manure. It also contains phosphorus. Nitrogen is great for leaf production. The phosphorus is good for fruit and flower production. So consider exactly what you will be enhancing with its application. Average N-P-K (nitrogen-phosphorus-potassium) analysis of composted rabbit manure is 2-1-0.8, which is relatively low compared to other commercial products. In order for the manure to be useful, it must be hot composted, preferably for a year, to reduce the probability of transmitting any pathogens lurking in the litter. A hot compost pile should measure at least 150 degrees in temperature.
Composting the litter changes the material into a form plants can better use. It also allows odors to dissipate. After the year-long composting, it should be applied to the soil in late fall and worked in. Preferably, it should not be used as mulch and never uncomposted, as the high level of nitrogen can actually burn and damage plants, even with the newsprint base. Since it has to be worked into the soil to be effective, you might find this easier with your perennial bed in fall than disturbing the roots of trees and shrubs.
How do I remove unwanted scrub trees?
We have scrub trees growing in our yard (around the fence line and in a crack between our patio and house). What is the best way to kill the trees and their root system without damaging our home, fence or grass?
Although a little labor intensive, the most effective way to remove scrub trees is to cut them off at ground level. Use sharp hand pruners, loppers, or small pruning saws to make a clean cut. Use bleach handwipes to clean the blades of all tools used to avoid spreading any bacteria to your desirable plants. Dry them well to prevent rust.
Next, apply an herbicide product to the cut stubs that contains the ingredient triclopyr. Use a sponge brush dipped in the product to daub directly on larger cut stubs. For pencil-width stubs, you can use a narrow-stream spray bottle. Be careful not to spray on a windy day and use cardboard shields to protect any nearby plants you want to save. Read the label directions carefully before applying, and wear protective gloves and clothing.
How do I get get hazelnuts to produce fruit?
I now have 5 seedling hazelnut bushes growing, in conjunction with National Arbor Day. They are still quite small, but I would like to know if there is a special fertilizer to boost the growth of hazelnuts.
Can you spell “patience”? Nut trees or shrubs may be listed as fast growers, but it takes several years before they are mature enough to produce good edible fruit. In this case at least 6 years, maybe as long as 12 years. After that long there will only be nuts if you have a minimum of two varieties of hazelnut because, like apple trees, they are not “self-fruitful” and need a second variety nearby to achieve cross-pollination between the varieties. And then you will have to battle the wildlife that also enjoys them! There really is no magic pill fertilizer to make your hazelnut trees grow faster to the point where they produce those wonderful fruits more quickly. Instead, make sure you get a soil test for the area in which they are planted to know the pH and the nutrient level of the site. Hazelnut trees (Corylus avellana, C. americana, C. colurna ) like a pH of 6 to 7. Although they will grow and produce fruit in shallow soils, they prefer a well-drained site with plenty of organic matter. Sandy and clay soils both benefit from cultivating in composted organic amendments.
Hazelnuts were often established as hedgerows in Europe and Australia since the plant’s natural characteristic is shrubby as opposed to single stem. Often for nut production, they are kept pruned to a single trunk and can produce a deep taproot. Although they do produce many shallow surface feeder roots, they prefer not to be moved once planted. Hazelnuts also don’t mind the cold winter temperatures of Michigan. They actually need a chilling of a couple months in the low 30’s to help them toward fruit production. However, they really do not care for drying winds. So while they are still young and easily moved, make sure you have sited them properly.
Related: Growing Fruit in Michigan
What is a good choice for a privacy shrub?
What is a good choice for a privacy shrub in southwestern Michigan? How early in the spring can I plant it?
When seeking privacy, plant more than one plant. A trio works well as they balance each other, forming a community rather than an “orphan” look. Plant three of one species laid out in a shallow triangle so they fill in around each other aesthetically. Straight rows look artificial. You can also vary the trio with a single specimen for the center point and flank each side with another species.
For example, center a leatherleaf viburnum (Viburnum rhytidophyllum)with its soft, oval, gray-green leaves and flank it with native ninebarks (Physocarpus opulifolius) with burgundy leaves and peeling bark. Both are deciduous in zone 5. Viburnum tops out at about 10 feet and the ninebark tops out about 8 feet. They both bloom spring to early summer, have considerable winter interest, grow relatively quickly, and deer don’t find them appealing.
Another possibility is centering an evergreen such as ‘Green Giant’ arborvitae, which is an open pyramidal evergreen and less appealing to deer. They are tolerant of various soil types, but prefer good drainage. An evergreen paired with deciduous shrubs can get you more “instant” privacy than waiting for three identical shrubs to reach maturity.
Flank the evergreen with the ninebark variety Amber Jubilee which has gold-orange overtones in the leaf veins, or ‘Summer Wine,’ which features a dark burgundy color. By creating a group of compatible plants, spaced apart according to their mature width, you have something attractive to look at while achieving a privacy screen.
Related: Step-by-step guide to planting trees and shrubs
Related: Tree and shrub pruning tips
What is causing fruit to drop early on my apple tree?

We have a McIntosh apple tree that is about 30 years old. We have never sprayed it. In the spring, lots of tiny, green apples start falling. The remaining apples are wormy and misshapen, thus we end up composting all of them. Is there anything we can do so the apples are good to eat?
Every McIntosh apple has a direct lineage to a single tree discovered in 1811 by John McIntosh in Dundas County, Ontario. Your 30-year-old McIntosh is a venerable species worthy of treatment.
Premature apple drop can stem from several factors. A tree unable to support the vast number of fruits it has produced naturally thins out the fruit to decrease competition and conserve energy. Environmental conditions such as later frosts, excessive heat and cold, and abrupt changes in humidity can cause fruit to drop. The soil may be nutrient-deficient to support fruit growth. A soil test targeting apple trees is in order. Irregular watering can also cause fruit drop. Examine the weather patterns of the last few years to determine what weather conditions occurred. Consider your watering practices and note changes and improvements.
The condition of your remaining apples suggests a strong pathological source. If there are “worms” in the fruit, you probably have codling moth (Cydia pomonella). The worms are the larval stage of this pest. The second generation adults emerge in July laying eggs on the apples. The young caterpillars can tunnel into the developing fruit shortly after egg hatch, exiting to pupate into another generation moth. This is when the most damage is done.
To get good eating apples again, you need a steady maintenance program of vigilance and treatment. Homeowners can manage watering and fertilizing consistently. You can also practice good yard hygiene by removing fallen leaves, fruit, and debris from the tree’s vicinity. Such plant debris provides opportunities for re-infestation. Through observation in the spring, verify the codling moth is the culprit before embarking on any spray insecticide program. Because of the critical timing of sprays and the chemistry of insecticides, hiring a professional arborist who is experienced in tree fruit culture is a wise move. In the space of one season, you should see a marked improvement in edible fruit.
ALSO READ: Tips for Growing Apples in Michigan
How do I overwinter small potted evergreens?
Can I overwinter boxwoods in plastic pots (about 5-gallon size)? I’m not sure what variety they are. Or should I plant them in the ground even though it is November?
Any small ornamental evergreen or conifer in a container needs special treatment to overwinter a zone 5 winter (-20 degrees). If you have the space, you can bury the entire container in the ground and mulch leaves and compost over the base to protect it from freeze and thaw. If the location is subject to winds, a wind barrier of burlap or fabric to protect the leaves and needles is essential to avoid desiccation. You can also surround them with a staked chicken wire cage and fill the space with fall leaves. This also protects against sunscald. If no ground space is available, then place the boxwood containers in a sheltered area, cluster them together for protection, and place a windbreak around them for added protection from desiccation. Once the soil is frozen, the shrubs can’t take up moisture through their root systems to replenish what is lost in their leaves. You can also use an anti-desiccant spray on the foliage to further prevent moisture loss.
Once ground soil shows signs of thawing, night temperatures remain above freezing, and you see signs of spring growth on other plants, then you can remove the heavy winter protection. Give them a few weeks to acclimate and day temperatures to warm before moving them from their sheltered location.
Related: Overwintering Sweet Potato Tubers
How do I establish moss on a shady path?
We have a shady, worn path on the north side of our house. If I installed stepping stones there, how can I get moss to grow between the stones?
Moss has a unique beauty and has become the focus of a new form of gardening. Since it generally loves acidic, compacted, deeply shaded and poorly drained sites, moss is wonderful for locations that would otherwise be a gardening nightmare.
Four types are typically used in moss gardens: fern (or sheet) moss, the most versatile and fastest-spreading groundcover; rockcap, used for walls, boulders and pond edging; haircap, which prefers partial sun and well-drained soil; and cushion, which prefers sandy soil, tolerates partial sun and is excellent for rock gardens.
In your situation, to get moss to take hold, the first thing you need to do is make sure the growing requirements are met. Think about where you would find it in a natural setting: normally in a shady, relatively cool and damp location, like the woods, shady areas next to a stream, or under a tree where it is shaded, damp and cool.
Do a soil test first. The soil needs to be poor in nutrients and slightly acidic—the pH should be between 5.0 and 6.0; lower is okay, with 6.5 the maximum but not ideal. The soil can be amended to the desired pH with liquid sulfur or aluminum sulfate, or mix in coffee grounds or peat moss. Using Roundup to clear an area of weeds will also help create favorable moss-growing conditions. Moss plants need a firm soil bed rather than loose, fluffy soil, so if the area has been cultivated recently it should be tamped down lightly. Remove any debris, plants, or leaves (moss doesn’t like compost).
Once you have taken care of the soil, you are ready to “plant.” With some patience you can grow your own moss. You will need some moss to start. See if you can find some growing in your yard (or a neighbor’s or friend’s) in conditions similar to where you will apply it. Take a good size strip of healthy moss (remove as much dirt as possible) and crumble it in a blender. Add 2 cups of buttermilk and 2 cups of water. Blend at the lowest speed until it is completely mixed and the consistency of a thin milkshake (add water if necessary). Spread this mixture on the soil. You might need to make more than one batch.
It is imperative to keep the area slightly damp at all times! Keep an eye on it and mist regularly with water, especially the first 3 weeks. It usually takes about a month to get established but it also can take up to a year. The easiest way to ensure success would be to install misters and a timer if the area is not naturally moist or damp. You can use the same mixture (but slightly thicker) to grow moss on rocks, flowerpots, etc. Use a paintbrush to apply the mix and mist regularly to keep it moist.
Having the opposite problem? Dealing with moss in your lawn
Related: Trees are hosts to many non-harmful plants, insects and animals
- « Previous Page
- 1
- 2
- 3
- 4
- …
- 34
- Next Page »