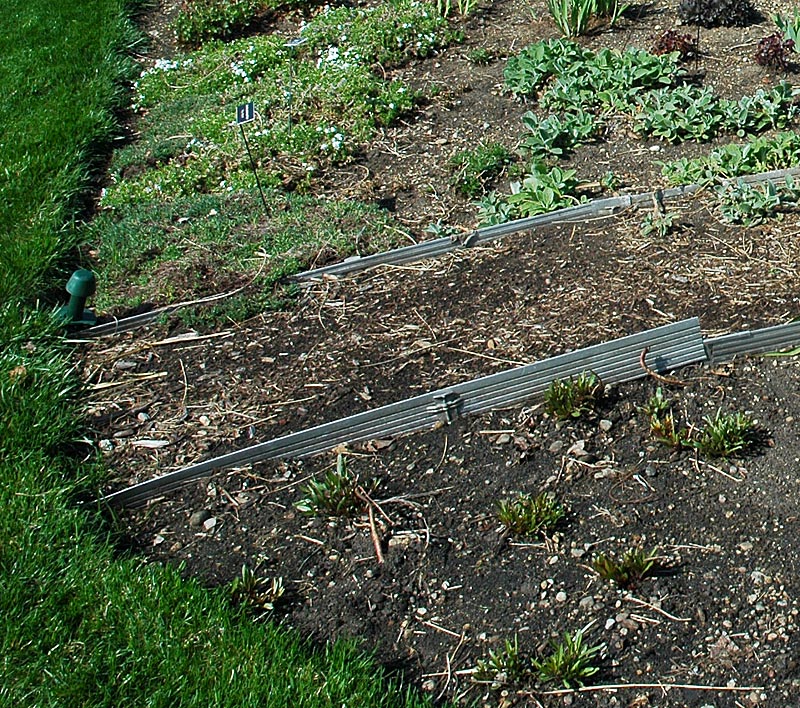
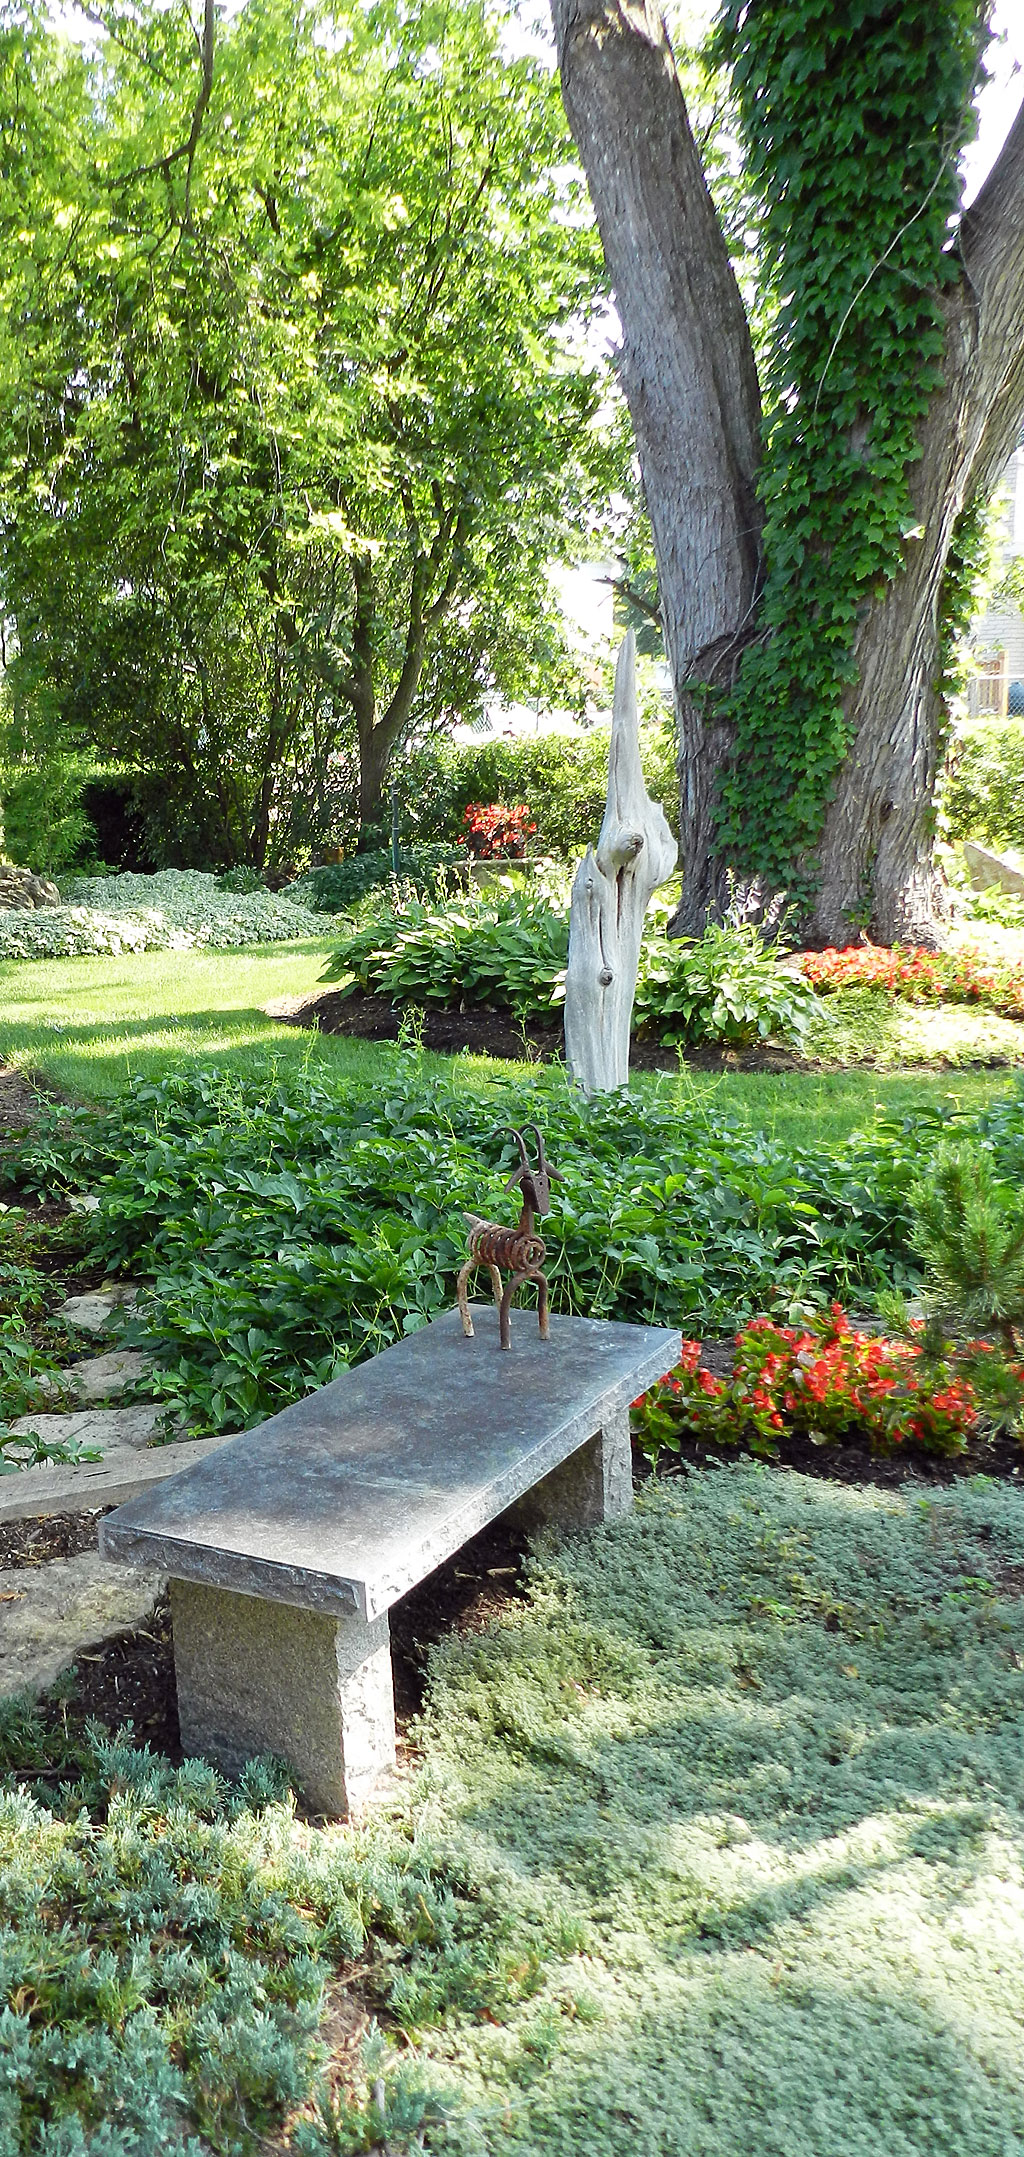
Photos by Steven Nikkila
For the full article on raised garden beds by Janet Macunovich, pickup a copy of the June, 2013 issue of Michigan Gardener in stores or find it in our digital edition.


Click on the cover to read now!
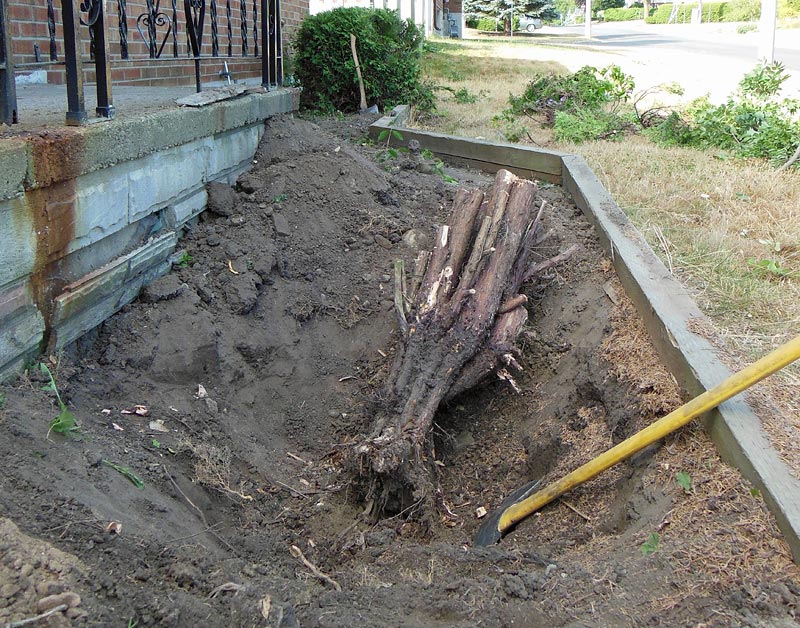
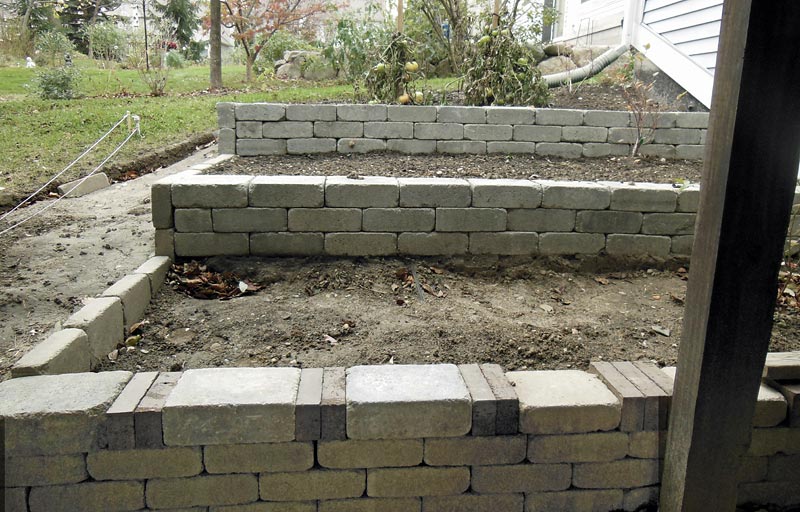
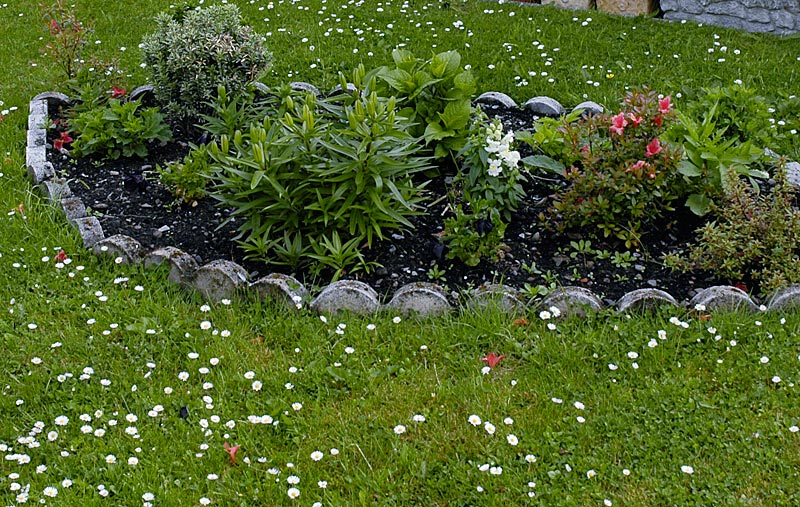
Photos by Steven Nikkila
For the full article on raised garden beds by Janet Macunovich, pickup a copy of the June, 2013 issue of Michigan Gardener in stores or find it in our digital edition.
Continued from page 50 of the May 2013 issue.
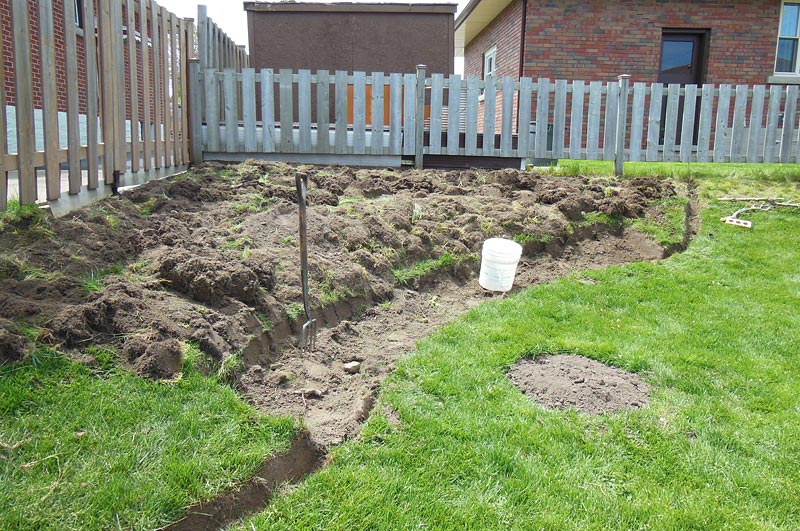
Photos by Sandie Parrott


Continued from page 54 of the May 2013 issue.
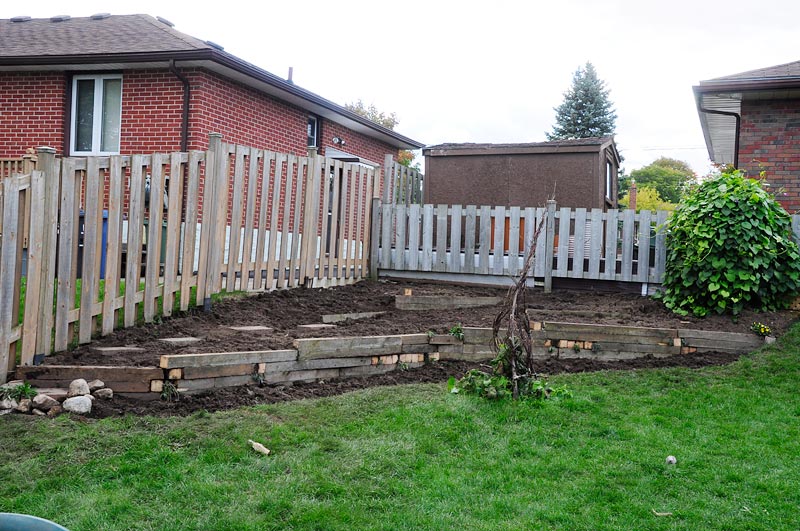
Photos by Steven Nikkila

Continued from page 42 of the April 2013 issue.
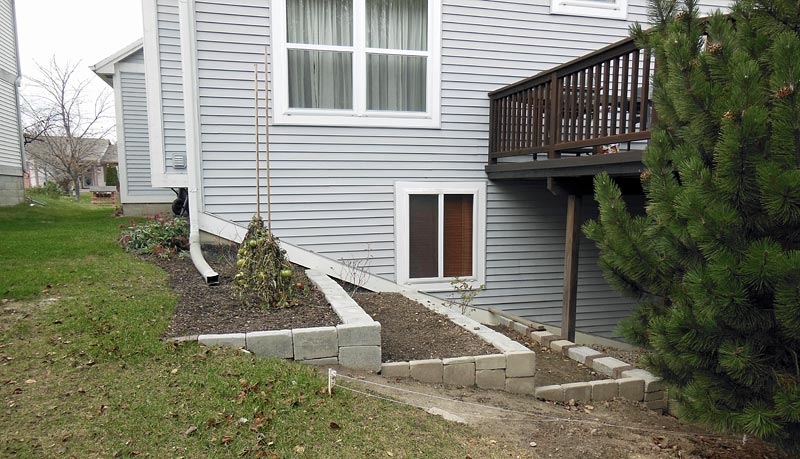
Photos by Steven Nikkila
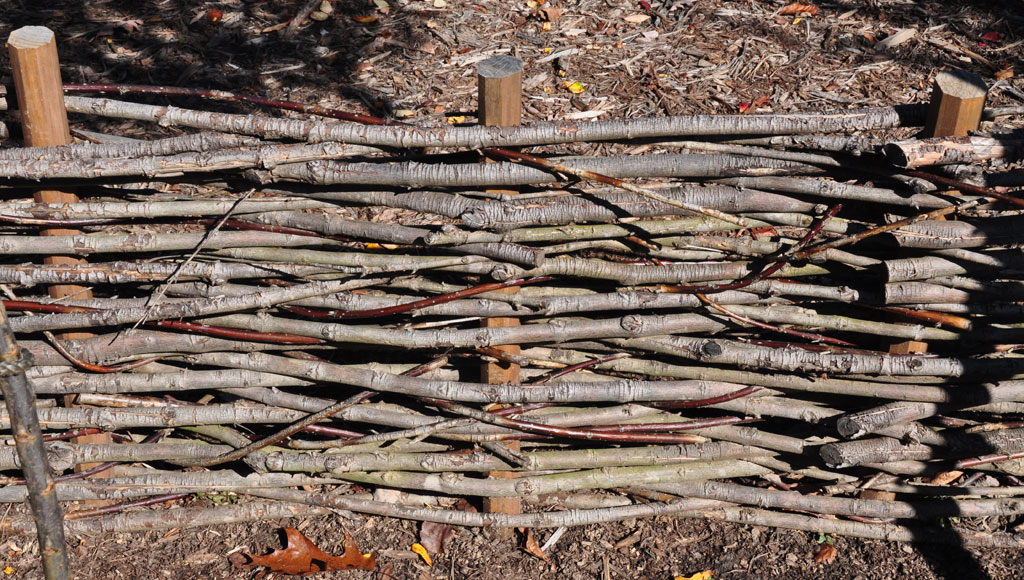
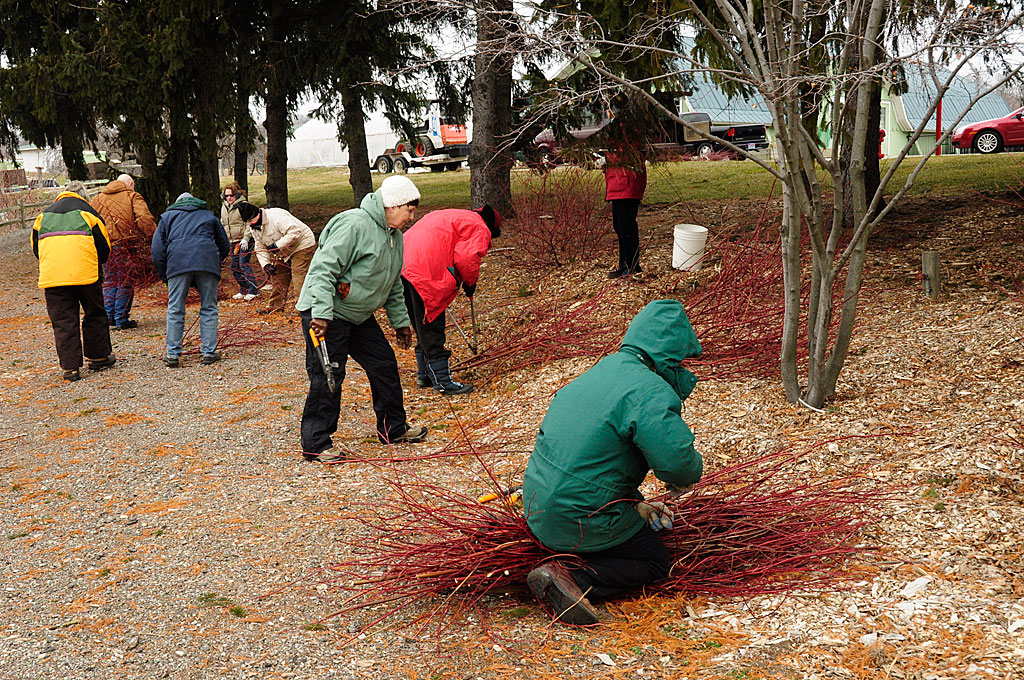
prevents dehydration can extend the wood’s useful life. On this January day we seized an opportunity to cut a quantity of redtwig dogwood although we would not weave until April. It was a gamble but paid off in withes still quite flexible and ready when we were on April 1.
Materials needed:

1. Set three-part posts at 15-inch intervals along the desired fence line. Each three-part post consists of:
a. Two flexible weaving wands, 48 inches or greater. If the bottom 18 inches is rigid, not flexible, that’s okay but everything above that must bend easily. If the weaving wand has side branches you will treat the wand plus its twigs as one bundled unit.
b. One stout stake, its top at the desired finished height of the fence.
c. All with their butt ends securely seated in drilled or punched holes about 6 inches deep. Depth of the holes depends on soil type and finished fence height. Looser soil and taller fences need deeper holes.

2. Select a new 3- to 5-foot wand and weave it in and out around 3 or 4 posts. If this wand has side branches, treat it as one bundled unit. Pass alternately behind and in front of three-posts, and thread between each post and one of its weavers.
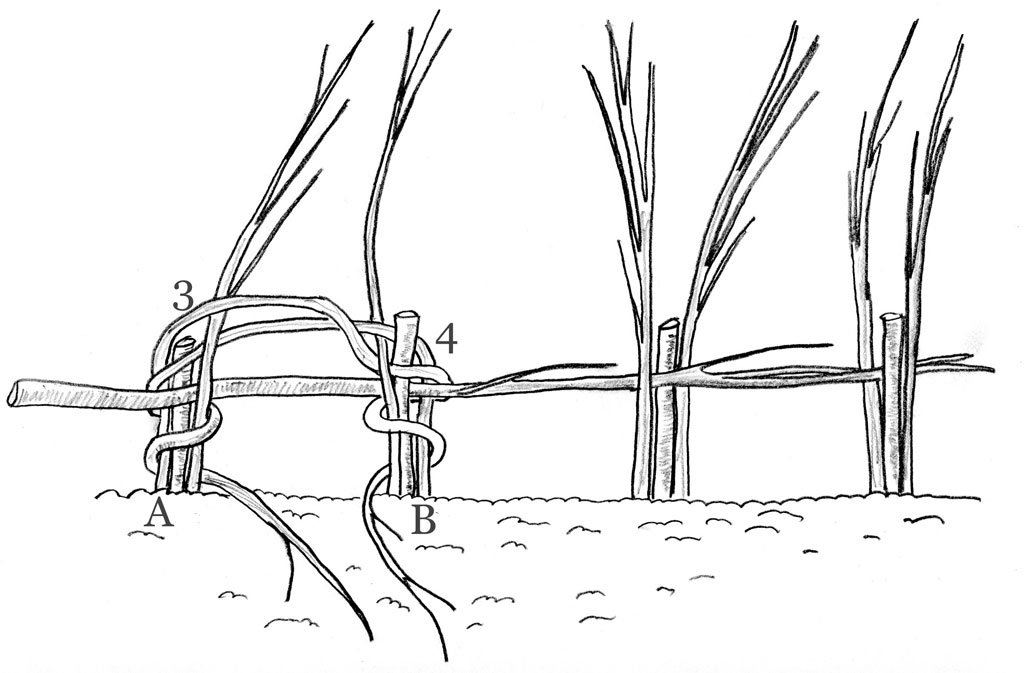
3. Grasp the left-side weaving wand of post group A. Bend it to meet B, the next post to the right. Wrap down and around the three branches that make up post B, beginning between post B’s stout stake and left-side weaving wand. Wrap around the horizontal wand. Leave this weaver wand’s tip trailing on the ground. If a wand should crack, don’t let it break through completely, or replace it if it does.
4. Now bend and weave post B’s right-hand weaving stem to the left. Thread it between post A and its free weaver, then wrap around that post group.
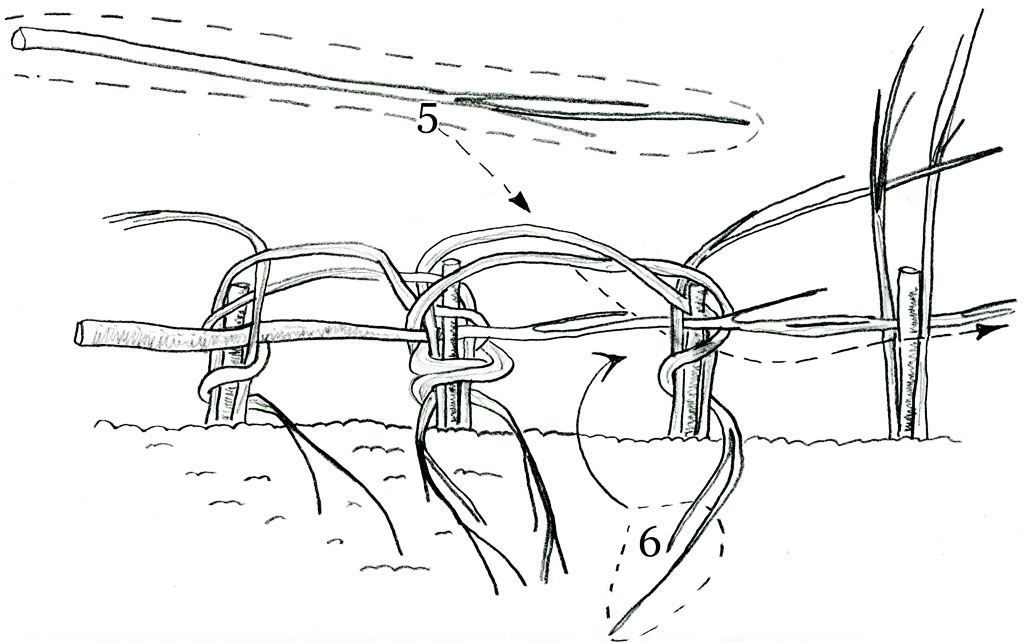
5. Weave to connect 4 or 5 posts. Then insert another 3- to 5-foot wand horizontally, as in #2, overlapping the first horizontal by half and alternating with it by weaving in and out between the posts.
6. Bend trailing tips of all weaving wands up to wrap around and run with horizontal wands. Tie with twine at intervals as necessary, or snug the wand tips into portions already woven.
7. Insert more 3-part posts and keep weaving.
Continued from page 36 of the April 2013 issue.
Photos by Sandie Parrott
To read the full Janet’s Journal, “Anti-gravity gardening: Planting on a hill,” pick up a copy of Michigan Gardener (in stores by Sept 5) or check out page 32 in our e-edition of the September/October Issue.


In the series above, a stone placed on a step cut to lean back into the hill. The next stone also leans back, and its face is set back away from vertical. Given stones stacked across the face of the hill, this setback would create a “battered” retaining wall. A batter of 1” back for each 12” rise stabilizes a retaining wall.

At the Royal Botanical Garden in Edinburgh, Scotland, this 1.75:1 slope (57 percent) features artistically placed boulders but the main retainers are plants.

Those of us who garden on relatively flat lands may gape at how slopes are handled in hillier regions. Once you know something about terracing, you may focus as much on the ways this feat is accomplished as on the unusual plants you see in faraway places. Residents’ attitudes toward hills and their skill in dealing with them can be worth note, too. That is, the residents of up-and-down neighborhoods in the foothills of California’s San Bernardino Mountains regularly stabilize long, steep hills solely with plants such as these rambler roses and honeysuckle vines.
To read the full story on Atwood Elementary, pick up a copy of Michigan Gardener (in stores now) or check out page 28 in our e-edition of the July Issue.


All photos by Sandie Parrott
Text and photos by Sandie Parrott
Water. They must never dry out; too dry is worse than too wet. For types with overlapping leaf bases, keep the vase area full of water. Overflow a bit for the roots. Large plants can hold several gallons of water. For terrestrial types without a vase area: keep them evenly moist; they can tolerate some dryness.
Air. Air plants (Tillandsia) are named after a botanist that was afraid of water. Mist every couple of days or dunk and soak one hour, every other week. Air plants need good air circulation—use a fan indoors in the winter and hang them outside during the summer. If elevated, you don’t have to deal with sow bugs or other ground pests.
Light. In summer, bromeliads will do well where hosta plants grow well. Wingert also uses 40 percent shade cloth on his shade house. For winter, they need all the light they can get: a south, west, or east window, or better yet, a greenhouse.
Soil. For vase plants, Wingert makes his own mix of 1/3 perlite and lava rock, 1/3 cypress mulch and aged pine bark (fine), and 1/3 peat moss. For terrestrials like Cryptanthus, Dyckia, and Orthophytum, he uses a professional soilless mix.
Pots. Wingert uses plastic. They are lightweight and fit the pot rings in his shade house. Most bromeliads like to be pot-bound.
Fertilizer. This is a constant source of debate. Some experts do not fertilize. It is believed by some that if you want more flowers and don’t care about the foliage, it is alright to fertilize. If you decide to fertilize, use water soluble fertilizer added to water. Place some in the innermost cup of the plant and a little on the soil. Bromeliads cannot handle urea or copper; make sure fertilizer does not contain either one. Air plants (Tillandsia) need high nitrogen. Guzmanias, billbergias and vriesias prefer an orchid-type fertilizer; they will bloom much better. Neoregelias need a low nitrogen fertilizer, like a cactus fertilizer.
Pests. Not a lot of pest problems exist for bromeliads. Scale will create spotting but won’t kill the plant. Use insecticidal soap and scrub lightly. Rub them off if dead. Reapply the soap in two weeks if the infestation is bad. Mealy bug may appear on flower spikes, but it shouldn’t be a concern. Watch for chipmunks planting or spreading seeds in pots.
Foliage maintenance. It is natural for the lower leaves to brown and dry; just remove them. You can carefully trim brown tips with scissors.
Propagation. Plants form pups or offshoots after they bloom. Remove them when they are 1/3 to 1/2 the size of the mother plant. Sever as close to the mother plant as possible and plant separately.
Seeds and plants. Seeds can be collected from plants or purchased. Most serious growers use their own seed or obtain seeds at seed exchanges from other growers. The Bromeliad Society International has a list of companies selling plants and seeds; visit www.bsi.org.
To learn more or attend a Southeast Michigan Bromeliad Society event, visit their website: www.bromeliad.society.gardenwebs.net/.


Here are additional photos from the Applewood feature in the May issue of Michigan Gardener. If you can’t find a copy of the print edition, click here to check out the May 2012 e-edition.

One of the two majestic burr oaks stands beside the rose garden, which also has many other perennials and annuals. (Photo: Sandie Parrott)

The branches of this sugar maple are allowed to grow down to the ground. “It is very happy with all the space, water, and fertile soil it needs,” said Program Coordinator Rebecca Stack. (Photo: Applewood Staff)
Above: Originally the caretaker for the farm and animals lived in the gate house, pictured in the 1930s. Below: It has housed the estate’s archives and now serves as intern housing. (Old photo: Applewood archives / New photo: Applewood staff)


The demonstration garden in the early 2000s. This used to be the farmland and is now utilized to show new plant varieties, plant combinations, herbs, and vegetables to the public. (Photo: Applewood staff)

This perennial hibiscus (Hibiscus moscheutos ‘Southern Belle’) is hardy to zone 4. It is cut back to 3 inches each fall. It comes up late in the spring, so having a permanent tag or stake in the ground is important so the plant won’t accidentally be dug up. (Photo: Ryan Garza)
by Janet Macunovich / Photos by Steven Nikkila
It doesn’t take long to seek second or even third opinions before you place a new plant. Try it this year. Here’s what happened when I checked some trusted, respected sources to learn about two plants’ size and growth rate.
Textbook A: 20 feet in 15-20 years
Textbook B: 8-9 feet in 20 years
Mail order catalog: 4 feet in 10 years; growth rate 1-6 inches per year
Garden Center A: 6-8 feet tall x 3-4 feet wide, growth rate 4-8 inches per year
Garden Center B: 10-12 feet x 5-7 feet
Garden Center C: 12 feet in 10 years; mature height 20 feet; fast-growing
Botanical Garden: 12-20 feet tall x 8-12 feet wide
My own Hicks yews: 12 feet tall x 6 feet wide in 16 years, grew 8 inches in 2011

One of the trusted sources we checked when looking into the Hicks yew’s vital stats was our own hedge. We planted these Hicks yews in 1995. They were then just 36 inches tall. 16 years later their tops are level with the 12-foot pole pruner in my hand.

Left: Even if we couldn’t see the shrubs themselves, we could read a lot from just a branch. The current year’s growth begins at the whorl of side branches, and has green twigs because it has not yet developed wood. Do you see the scaly bark developing on last year’s wood, below the whorl, in the lower part of the photo? Right: That’s 8 inches of growth this year, less than the average they’ve established in this site, but still significantly more than the rate some sources told us to expect.
Textbook A: 9-12 feet in 10 years; full size 30 feet tall x 20 feet wide
Textbook B: 20 feet in 25 years; full size 70 feet
Mail order catalog: 5 feet in first 10 years; 6-12 inches per year
Garden Center A: 6-12 inches per year; 40-50 feet tall x 30 feet wide
Garden Center B: 30 feet x 20 feet; slow
Garden Center C: 15 feet in 10-15 years; mature height 50 feet
Botanical Garden: 20-30 feet tall x 10-20 feet wide
My own tricolor beech: 20 feet in 18 years, grew 15 inches in 2011

Left: We can let plants tell us exactly what they’re capable of, in a given site. It’s there in the growth rate of a branch. See the series of close-set creases that ring this tricolor beech twig? They formed where growth terminated last year, and began again this spring. Measure from that “terminal bud scar” to the branch tip, to discover the annual growth rate…which is just about 15 inches on this (center) branch. Right: On many woody plants, including beech, the terminal bud scars that mark cessation of growth each year remain visible for many years. Notice that the scar is not the only line. Changes in the bark can reveal the line between one year’s growth and the next. In beech, the bark is thicker and less red on the older wood, in the lower part of the photo.
 This is six years’ growth on the tricolor beech growing in my own garden. I was able to read backward, and see that this branch grew 76 inches in six years. That’s an average of 13 inches per year. Overall, the tree tells the same tale. It was 6 feet tall when planted and after 18 years is over 25 feet tall.
