All-America Selections (AAS) tests significantly improved new flowers and vegetables in trials across North America. This year’s AAS Winners are new cultivars with superior performance. Look for these plants or seeds at your local garden center.
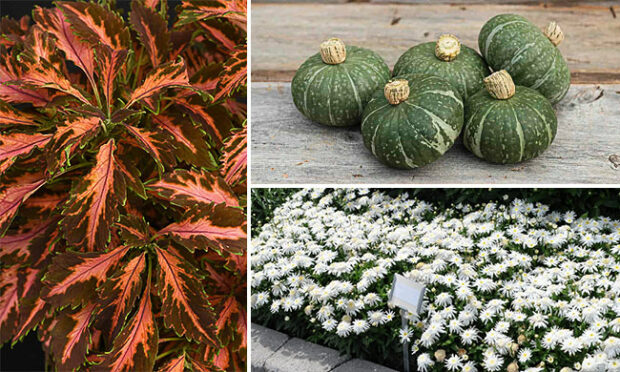
Coleus: ‘Premium Sun Coral Candy’
The first seed coleus to be an AAS Winner. Unique, multicolored foliage on a uniformly compact plant. Narrow, serrated leaves gracefully drape down the mounded plants. Holds its color well, even when grown in full sun. ‘Coral Candy’ was evaluated in the container trial, meaning it’s great for small spaces. It held up well into the fall and had almost no flowers, even late in the season.
Squash: ‘Sweet Jade’
This single-serving-sized squash proved itself with high yields. Each fruit is between 1 and 2 pounds and can be used for single servings, as an edible soup bowl, or in Asian-style dishes where a sweet, earthy squash is typically used. The deep orange flesh of ‘Sweet Jade’ is dry, yet sweet and flavorful, whether roasted, baked, or pureed.
Shasta Daisy: ‘Carpet Angel’
The first-ever groundcover Shasta daisy (Leucanthemum). Large, three-inch flowers boast a second inner frilly bloom, adding to the unique look. Only growing to six inches tall, this unique Shasta daisy spreads up to 20 inches wide. Excellent branching means more flower stems sporting pure white blooms that look like angels dancing over the carpet of dark green foliage. A little deadheading of spent flowers will reward you with even more blooms.
Elsewhere: Search past All-America Selections winners