Michigan Gardener

SIGN UP to stay in touch!
We will send you occasional e-mails with gardening tips and information!


Digital Editions

Click on the cover to read now!

  • Home
  • Departments
    • Ask MG
    • Books
    • Clippings
    • Garden Snapshots
    • MG in the News
    • Janet’s Journal
    • Plant Focus
    • Profile
    • Raising Roses
    • Thyme for Herbs
    • Tools and Techniques
    • Tree Tips
  • Garden Event Calendar
  • Resources
    • Alternatives to Impatiens
    • Garden Help
    • Soil and Mulch Calculator
    • Public Gardens
  • Web Extras
  • About
    • About Us
    • Editorial Content
    • Privacy Policy
    • Contact Us

PLEASE NOTE: In the autumn of 1995, we hatched the idea for a free, local gardening publication. The following spring, we published the first issue of Michigan Gardener magazine. Advertisers, readers, and distribution sites embraced our vision. Thus began an exciting journey of helping our local gardening community grow and prosper.
After 27 years, nearly 200 issues published, and millions of copies printed, we have decided it is time to end the publication of our Print Magazine and E-Newsletter.

Archive for the Ask MG department

Suckers on linden trees

July 24, 2009   •   

We planted 2 linden trees about 5 years ago. They are doing very well, but one of them has suckers that grow every year. By July, they are about 2 feet tall and this is when I have been cutting them off. Is this OK? Is there a better way to handle this? Can the suckers be prevented from growing? Why does one tree have them and not the other?

Occasionally trees may send up sucker growth from mature tissues originating at or below ground level. The best way to prevent recurrence of this is to trim back the suckers as close to the point of origin as possible. Sometimes this may require careful removal of some soil to expose the base of the suckers. Remove the growth by cutting as close to the mature tissue (from which the sucker emerges) as possible, or by twisting and pulling the shoots if they are young and tender. The latter usually provides better control because the latent bud that is causing the sucker is often removed in the process. Once removal is completed, replace and firm the soil.

In some cases, all that can be done is to continue the pruning ritual since no treatment is really available to prevent these suckers from growing. Eventually, some trees will just stop on their own, while others will go on for years…that’s just how nature works.

Filed Under: Ask MG

Elm leaves are turning yellow and wilting

July 18, 2009   •   

by Steve Turner

I have a large elm tree in my yard and on one branch the leaves are turning yellow and wilting. Does this mean it has Dutch elm disease? If so, is there anything I can do to save it and what can I do to help prevent my other elms from catching it?

From the symptoms you have described, it does sound like your tree has signs of Dutch elm disease. The yellowing and wilting is called flagging and is one of the first signs of infection. The water-conducting cells in that limb are becoming blocked and the tree can’t supply enough water to keep up with the transpiration (water evaporating from the leaves) in that part of the tree. So, the leaves turn yellow, wilt and then turn brown or drop.

A good way to explain Dutch elm disease, which is a fungus, is to compare it to cholesterol in humans. If your arteries become so blocked that blood cannot pass through them, the organ that is being supplied will fail. The same thing applies with a tree — if the water-conducting tissues become blocked by a fungus build-up, then that portion of the tree will die. All this can happen very quickly under the right conditions.

As far as saving your tree goes, that gets a little more complicated. Dutch elm disease is very hard to control, but it has been done. If the tree is flagging in 5 percent or less of the crown then there is some hope. The first step is to sterile prune out the infected limbs back to healthy wood and then do trunk injections with a systemic elm fungicide at a curative rate. There are several brands on the market. In my experience, I have found Arbortech and Alamo to work the best. Then water, water, water! Your mature tree needs a lot of water since its ability to transport water has diminished. This is especially true during the summer heat which causes the tree to transpire at a much higher rate than in cooler weather. It will need a constant supply to keep up with the increased demand. This is why your tree looked fine in the spring but is now showing the signs of infection. Chances are, your tree has been infected for a while but up until now has not faced a strong demand for water.

In regards to your other elm, there are three ways that elms become infected with Dutch elm disease: 1) by elm bark beetles feeding on diseased and then healthy elms, 2) through pruning with contaminated saws and loppers, and 3) through root grafts connecting elms together by their root systems below the ground. The first way is the main cause of the problem, but the second happens more often than people realize. Look at elms near power lines that have been pruned in the last couple of years; many of them are either dead or infected because the fungus was transferred from one to another. The third is common in neighborhoods with smaller yards or where the elms are planted closely. When one elm becomes infected, the others around it can start dropping like flies. In your case, this is probably the biggest threat to your other elm.

I recommend that owners of large, specimen elms have their tree injected every other year or every year if other trees in your neighborhood are infected. The cost of the injections is less expensive than the removal of a large, mature tree, which can cost up to several thousand dollars depending on the size and location of the tree. The bottom line is to keep your elm in good health through proper watering, fertilizing, pruning, and, on large trees, injecting. Also, to increase the chances for a prize elm’s survival, you may want to remove any small elms in the area, as they seem more prone to infection, especially if they are near power lines and subject to pruning. For those of you who would like to plant an elm, the American Elm Society (800-FOR-ELMS) has a disease resistant variety called the Liberty Elm. They are, however, hard to find in larger planting sizes, but free saplings can be obtained by joining the society, a small price to pay for the beauty of the great American elm.

Filed Under: Ask MG

Norway Maple doesn’t look healthy

July 16, 2009   •   

by Steve Turner

Over the last couple of years, my Norway maple seems to be getting thinner, getting its fall color early, and some limbs are dying on one side of the tree. What’s wrong?

Unfortunately, the situation does not look good. From what you have described, it sounds as if your tree has girdling roots, which is a major problem of Norway maples and ‘Crimson King’ maples, a cultivar of the Norway maple. Many of these trees develop the problem between 25 and 40 years of age, which is also when the tree starts to mature and become the picture perfect tree we all admire. If you look closely at the base of the tree, you will see that instead of your tree having “root flare” as it goes into the ground, it looks more like a telephone pole going straight into the ground or it has a flat side instead of being round. These are sure signs that the roots below are wrapped around the trunk and are causing a slow, but certain death by strangulation for your otherwise perfect maple.

The reasons for this are a little more complicated. The problems begin in the nursery when the trees are dug for transplanting. The process of digging severs tree roots, which in most trees is no big problem. But with Norway maples, this causes a major change in the way the root system develops. In the tips of the roots is a growth regulator that causes all the roots behind the tip to remain smaller than the main root which extends away from the tree. When this root tip is severed, the tree loses its ability to control the size of the lateral roots, and that is where the trouble begins. The lateral roots become dominant and cross the trunk of the tree causing the restriction that eventually brings the demise of the tree. It’s no coincidence that the size of the trunk at the time of decline is usually the size of the original root ball at the time of planting, which is why it takes so long to discover the problem.

Unfortunately, there is no cure. Fertilization will only speed up the growth of the tree and cause it to die sooner. Cutting the roots is expensive and is not a permanent solution; they will grow back in time and then you are back to square one. Keeping the tree well watered will help prolong its life, but it is not a cure.

Steve Turner, Certified Arborist, is from Arboricultural Services in Ferndale, MI. 

Filed Under: Ask MG

Controlling damage from Japanese Beetles

June 22, 2009   •   

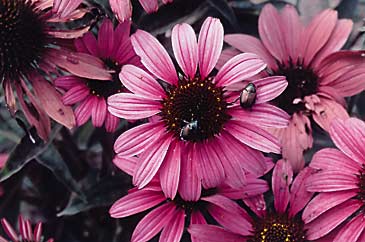
Japanese beetles are 3/8 inch long and metallic green in color. (Photo: Steven Nikkila / Perennial Favorites)

by Nancy Lindley

Ah, summer! A time when gardeners can relax and enjoy the fruits of their labor. But wait, what’s that insidious cluster on the rose blossoms? Why do leaves of the linden tree have a tattered appearance? Oh no, it’s a Japanese beetle. Why, those creatures must have stomachs made of tempered steel—they’re devouring the poison ivy! And thus begins the beetle battle. Our goal: defeat the enemy. But to defeat the enemy, we must know the enemy. 

Adult Japanese beetles are easy to identify. They’re about 3/8 inch long, metallic-green in color, and emerge from the ground in late June. They feed in groups, starting at the tops of plants, then work their way downward. Individually, Japanese beetles don’t consume much. But collectively, their damage can be devastating—and heart-breaking. Japanese beetles feed on over 300 varieties of plants ranging from sweet corn to birch. They are especially fond of plants that grow rapidly in direct sunlight. Their larvae live in the soil and wreak havoc when they feed on the roots of irrigated turfgrass.

Where the little buggers came from

Japanese beetles appeared in the Northeast United States in 1916, probably arriving in the soil of imported nursery stock. They have been steadily moving outward at a rate of approximately 50 miles a year. They are now found in all areas east of the Mississippi River. Oregon and California are especially concerned with these pests and have rigorous controls on the acceptance of out-of-state nursery stock. Unfortunately, it’s probably only a matter of time until Japanese beetles infest all portions of the country.

The damage that Japanese beetles cause is especially bad at the outer reaches of their territory. That’s because few natural controls exist in newly colonized areas. These pests spend the first ten months of their lives in the soil as grubs, starting in August or September. The following June, adults emerge and congregate on plants where they begin their feeding and breeding frenzy. Adults tend to be highly active on warm, clear days, then return to the soil in the evening. Adults will also stay hunkered down in the soil if the weather turns cold and wet.

Every three or four days for several weeks, adult females will lay one to four eggs, and up to 40 to 60 during their lifetime. 45 days after their emergence, adult beetles say sayonara and begin to die off while, simultaneously, the next generation is beginning to hatch.

Moisture from a late-summer rainfall or irrigation is all that’s needed for eggs and newly hatched grubs to survive. The grubs grow quickly, feeding on grass roots. However, if conditions become too dry, they are capable within a few weeks of moving deeply into the soil for moisture and other roots on which to feed. In autumn, grub-infested turf will appear as large dead patches—the kind of thing that causes severe hair loss and blown capillaries in golf course managers.

When the soil temperature falls below 60 degrees, grubs burrow into the soil and remain there in an inactive state throughout winter (or perhaps read articles like this and plot counter-strategies). In spring, the grubs move toward the surface as soil temperature increases, and resume feeding on grass roots for a brief period. They pupate in an earthen cell and remain there until they emerge as adults.

Natural enemies

Many different birds eat Japanese beetles; however, they prefer to dine on the grubs. And in their effort to search for grubs, they tend to tear up small pieces of turf. Okay, a small problem. A larger problem is the lawn damage created by moles and skunks who also feed on the grubs.

Predaceous insects such as the praying mantis occasionally feed on adult beetles and grubs, as do a few native wasps and flies. However, the role they play in controlling Japanese beetles is relatively minor. Several parasitic wasps, flies and plant-friendly beetles have been imported in an attempt to control the beetles, but have seen only limited success.

Natural controls

Japanese beetles are not a major pest in, of all places, their native Japan and Korea. This is because several natural controls are present. These include (1) an intestinal parasite called a gregarine, which attacks the grubs, (2) a nematode, or microscopic worm, which eats the grubs, and (3) a bacterial disease called milky spore, which infects and kills the grubs.

These controls were introduced in the Northeast United States several years ago and have kept the beetles in check. As a result, researchers at Michigan State University are assessing the success of these controls and are working to establish them in Michigan’s eco-system on a large-scale basis. Unfortunately for homeowners, these controls are not very effective on a small-scale since adult beetles can easily fly into and out of treated areas. Also, these natural controls are effective only on grubs, not adult beetles.

Chemical controls

It’s difficult to control adult beetles with chemical sprays. Plus, these products also kill beneficial insects such as honeybees. Rose fertilizers with systemic insecticides have no effect since individual beetles don’t actually eat much.

Products that contain neem oil are safer and are believed to repel Japanese beetles. However, they, like other chemical sprays, must be applied every few days.

Turf damage from grubs can be prevented with a late July application of Merit (imadichloprid). However, most homeowners can prevent turf damage simply by keeping their lawns adequately irrigated and fertilized. Keep in mind that treatment of your grass for grubs will not appreciably reduce feeding damage from adult beetles, unless your neighbors are treating their lawns too.

Practical control

To prevent grubs from damaging the turf grass at our rose nursery and large display garden, my husband and I simply irrigate and fertilize the grass.

As for adult Japanese beetles, homeowners can benefit from the same technique we use to minimize damage: remove them by hand. That’s not as tedious and time-consuming as it might sound. We have thousands of rose bushes, yet spend less than an hour a day on beetle removal. My husband, the main beetle-control officer (and shall hereafter be known as “Beetle Bailey”), walks through the nursery on sunny afternoons and shakes beetles from each bush into a bucket of soapy water, or plucks them one by one and tosses them in. The beetles don’t die immediately, but the soap coats their wings so they can’t fly. Eventually they drown, and we dispose of them the next day in our trash.

We tried to control Japanese beetles with Sevin, but found we had to spray every few days. Plus, we weren’t comfortable using an insecticide that harms beneficial insects. Beetle Bailey reports that daily hand removal actually takes less time because there is no suiting up, mixing chemicals, application, equipment clean-up or showering afterward.

We found that Japanese beetles are especially fond of fragrant, light-colored roses. If pressed for time, Beetle Bailey only scouts the area of the nursery where our most fragrant roses, the rugosas, reside. He has even cut blossoms off white and yellow rugosas to avoid attracting beetles. Daily removal is better than waiting to do it every few days, since individual beetles are attracted to large groups feeding on blossoms. If you prevent groups from forming, you minimize damage.

We also use professional-grade traps from Tanglefoot on the outer perimeter of our property. Since these traps work by attracting beetles, they may be impractical for small gardens (the beetles may bypass the trap and head for your garden). However, in larger areas consisting of several acres, multiple traps placed in sunny areas can be used to keep beetles away from desirable plants. With professional-grade traps, beetles are collected in a screw-on canister. This canister must be emptied daily, otherwise the beetles die and create an odor that wards off other beetles and prevents the traps from doing their job.

So, when it comes to controlling Japanese beetles, you actually have several options, each offering varying degrees of effectiveness. You can wait for natural enemies to establish themselves, or you can take a more aggressive approach with chemical control or natural control. We prefer practical control at our nursery because it’s probably the safest, simplest and most effective method of all. And no, I’m sorry to report that Beetle Bailey is not for hire.

Nancy Lindley, now retired, owned and operated Great Lakes Roses in Belleville, MI.

Also on MG: Janet’s Journal: Plant damage awareness will help prepare the garden for next year

Related: Japanese beetles – Tips for your lawn

Filed Under: Ask MG Tagged With: control, damage, japanese beetle, Merit

Bypass vs. Anvil, which pruners are better?

April 14, 2009   •   

It seems that bypass pruners are recommended more often than the anvil type – are there any times where the anvil type are better?

The majority of gardeners do seem to prefer the bypass pruners. Closer, more precise cuts are possible with bypass style shears. Cuts are also cleaner with less chance of crushing stem tissue as sometimes happens with the anvil style pruners.

Anvil shears, on the other hand, can take a larger bite without springing (bending or spreading the blades apart). Double-levered anvil blades are often used for lopping shears (long-handled pruners for cutting larger stems up to 1-1/2″ in diameter or more). Anvil blades adapt nicely to ratchet-style pruners, as well. Ratchet pruners have more strength, but require less effort to operate, making them ideal for arthritic gardeners. Also, anvil pruners are less expensive than the bypass type.

Whichever style pruner you choose, never try to cut branches larger than intended for the tool being used. Most hand pruners should not be used to cut branches over 3/4″ in diameter. Loppers should be used for stems up to 1-1/2″ or so. A pruning saw is the best choice for larger branches.

Always keep your cutting blade sharp. Many better pruners are constructed in a way so as to allow for blade replacement should it become nicked or badly worn.

Filed Under: Ask MG

Troubleshooting Pieris problems

April 14, 2009   •   

After losing my third Pieris japonica in the last 4 years, I’m ready to give up. I thought exposure to wind might be the problem, so I planted the last couple in relatively wind-protected areas, but to no avail. Even though they were all planted in different areas, they all died the same way – turning dry and brown at the top (the lower leaves were still somewhat healthy and green), then the same thing would gradually happen to the lower leaves. Can this plant be grown successfully in this area or should I give up?

Pieris can indeed be successfully grown in our area. As with boxwood, soil and location are the keys. While these plants share the same requirements for planting location, the soil needs of a pieris are much more difficult to properly provide.

Pieris require a much more acidic soil (pH 4.5-6) and they have little tolerance for clay. To be successful, either prepare a raised bed or remove soil and reconstruct the planting area using loose topsoil, sphagnum peat, and pine bark. Once planted, mulch thoroughly with pine bark and most importantly, keep the soil evenly moist, especially during February and March, when most winter damage occurs. Fertilize just like you would any azalea or rhododendron.

Periodically check the pH of the soil (1-2 times per year) and adjust when necessary. Roots fail to develop when the pH rises above the optimal range, at which point decline may begin. Soil tests are very critical when plants are located near foundations or sidewalks where lime may be leached from the masonry, causing the pH to rise.

Filed Under: Ask MG

Hardy mums not overwintering

April 14, 2009   •   

Once again, the “hardy” mums I planted last fall didn’t make it through the winter. All I have now on each plant is a few straggly stems of foliage – nothing like the dense, bushy plant I had. I have mulched them with 4 inches of shredded bark for the winter, but that has not helped. How can I get these mums to come back?

September is the month to start planning and planting your fall garden. Annuals start their decline and its time to add fresh new color to your flower beds, pots, and even hanging baskets.

As temperatures cool down, colors turn up and intensify. That’s why the ever popular garden mums remain high on every gardener’s want list for fall plantings.

Over the years, mum breeders have provided us with wonderful new colors, sizes and shapes of the ever-popular garden mum. But, as these new characteristics were developed, something else had to go. It takes a lot of energy to produce all those wonderful new qualities that our new mums possess, and therefore, generally, they don’t have enough vigor left to overwinter.

Filed Under: Ask MG

Using grass clippings and leaves as mulch

April 14, 2009   •   

While I do have a compost pile, I wondered if it is OK to use grass clippings and leaves as a mulch. I have heard that they actually remove nutrients from the soil as they decompose and, therefore, shouldn’t be used as a mulch. It seems to me that they would be actually returning nutrients to the soil as they decompose. Please advise.

Organic mulches such as grass clippings do eventually return nitrogen and other nutrients to the soil. However, during the early stages of decomposition, the microorganisms responsible for the breakdown of the mulch require nitrogen and will steal it from the soil. This may cause a temporary nitrogen shortage to surrounding plants unless it has been supplied with nitrogen supplements such as cottonseed meal, bloodmeal, or urea.

If grass clippings are spread too thickly, they will heat up and make a hot, slimy mess. If they are too close to the stems of young, tender plants, this reaction can cause damage. Further, as the layer compresses, it can become tight and allow only anaerobic decomposition, often producing a bad odor in the process.

While some gardeners may disagree, grass clippings are not a preferred mulch. It’s best to compost them completely in a compost pile and use the resulting rich humus to enrich new or existing planting beds.

Filed Under: Ask MG

Selecting boxwood variety and planting for success

April 14, 2009   •   

I want to plant a low hedge of boxwood, roughly 2 feet tall, to serve as a border around an English-style perennial garden. In the last couple years, I have seen boxwoods with some bad winter burn. Can you recommend a few varieties that are low-growing and hardy to Michigan winters?

Many boxwoods have suffered through our recent winters. Unfortunately, even the most hardy boxwood varieties may have difficulties surviving our Michigan winters unless they receive the proper soil conditions and protection from winter sun and wind.

For starters, boxwood should be planted in a very well-drained, slightly acidic soil (pH 5.5 – 6.5). Heavier soils should be thoroughly worked to incorporate amendments such as sphagnum peat and pine bark. Prepare an area at least twice the diameter of the eventual plant size and for the length of the hedge. Mulching the soil surface is also important to keep roots cool and evenly moist, while providing protection from winter cold.

Choosing the proper location for planting boxwood is also important. Ideally, they should receive no direct winter winds and little direct sun from the south and west. This means eastern exposures provide the best protection from damaging elements. Other microclimates such as courtyards, evergreen screens and wooded areas may also work as long as they provide this same type of protection.

For varieties that stand up better to Michigan winters, try Korean Littleleaf, Winter Gem or hybrids such as Green Gem and Green Velvet.

Filed Under: Ask MG

Is it normal to have an interior “dead zone” on yews (taxus)?

April 14, 2009   •   

I have a large, globe-shaped yew (about 7 feet tall) that looks great – the foliage is dense on the outside and its needles are a healthy, dark green. However, when I peer inside, the branches are all bare and the only green growth is on the last 5 or 6 inches of the branches. Is this normal?

Many evergreens, including yews (taxus species), junipers, and arborvitae have a “dead zone” or hollow spot in their interior. There are several causes for this lack of foliage on the interior of the plant. First, as evergreens grow, their new growth is mainly on the exterior of the plant. As the exterior of the plant thrives, the center of the plant receives less and less sunlight. The interior branches are shaded out and die off.

A second cause for the “dead zone” is the natural needle shedding of evergreens in the fall. Evergreens lose their oldest needles, those in the center of the plant, in the fall as a protection from having to support too much foliage over the winter. This shedding of older needles is especially apparent on white pine (Pinus strobus) and arborvitae in the late fall.

Filed Under: Ask MG

  • « Previous Page
  • 1
  • …
  • 28
  • 29
  • 30
  • 31
  • 32
  • …
  • 34
  • Next Page »

Copyright 1996-2025 Michigan Gardener. All rights reserved.