Michigan Gardener

SIGN UP to stay in touch!
We will send you occasional e-mails with gardening tips and information!


Digital Editions

Click on the cover to read now!

  • Home
  • Departments
    • Ask MG
    • Books
    • Clippings
    • Garden Snapshots
    • MG in the News
    • Janet’s Journal
    • Plant Focus
    • Profile
    • Raising Roses
    • Thyme for Herbs
    • Tools and Techniques
    • Tree Tips
  • Garden Event Calendar
  • Resources
    • Alternatives to Impatiens
    • Garden Help
    • Soil and Mulch Calculator
    • Public Gardens
  • Web Extras
  • About
    • About Us
    • Editorial Content
    • Privacy Policy
    • Contact Us

PLEASE NOTE: In the autumn of 1995, we hatched the idea for a free, local gardening publication. The following spring, we published the first issue of Michigan Gardener magazine. Advertisers, readers, and distribution sites embraced our vision. Thus began an exciting journey of helping our local gardening community grow and prosper.
After 27 years, nearly 200 issues published, and millions of copies printed, we have decided it is time to end the publication of our Print Magazine and E-Newsletter.

Dormant pruning: Make a positive start to your gardening season

March 18, 2025   •   Leave a Comment

by Evelyn Koponen

As you look forward to a fresh gardening season, it is a good time to consider what you can do to improve the health and overall look of your landscape. A tree or shrub that is not maintaining the shape you desire, or has stopped producing as many flowers as it did in the past may need a good pruning. Trees and shrubs in dormancy can be pruned more aggressively, with less stress to the plant and minimal risk of disease because pests that would attack these trees and shrubs are dormant as well. An aggressive dormant pruning will promote more vigorous growth in the spring, which can bring new life and shape to a tired area of your garden.

To encourage and support you in your pruning ventures, here are some standard pruning guidelines for shrubs.

Step 1: Analyze

Be familiar with the plants that you are pruning. This seems obvious, but misidentification can happen—common names can be very similar and confusing, and different pruning forms may be needed on variations of the same plant type. Doing your own research on the best time of year to prune your particular shrub is important. For example, oakleaf hydrangea (Hydrangea quercifolia) and smooth hydrangea (H. arborescens) should not be pruned at the same time. Oakleaf hydrangea flowers on old wood, so pruning right after flowering is appropriate. Smooth hydrangea flowers on new wood, so cutting back severely in the late fall or early spring is ideal.

Make sure that you know your reason for pruning. Consider the whole of the plant, identify dead wood and potentially diseased areas that need to be removed, and plan how you want the end shape of the plant to be. Healthy, corrective shaping of a shrub or tree can take several years, so be patient with your plant and with yourself.

Step 2: Tools

For pruning most shrubs, a few simple tools will go a long way. On bigger limbs, use a sharp hand saw. On smaller branches, use bypass pruners and bypass loppers. These should cover most of your pruning needs. To help prevent the spread of disease, it is a good habit to keep a spray bottle with 91 percent isopropyl alcohol on hand, to sanitize your tools after pruning a shrub or tree. Using proper tools that are sharp is essential to prevent jagged cuts or crushed branch tissues that will prevent the cut from healing over.
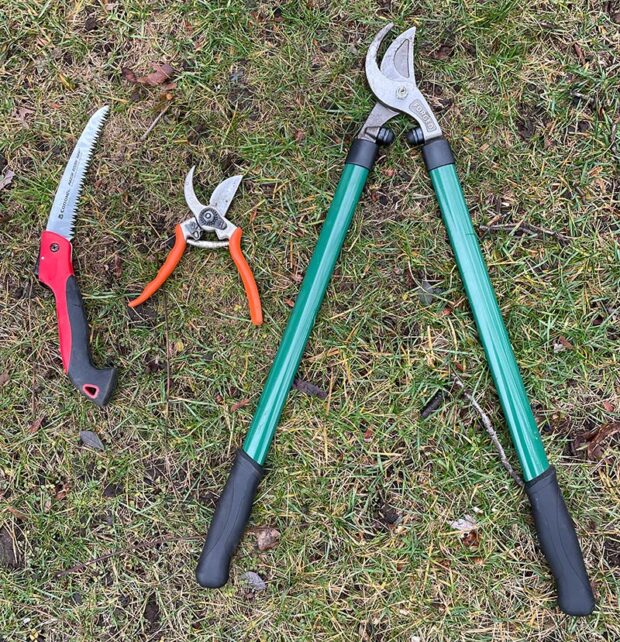
Basic tools for dormant pruning: a sharp hand saw, small bypass pruners, and bypass loppers.
Basic pruning tools: a sharp hand saw, small bypass pruners, and bypass loppers.

Step 3: Making cuts and removing branches

To help your plant recover quickly and efficiently from pruning, make clean, slightly angled cuts just above a bud or branch collar. Leaving torn cuts and stumps heightens the likelihood of disease and further dieback. Giving your cut a slight angle will help rainfall drain from the cut instead of pooling and causing rot or disease.
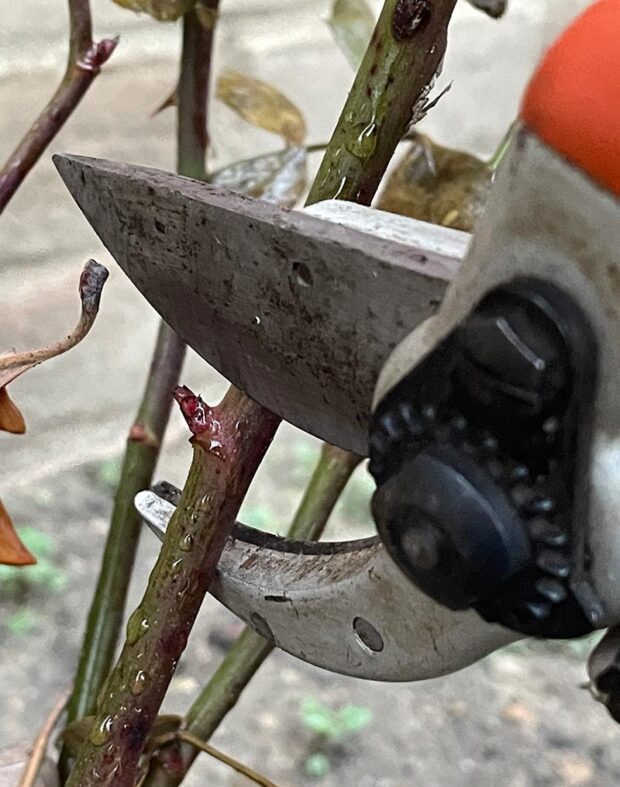
Make clean, slightly angled cuts just above a bud or branch collar.

A simple pruning consists of removing any diseased or dead branches all the way to the base of the shrub. If the plant experienced fungal problems the previous season, remove infected plant parts and either burn or throw away any debris to prevent spreading fungal disease to other areas of your garden.
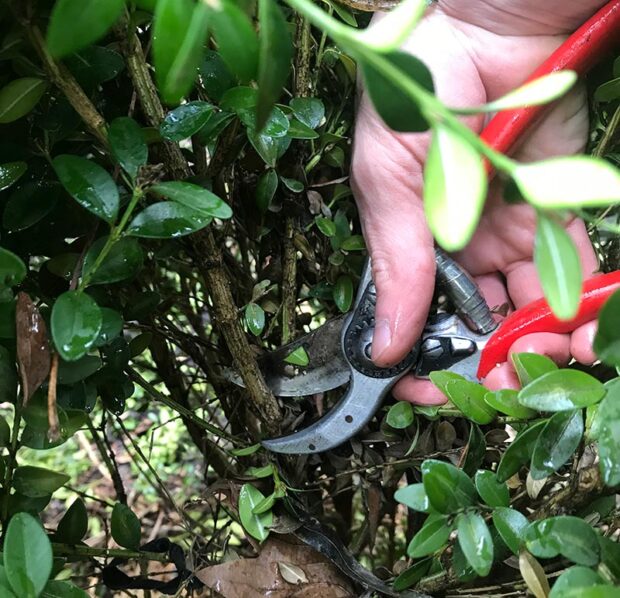
If your shrub is dense and congested, make thinning cuts on the interior of the plant, back to the main stem.

If two branches are crossing, choose which branch has the better form and then remove the other crossing branch. The same idea applies to any branches that are rubbing each other. Keeping a bowl shape in mind, make thinning cuts to your shrub by removing one-third of the oldest, largest branches. This encourages new, vigorous growth. It is important to remind yourself, throughout pruning a plant, of what shape you are attempting to achieve in the end.

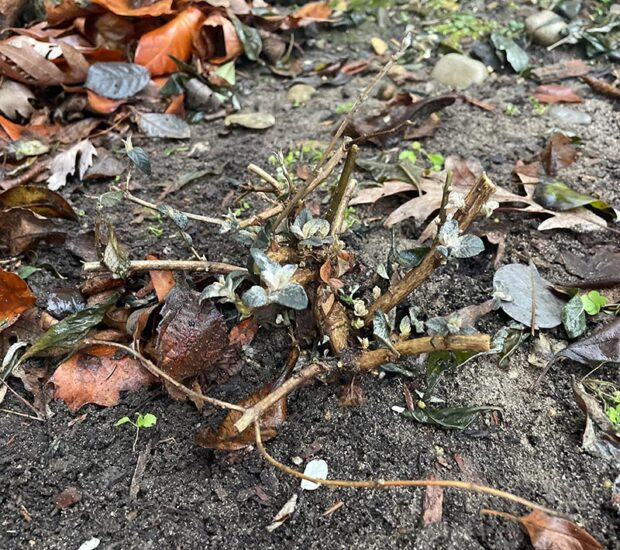
In some cases, coppicing your shrub may be a good option. Coppicing is cutting the whole shrub back to nearly ground level, sometimes referred to as “stooling” a plant. This promotes entirely new growth and is a good practice for shrubs that are becoming unmanageable in size and density, or for shrubs which benefit from a flush of new growth for flowering on new wood. Butterfly bushes and spireas are a couple shrubs that benefit from coppicing.
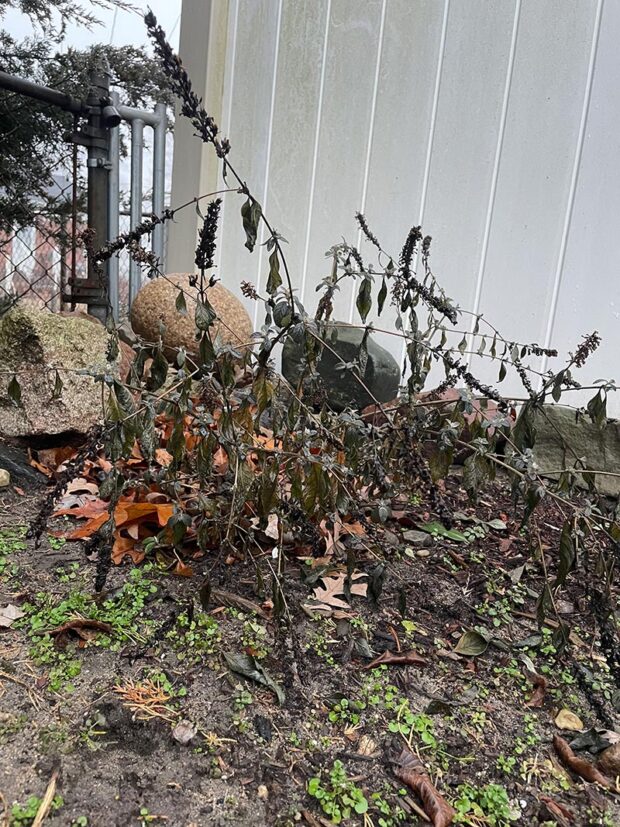
A butterfly bush before coppicing.
The same butterfly bush after coppicing, which promotes entirely new growth.

Entering the world of ornamental trees may require more research on your part. There are a multitude of styles and techniques depending on what tree you have and what you are trying to achieve. Reaching out to a local professional gardener for advice or an initial pruning can help start you on your way to becoming a pruning expert yourself.

Evelyn Koponen studied rural development and had several jobs in cultural and social development before changing careers to horticulture. Evelyn was able to bring her previous experience from rural permaculture development and greenhouse work to Atzinger Gardens, where she is a head gardener.

RELATED: Pruning ornamental trees

RELATED: How to grow great roses: Pruning and fertilizing

ELSEWHERE: Pruning evergreen shrubs

Filed Under: Uncategorized

Garden Profile: The circle garden

September 9, 2024   •   Leave a Comment

Lynn O’Shaughnessy’s breathtaking garden layout is loaded with native plants and is a haven for pollinators

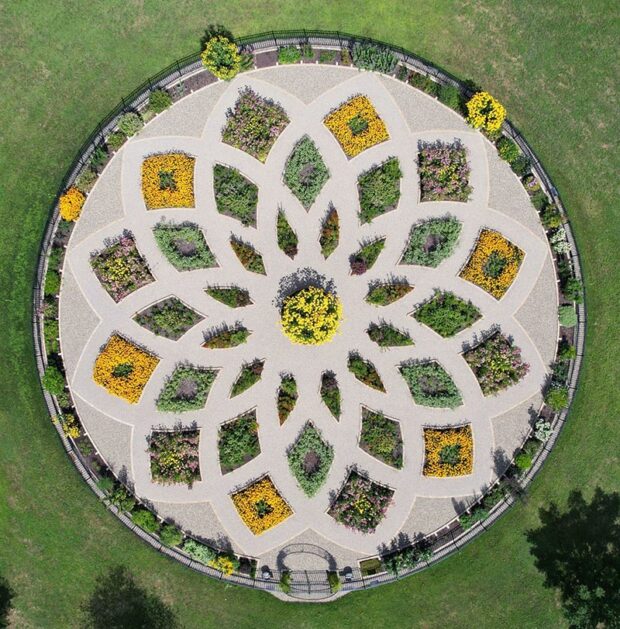
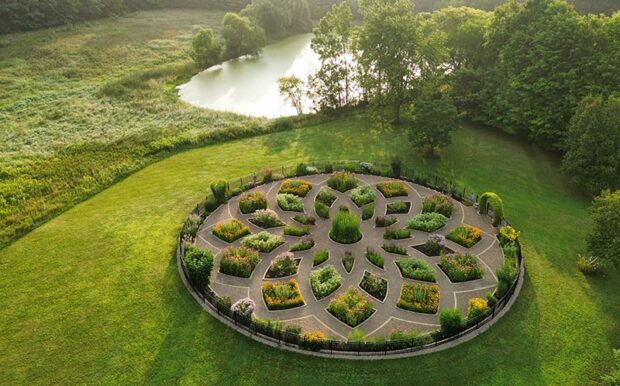
Lynn O’Shaughnessy’s circle garden, as seen from above.
Lynn O’Shaughnessy’s circle garden, as seen from above. / Photo: Lynn O’Shaughnessy

by Lisa Steinkopf

If a plane flew over Lynn O’Shaughnessy’s property, I’m sure it would circle and fly over again, just to see the spectacle. Lynn’s circle garden is beautiful from ground level, but is stunning from above. After initially seeing Lynn’s garden on a tour, we later met to talk about what inspired her to build the circle garden and why she decided to plant only native plants.

The very first time I attended a garden walk at Lynn’s was before the circle garden was built. Her sunny gardens were bursting with color and her hosta garden in the woods was exceptional. But the shade got deeper and the deer hungrier, so she decided to concentrate on a new garden. (That said, she also is revamping the hosta area into a native planting.)

The second time I toured her property, the hosta area was roped off, while her perennial beds and the new circle garden were the stars of the show. Lynn was giving a circle garden tour to a few attendees. I took photos and listened from afar, and could feel the pure joy and love of the garden radiating from Lynn as she described the new space. She has a passion for native plants and has created an exceptional garden to demonstrate that native plants don’t have to look like roadside weeds. The gorgeous garden is both well planned and well executed.

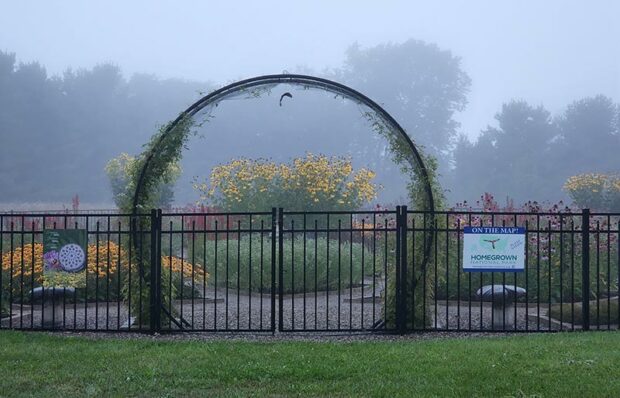
The entrance to the circle garden on a foggy morning. / Photo: Lynn O’Shaughnessy
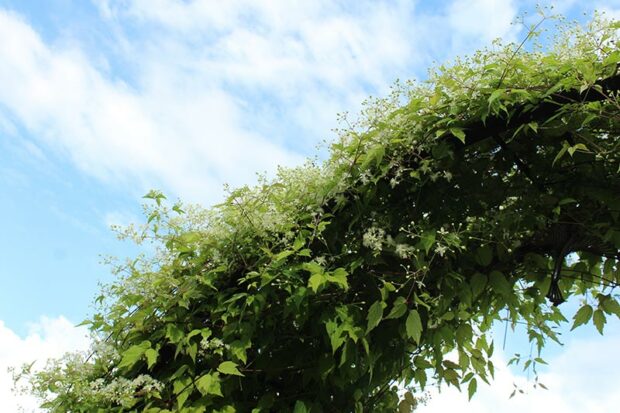
The entrance arch is covered with virgin’s bower vine (Clematis virginiana). / Photo: Lisa Steinkopf
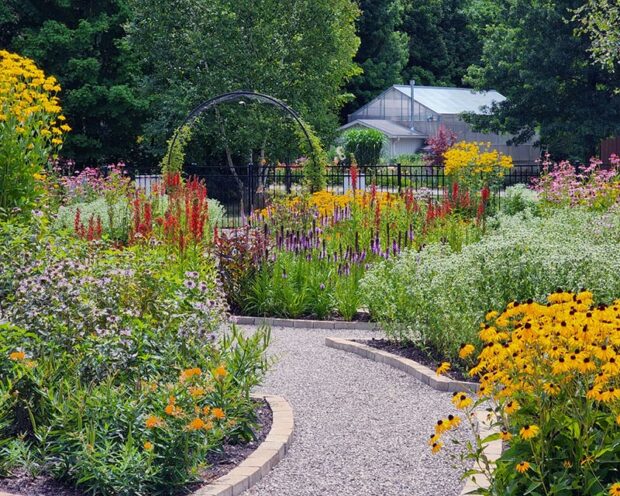
Inside the circle garden in full bloom, with Lynn’s greenhouse in the background. / Photo: Lynn O’Shaughnessy
Lynn expresses the joy she has for her native garden. Next to her is the native cup plant (Silphium perfoliatum). / Photo: Lisa Steinkopf

Garden conception

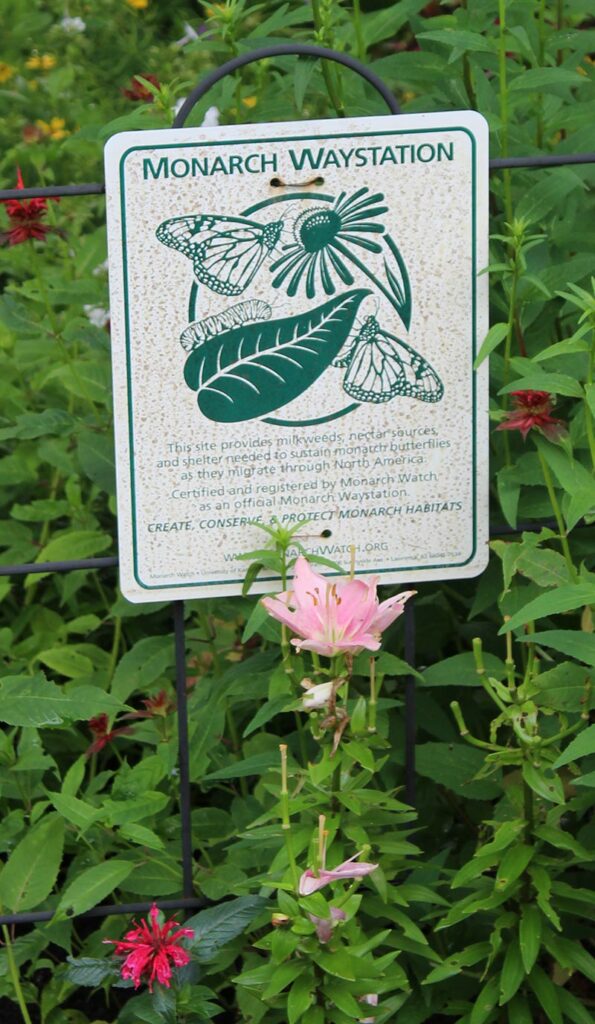
What brought about her interest in native plants? In 2018, she investigated how her garden could become a monarch waystation, and began adding plants that monarchs would love. She started seeing other butterflies as well. The new plants she had incorportated were natives, and she was seeing more butterflies than ever. She decided to start gardening with a purpose—to support the pollinators.

In the winter of 2019, a friend showed her an aerial photo of the lavender labyrinth at Cherry Point Farm in Shelby, Michigan. The center was a circular garden with a 12-point geometric design. Instantly, she knew this would be the garden design for her native plants.

She researched the layout and found it was a sacred geometry design known as torus vesica piscis. Using the design as the center, she created a vision board with pictures of the many native plants she wanted to incorporate into the design.

An early design drawing for the circle garden. / Photo: Lynn O’Shaughnessy
This vision board shows the initial idea coming to life. / Photo: Lynn O’Shaughnessy
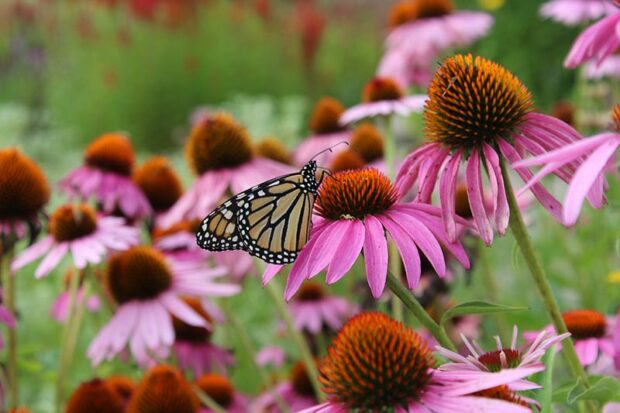
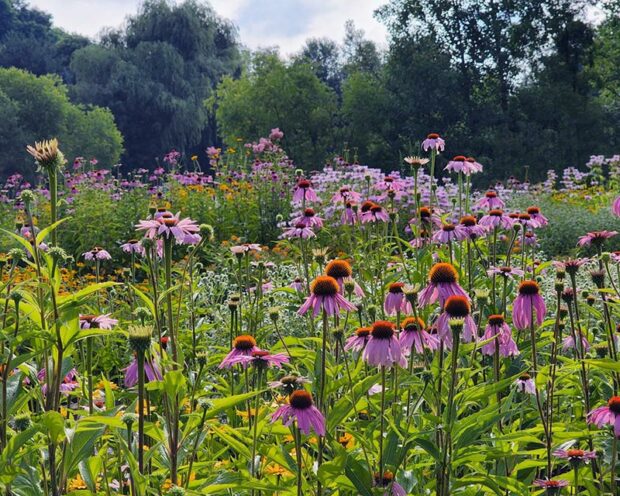
A monarch butterfly on a purple coneflower. Look closely to notice his small friend on the flower. / Photo: Lisa Steinkopf
Lynn’s garden is designated a Monarch Waystation. / Photo: Lisa Steinkopf
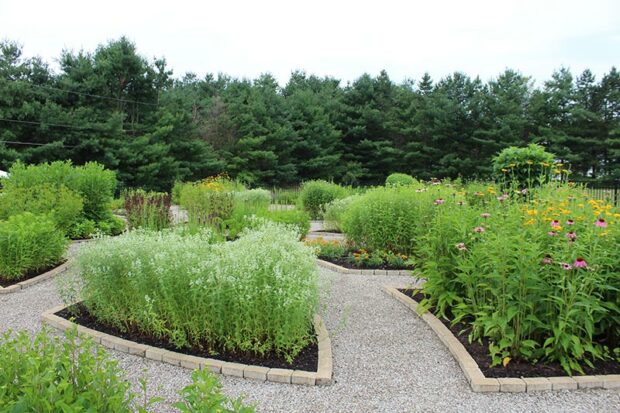
The circle garden beds are edged with brick and the walks are gravel, so no lawn mowing is needed. / Photo: Lisa Steinkopf

Building the garden

Lynn created the garden independently, except for the ground preparation, fencing, and irrigation. The garden is 100 feet wide and the fencing keeps the deer, turkeys, and rabbits out. The robins are still a problem, scratching and throwing soil onto the walkways. Lynn lives on 10 acres, so there are plenty of critters to keep out of the garden.

The contractors removed eight inches of topsoil and replaced it with sandy loam. They also installed an irrigation system. The rest was done with Lynn’s muscle power using a shovel and wheelbarrow. The walkways between the beds are gravel instead of grass so there would be no need to mow. Lynn chose brick edging to keep it neat and clean (the robins don’t understand that part).

It took her three months to get the garden ready to start planting the next year. The next spring, she worked for two more months and the circle garden was finished. She purchased some plants from native plant nurseries, and also grew many things, sowing seeds in her greenhouse. One of the helpful garden features for visitors is that every plant has a sign with its common and botanical name. The entire garden consists of perennials, except for two shrubs: shrubby St. John’s wort (Hypericum prolificum) and New Jersey tea (Ceanothus americanus). She has flowers blooming from April through the fall and everything is cut down to six inches in late fall.

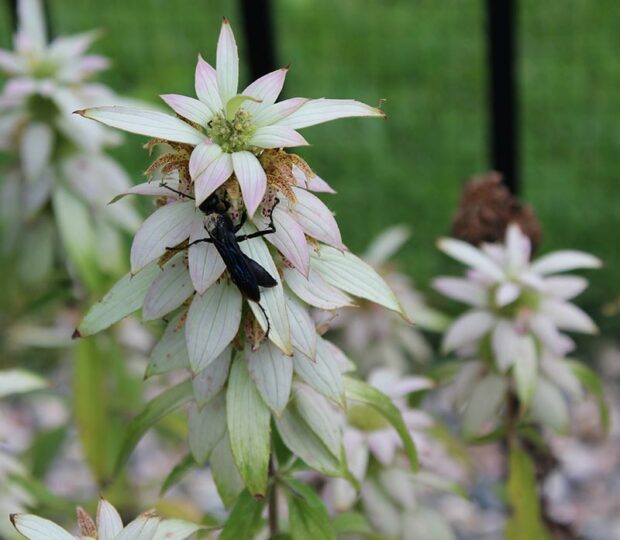
Spotted bee balm (Monarda punctata) with a great black wasp. / Photo: Lisa Steinkopf
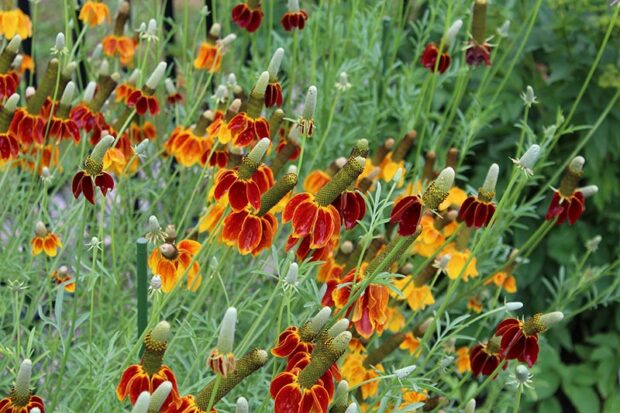
Mexican hat or long-headed coneflower (Ratibida columnifera). / Photo: Lisa Steinkopf
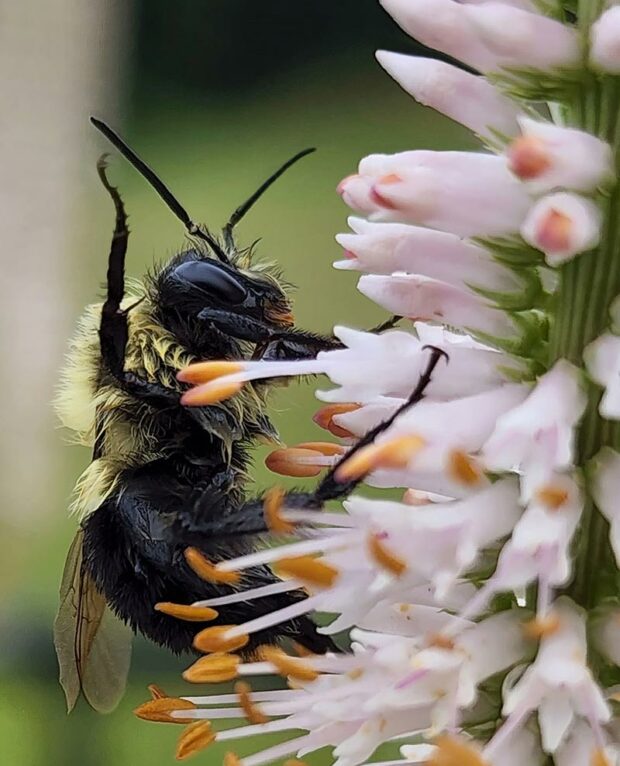
The common eastern bumble bee. / Photo: Lynn O’Shaughnessy
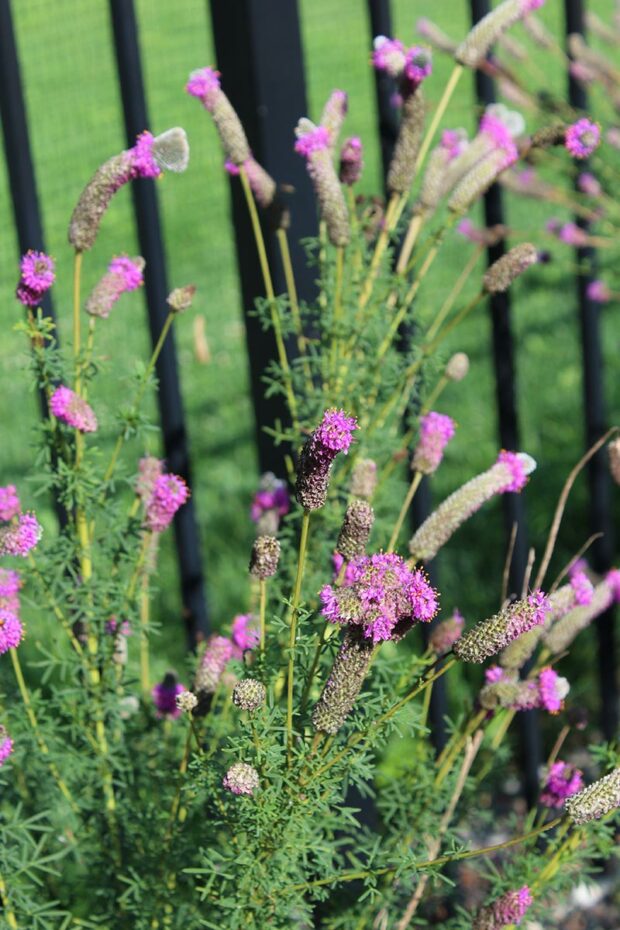
Purple prairie clover (Dalea purpurea). / Photo: Lisa Steinkopf
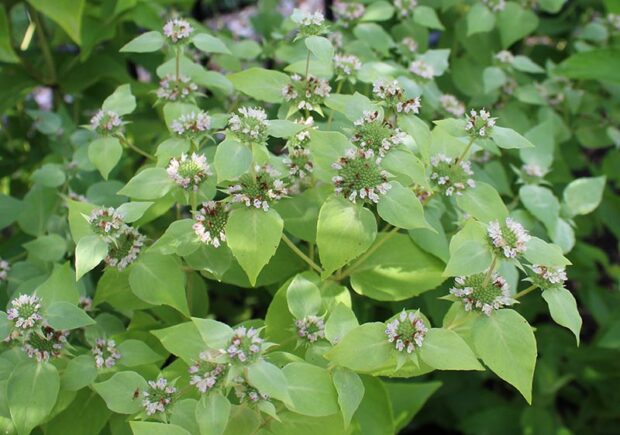
Clustered mountain mint (Pycnanthemum muticum). / Photo: Lisa Steinkopf
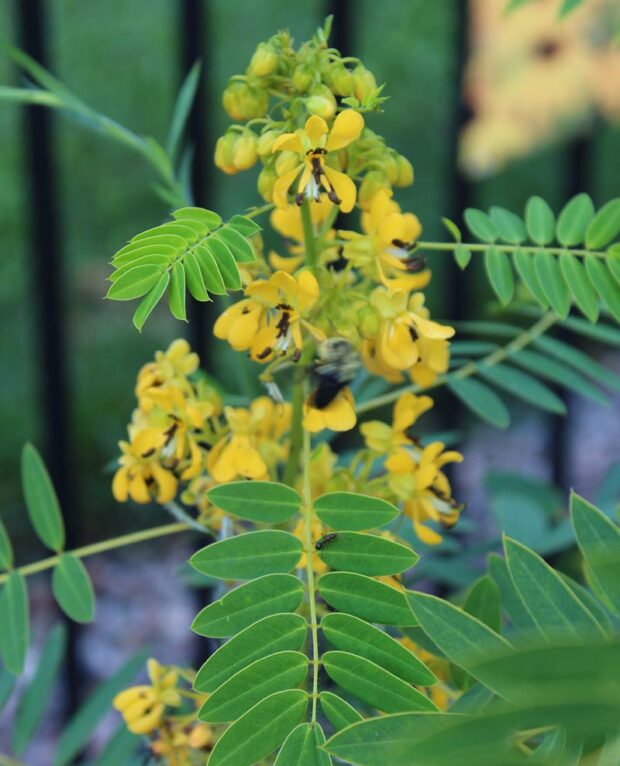
Wild senna (Senna hebecarpa). / Photo: Lisa Steinkopf
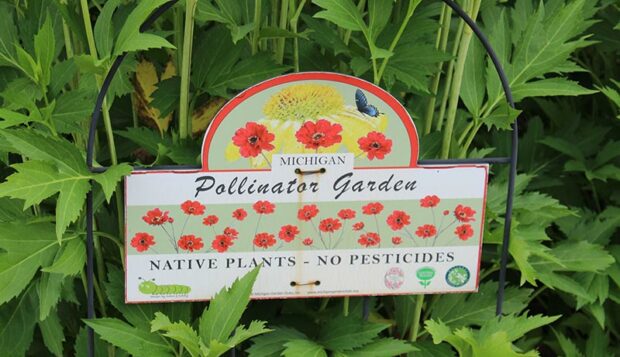
Lynn uses no pesticides in her pollinator garden. / Photo: Lisa Steinkopf

Pollinator lessons

This native garden is grown for pollinators. I saw so many as I walked through the garden with Lynn. She knew them all. How did she learn to identify them? She discovered the website www.bugguide.net, created by Iowa University. You can send in your “bug” picture, and they will do their best to identify it.

As we walked around the garden, here are a few things I learned from Lynn, in no particular order:

  • Bunnies don’t eat bee balm (Monarda).
  • Wool carder bees use lamb’s ear wool for their nests.
  • The clustered mountain mint (Pycnanthemum muticum) has the most diverse selection of pollinators. Lynn photo-documented 26 different pollinators on it while it was blooming.
  • Golden Alexander (Zizia aurea) is a host plant for the black swallowtail, a resident in every Michigan county.
  • Lynn’s favorite flower is bottle gentian (Gentiana andrewsii) because the blue flowers never fully open. In the late summer, our native bumblebee pollinates it by pushing its way in. She likes this plant’s interesting story.
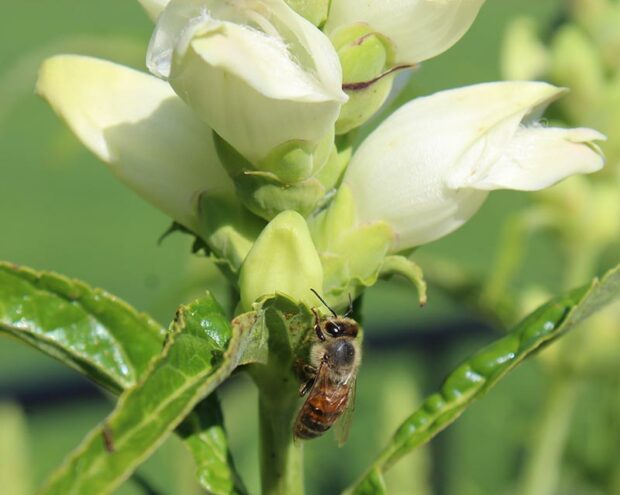
  • White turtlehead (Chelone glabra) is the host of the Baltimore checkerspot butterfly. The caterpillars overwinter in the leaf litter and become butterflies in the spring. This is unusual, as most butterflies don’t overwinter as larvae. This is a good reason to leave your flower beds messy in the fall.
  • I saw many different insects and many looked like bees to me. Yet, many were flies. How do you tell the difference? Flies have short antennae, two wings, and big eyes. Bees, on the other hand, have longer antennae, four wings, and small, oblong eyes.
  • Northern blazing star (Liatris) is the biggest butterfly magnet when blooming. The other plants are ignored when this is in bloom. Lynn took a photo with 11 monarchs in the picture at one time. 
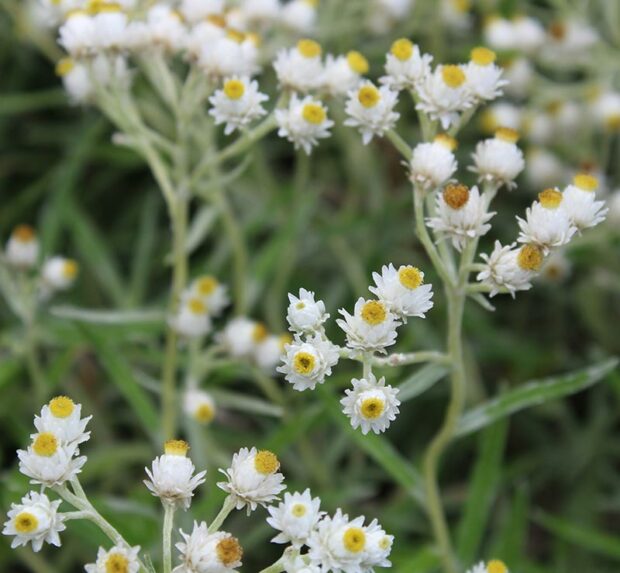
  • Pearly everlasting (Anaphalis margaritacea) is the host for the American lady butterfly. Lynn has seen 40 to 50 caterpillars on the plant, and they completely defoliated it. The plant recovered and bloomed 4 to 5 weeks later.
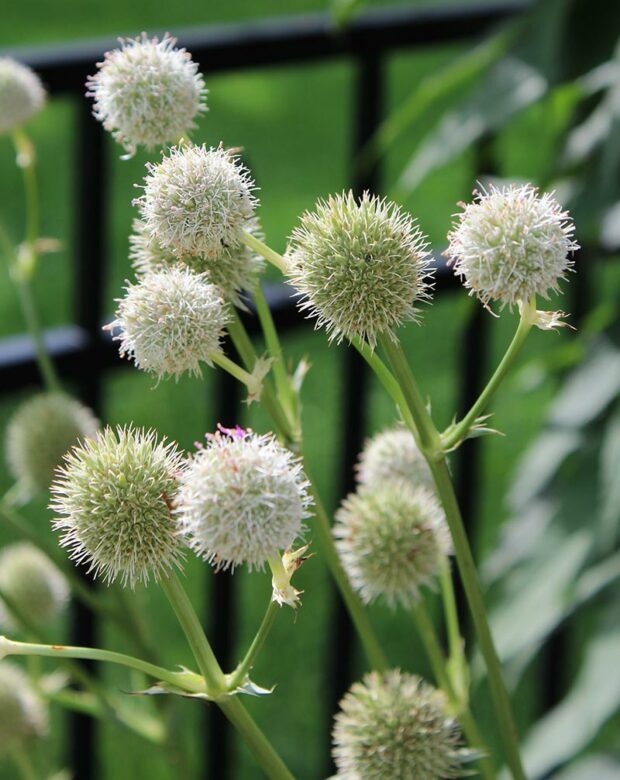
Rattlesnake master (Eryngium yuccifolium). / Photo: Lisa Steinkopf
A midsummer sunny day in the circle garden. / Photo: Lynn O’Shaughnessy
A pollinator on white turtlehead (Chelone glabra). / Photo: Lisa Steinkopf
Summer sunrise at the circle garden and adjacent pond. / Photo: Lynn O’Shaughnessy
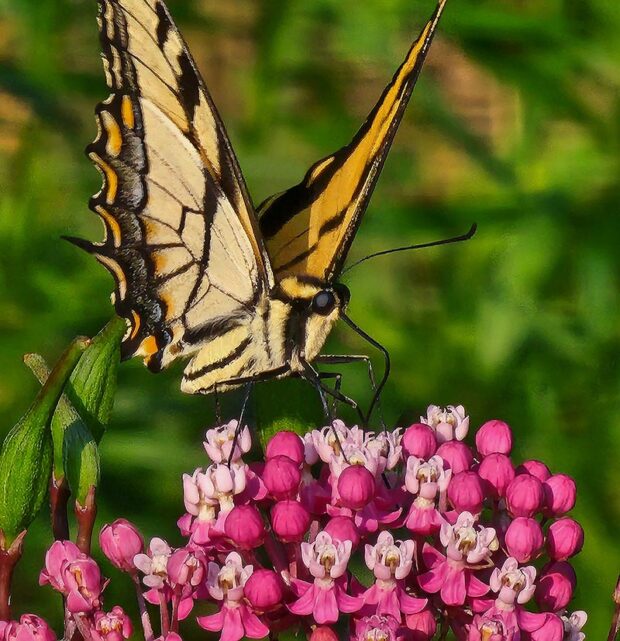
Tiger swallowtail butterfly on swamp milkweed (Asclepias incarnata). / Photo: Lynn O’Shaughnessy
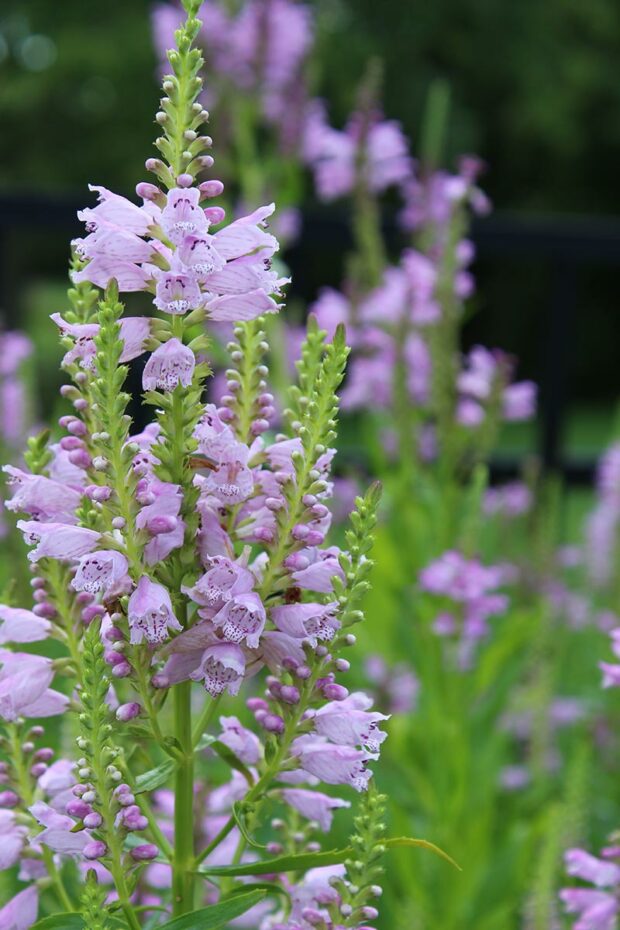
Obedient plant (Physostegia virginiana). / Photo: Lisa Steinkopf
Pearly everlasting (Anaphalis margaritacea). / Photo: Lisa Steinkopf

In its fourth year, the garden looked amazing and seemed much more established than a four-year-old garden. Lynn takes a drone photo every Friday to record the progression of growth and flowering. She hosts garden clubs and other groups, giving them tours of the garden (by appointment only). I learned so much from Lynn about pollinators and native plants. If you have a chance to tour her garden, don’t miss it. It is an amazingly beautiful place, buzzing with life.
Lisa Steinkopf is The Houseplant Guru (www.thehouseplantguru.com).

Filed Under: Profile

Garden Profile: Ponds, hostas, fairies and more

April 24, 2024   •   Leave a Comment

After a career in horticulture, Julie Buttigieg now focuses on her own garden and the results are magnificent

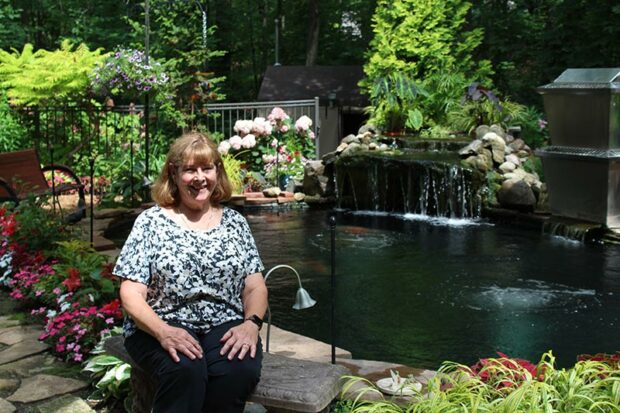
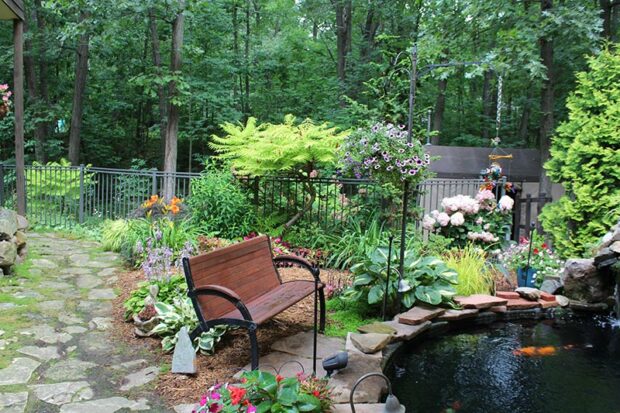
The Buttigieg koi pond is surrounded with beautiful plantings of annuals, perennials, conifers, and shrubs.

Text and photos by Lisa Steinkopf

As you drive by the Buttigieg home, it only takes one glance to know a serious gardener lives there. Yet the front yard is just a hint of what the back garden holds. On this three-acre property, there is not only an extensive fairy garden and hundreds of hostas, but also a roughly 16,000-gallon koi pond. What’s even more amazing: in 2015 none of it existed except the front yard cherry tree. Two years later in 2017, the garden was on its first garden walk.

The natural woods serves as a backdrop for this glorious perennial border.
This fountain and colorful bed greets guests at the front walkway entrance.
After a career in horticulture, Julie Buttigieg is now able to devote her time to her own wonderful garden and pond.

Let’s start at the beginning of Julie Buttigieg’s journey in horticulture. She attended Michigan State University where she studied floriculture. From there she landed a job at Weber Brothers Greenhouses, where she worked until it closed when I-696 was built. Originally from Dearborn, her mom told her about an employment ad for a horticulturist at Greenfield Village. That was 1977. Julie ended up working at Greenfield Village for 38 years, retiring in 2015. Mom knows best, right?

It was originally a florist position, making flower arrangements for different areas in the village and banquets held there. She was also an assistant in the greenhouse, planting window boxes and hanging baskets, and caring for the gardens around the planters. Julie also taught adult education classes, including wreath making, table centerpieces, and Christmas décor. In the early 1980s when the greenhouse manager retired, Julie took over and oversaw all the containers and gardens in the village, including growing the plants for them.

A progression of ponds

Julie and her husband lived in Livonia until 2015. They had a koi pond there—I remember visiting the garden on pond tours in 2012 and 2014. Their garden also had been on the Livonia garden walk in 1998 and 2002. At that time, their yard wasn’t particularly large and was filled with a swing set and sandbox for many years for their young son. When those playthings were no longer needed, building a pond became Julie’s focus.

She started small with a 300-gallon pond. When that became too tight, she moved up to 1,500 gallons. Then that became a 6,000-gallon pond, which was still too cramped—the growing fish were knocking the plant pots off the underwater shelves. The new 8,500-gallon pond had no shelves, so the plants couldn’t be knocked over. Then with retirement, Julie and her husband decided to move to a larger piece of property in Fenton. Happily, the new owners of their Livonia home kept the pond and have also been on the pond tour.

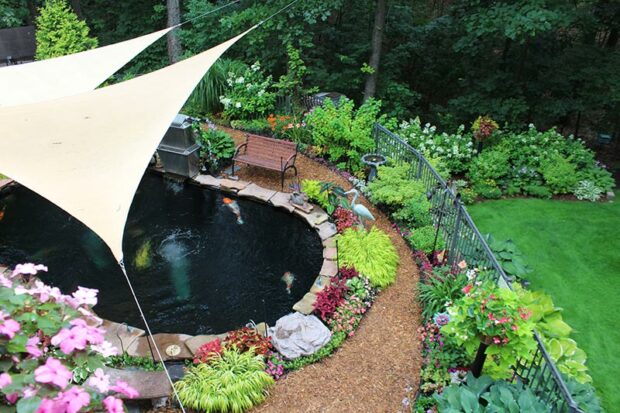
The view of the pond from the top patio shows how large the koi are. The shade sails protect the fish from the sun.
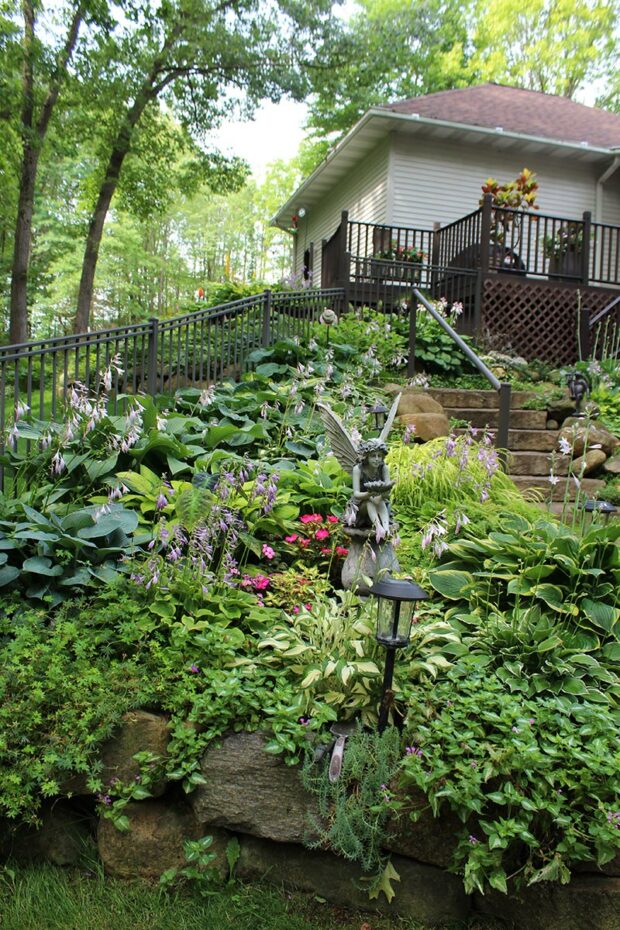
On this hilly property, steps lead to the upper patio and pond.
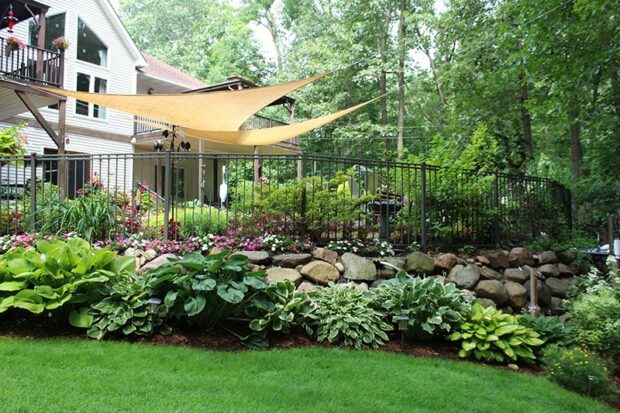
This boulder wall was installed to make a flat area around the pond. 
A perfectly placed bench to sit and enjoy the pond, the fish, and the waterfall sounds. 

When the Buttigiegs decided to move to a new house, they built the pond first to move their koi, which are now 18 to 20 years old and up to 38 inches long. They bought the new house in October 2014, but didn’t move in until the next July when the pond was finished. The koi are much loved pets and the couple wanted to be sure the fish had a new home to live in before the move. Amazingly, these fish can live 60 to 80 years.

This also gave the Buttigiegs time to dig up and divide the perennials in their previous garden and bring them to the new property. As far as the new pond goes, it is seven feet deep and holds 15,800 gallons of water. It is a long way from the 300-gallon pond Julie started with. There are drains and aerators to take the waste out and filter the water (using a bakki tower system). During winter the fish stay in the pond, which is covered. The water temperature is lowered slowly to 48 degrees starting in October and then gradually warmed back up starting in March. The fish rest and eat nothing for about two months of the year.

Plants and collections

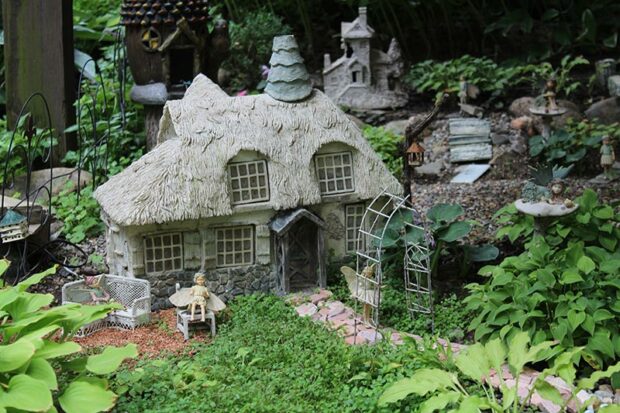
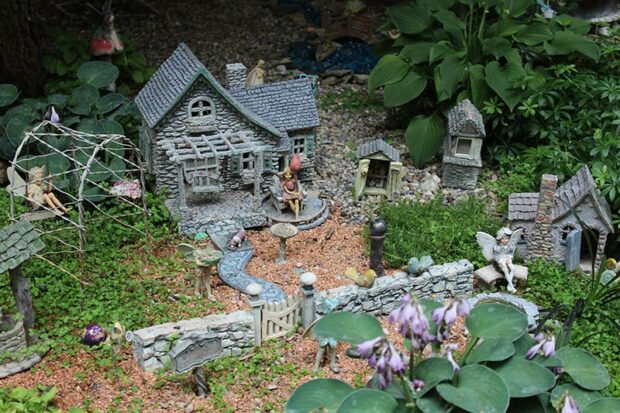
Another collection that moved from Livonia to their new garden was an extensive fairy garden. A castle is the focal point and was the piece that turned Julie on to fairy gardening. The current fairy garden is much larger than before and includes many small vignettes. The large house and castle stay outside all winter, but the rest is put away—a big job.

One of the fairy garden cottages.
This fairy garden scene has plenty of miniature accoutrements.

When they chose this property, it was bare and hilly, so the Buttigiegs hired professionals to do some hardscaping. They had the pond dug, a fence installed around the pond, and stone steps and a patio constructed. Two large boulder walls were built to make level areas for the patio and the area around the pond. Then Julie filled the garden with lovely perennials, shrubs, and annuals. The garden became her new full-time job; she now loves working in her own garden.

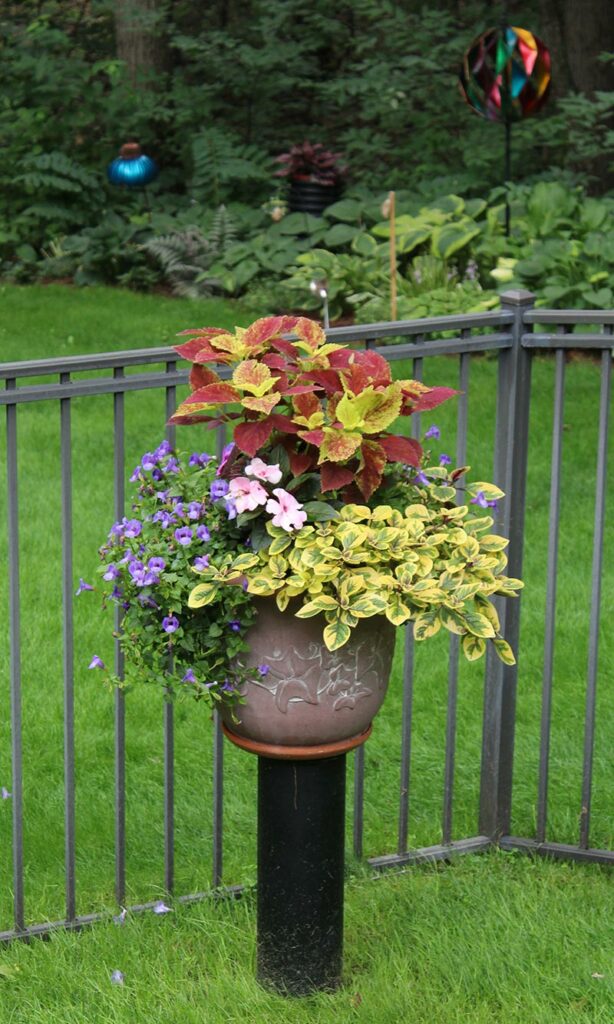
Julie’s husband made these pedestals for her container gardens, complete with lazy Susans.
Hostas play a large part in the planting scheme, while annuals provide pops of color.

One of her favorite plants is coleus—she has collected over 75 varieties. Julie takes cuttings of each one every fall and grows them under lights in her basement. She nurtures 10 flats of coleus cuttings, which amounts to 320 plants. She also has a fuchsia called ‘Billy Green’ that she has taken cuttings from and overwintered for 20 years. Julie also overwinters the Rex begonias she grows in pots in the mixed border.

This bright planting includes many of Julie’s coleus, New Guinea impatiens, and ‘Billy Green’ fuchsia in the upper right corner.
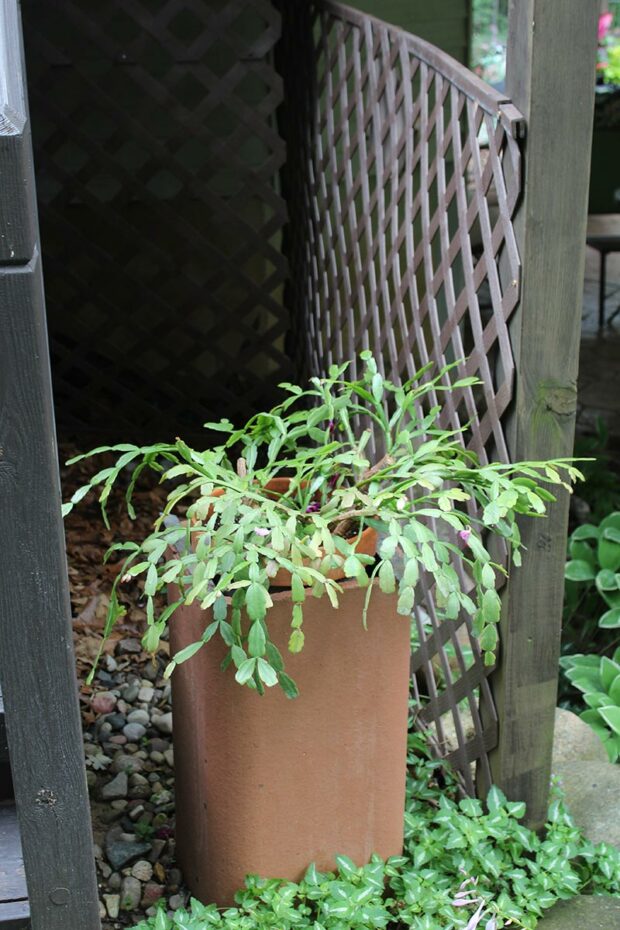
Julie’s grandma’s Christmas cactus, nearly 70 years old, spends summers outside.

Her third-generation Christmas cactus goes outside for the summer. This special plant belonged to her grandmother. Julie’s mom then took it to her schoolroom for many years, but after she retired, Julie inherited the plant and has now enjoyed it for over 20 years. I love family plants and the stories behind them.

Repelling the deer

On the Buttigieg property, one of the notable things was the lack of chewed plants by the deer. We all know hostas are deer magnets and Julie’s garden has hundreds of them. So, of course, I asked her secret. It is an intensive regimen that includes Bobbex animal repellent, Milorganite, and Green Screen deer and rabbit repellent. She uses all three deterrents to keep those pesky herbivores away. Milorganite, a granular “aromatic” fertilizer, is scattered in the garden every week like chicken feed. Maybe that’s one of the reasons her plants are so beautiful. She also sprays Bobbex every 7 to 10 days if it is rainy or twice a month if it is drier, as it eventually washes off. She uses over six gallons each time. And lastly, she hangs Green Screen in small bags on hooks around the garden. This regime seems to work, as I saw not one nibbled plant.

This lush hosta bed is well protected with bags of animal repellent hanging on hooks.

I also noticed the absence of mosquitoes. While Julie doesn’t spray for them, the homeowner’s association does. She requested that they not spray her garden, and they honor that, but the spray around the perimeter seems to work. Julie uses no insecticides or herbicides. She has dogs and, of course, fish, so her yard cannot be sprayed. If sprays landed in the pond, they could kill the fish.

This amazing garden filled with gorgeous plants, fanciful fairies, and mature fish is not to be missed. Julie, a member of the Open Gate Garden Club, works in the garden 10 to 12 hours a day in the spring and 2 to 3 hours daily in the summer. This is a well-tended garden, and it shows!

Lisa Steinkopf is The Houseplant Guru (www.thehouseplantguru.com).

Filed Under: Profile

Plant summer-flowering bulbs in early spring
April 4, 2024   •   Leave a Comment

If you want to enjoy summer-flowering bulbs in your garden, you may be disappointed if you wait until all danger of frost has passed before planting these beauties. Flowers may come late in the fall and be missed. Consider an early start (roughly mid March to mid April) for larger cannas, large-flowering dahlias, elephant ears, and anything else you want to have in flower earlier than late summer. 
Materials needed to get bulbs started: 6- or 8-inch pots, lightweight planting soil, bulbs, and plant labels. Read the planting directions on each bulb package. If you saved bulbs from last year’s garden, plant them in the pots so that they are just completely covered, roots down. Don’t plant them too deep. It’s better to err on the side of too shallow.

Once the bulbs are planted, thoroughly water them. This will help signal to the dormant bulb that it is time to spring to life. At this stage, the pots don’t need any light. They need warmth and water. So leave them in the basement or out of the way.

When new growth begins emerging, watch carefully. Treat them like houseplants when it comes to watering, allowing them to dry out a little between waterings. Every couple weeks, apply a water-soluble fertilizer. When the first leaves are beginning to separate from the shoot, move the plants to a bright, but indirectly lit window. It should take about two weeks from potting time until the plants are moved to the window.

These plants shouldn’t be planted into the garden until all danger of frost has passed. But they can still get some quality time outdoors. The bulbs can visit outside if the temperatures don’t drop below 50. Never expose them to frost! Overnight exposure is out of the question, unless it is in the garage, and the temperature will not drop below 45. It’s best to wait until early May for any overnight trips.

Continue to fertilize and expose plants to the outdoors. When the weather allows, usually mid to late May, transplant them into the garden. Stake the plants if necessary, being careful not to damage the bulb. Remember, do not allow the plants to be exposed to frost, or all of your hard work will be undone. If frost is predicted, cover the plants with rose cones or frost guard fabric.

Follow these steps and you will enjoy beautiful summer flowers!

Provided by the professionals at English Gardens.

RELATED: Proper planning ensures reliable spring bulbs

ELSEWHERE: Storing tender, summer-flowering bulbs, corms, rhizomes and tubers for winter

Filed Under: Feature Task

Hellebores are an early spring superstar bloomer

March 22, 2024   •   Leave a Comment

Lenten rose and Christmas rose are common names for hellebores (Helleborus), a gardener’s gift in the dreariest weeks before the spring planting season. In a “normal” Michigan winter, hellebores will begin flowering in March and last through May, thus generating 8 to 12 weeks of showy blossoms. Although many interesting species exist, this article will concentrate on the larger, brighter-colored blossoms of hybrids developed from the Lenten rose (Helleborus orientalis).

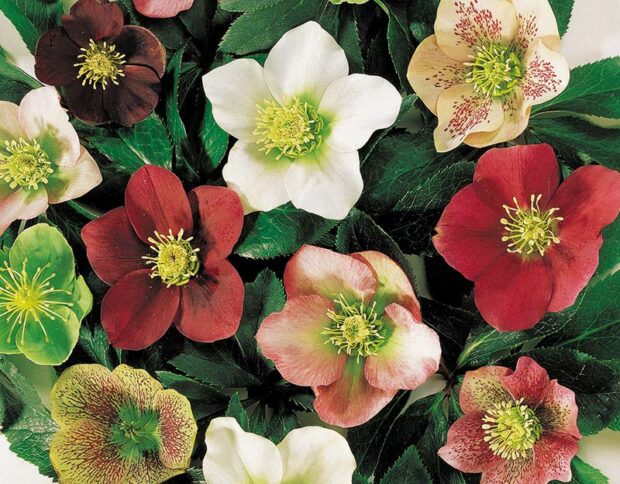
Despite the winter, hellebores will explode into bloom at the slightest hint of spring, with blossoms 10 to 18 inches high, above thick stems. Established plants produce multitudes of large, single flowers that shine with grace and beauty, concealing their durability. Colors range from pure white to yellows, greens, pinks, plums, rose, and the darkest purple. Petals may have a variety of shading, veining, and spotting that is rarely seen in garden flowers.

Hellebore Royal Heritage series
Royal Heritage series (Photo: Wayside Gardens)

Shortly after blooming, hellebores develop fresh foliage 16 to 22 inches tall and wide. It ranges from the finely cut leaves of certain species to the large, bold leaves of the more common orientalis hybrids. Leaf color ranges from pale to dark green and may be mottled with silvers, grays, and pinks. Hellebores are semi-evergreen in our climate—that means that the foliage may remain undamaged and green in the mildest of winters, while severe winters may discolor and flatten stems and leaves.

Despite their very early performance, hellebores are perfect companions to a number of spring bloomers. They combine well with the earliest-blooming bulbs such as crocus, scilla, or anemones. Fall-planted pansies and violas often produce flowers very early when hellebores are in full glory.

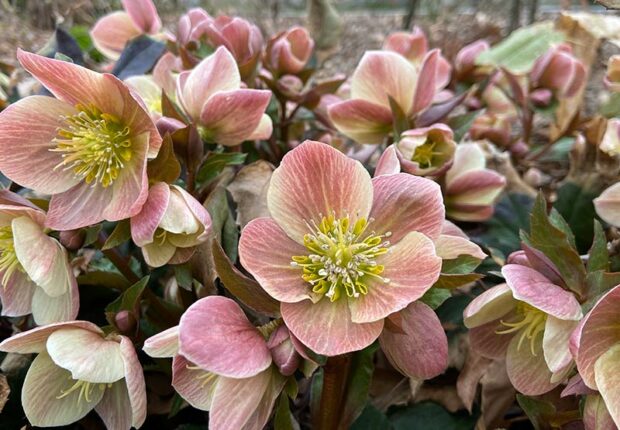
Hellebores are one of the first perennials to bloom in early spring.
Hellebores are one of the first perennials to bloom in early spring. (Photo: Eric Hofley / Michigan Gardener)

The earliest-blooming perennials such as primrose (Primula), lungworts (Pulmonaria), barrenwort (Epimedium), and some woodland wildflowers like trillium are also good hellebore partners. The glossy, bold, dark green foliage of Lenten rose hybrids persists through the growing season and contrasts beautifully with gold, silver, and bright green leaves. Try the gold leaves of certain hostas, golden creeping Jenny, or hay-scented ferns. For an equally stunning combination, position hellebores next to the silver foliage of lamium, Japanese painted ferns, silver-leaved perennial forget-me-nots (Brunnera macrophylla ‘Jack Frost’ or ‘Sea Heart’), or some lungworts such as ‘Moonshine’ or ‘Majesty.’

Hellebores will survive in sun or shade, but the foliage might look fresher if protected from the summer’s midday sun. Our Michigan clay soil is usually alkaline, which is fine for hellebores, but the poor drainage typically associated with clay should be corrected by adding pine bark or compost.

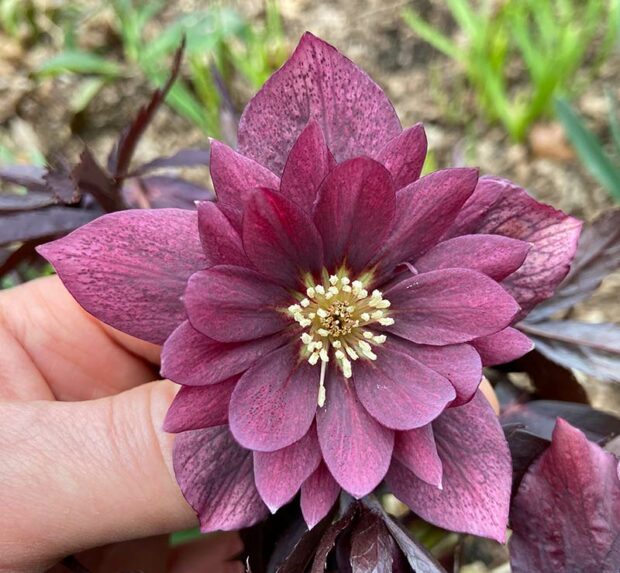
Breeders are creating hellebores with gorgeous flowers.
Breeders are creating hellebores with gorgeous flowers. (Photo: Eric Hofley / Michigan Gardener)

Hellebores have few pest and disease problems, but black spot is the most damaging and widespread difficulty with which hellebores must cope. Black or brown blotches may appear on leaves and spread to discolor flowers. Overhead watering, a lack of air circulation, and wet weather may contribute to infection, especially when plants lack proper cultural conditions. Removing the spent flowers and infected leaves will help minimize the spread of the black spot spores. Fungicides may also be used.

Lenten rose hybrids were initially available in mixtures that included many possible colors. These mixtures provided many beautiful, rich flowers, but also included several bland and less desirable forms. The safest way to buy hellebores was to purchase them when they were in bloom to ensure the best selections. Then, the “Royal Heritage” strain was developed, which offers larger flowers and an improved brilliant color range.

Hellebore foliage can be a lovely, dense groundcover. (Photo: Eric Hofley / Michigan Gardener)

Today, several varieties are available that offer specific colors or forms. The Royal Heritage strain has several varieties that each provide specific colors. Recent series include Frostkiss, Gold Collection, Honeymoon, Wedding Party, Winter Angels, Winter Jewels, and Winter Thrillers. With series like these, hellebores can now be purchased out of bloom, knowing that you will get the color you want.

Fresh hellebore flowers can be cut with a little stem remaining and floated on water for a breathtaking indoor display—these flowers are ideal for being appreciated up close. Blooms can even be dried as an everlasting flower.

In general, hellebores are underused. They bloom so early that gardeners are often visiting the garden center well after they have flowered. Plant one for an early reminder each season that spring is right around the corner. Plant a few and enjoy drifts of pristine flowers that you’ll look forward to year after year.

Hellebore

Common name: Lenten rose, hellebore (HEL-eh-bore)
Botanical name: Helleborus orientalis (or Helleborus x hybridus)
Plant type: Perennial
Plant size: Height and width: 16-22 inches
Habit: Clumping
Hardiness: Zone 4
Flower color: White, yellows, greens, pinks, plums, rose, dark purple
Flower size: 2-3 inches wide
Bloom period: Late winter to spring (March to May)
Leaf color: Glossy, dark green
Leaf size: Up to 16 inches long, rising from base
Light: Partial shade to shade. Avoid afternoon sun.
Soil: Well-drained
Uses: One of the earliest plants to bloom; use it to welcome the spring season.
Companion plants: Bulbs: crocus, scilla, anemones. Fall-planted pansies and violas. Early-blooming perennials: primrose, lungworts, barrenwort, trillium.

George Papadelis is the owner of Telly’s Greenhouse in Troy and Shelby Township, MI.

Filed Under: Plant Focus

Phenology: Use nature’s calendar to improve your garden

March 8, 2024   •   Leave a Comment

Spring is coming! How can you tell? Don’t glance at the calendar—look at the plants around you. Since they useheat from the sun to become active, plants and bugs are better than the weather forecasters. They are like little solar panels that absorb heat. When they get enough, they begin to develop and change according to how much they have absorbed.

Scientists use a system that is based on days that the temperature reaches 50 and above to calculate this activity—they call it DD50 (Degree Day of 50 degrees). Most insects and plants need a temperature of at least 50 degrees to start to become active. The hotter it gets, the quicker they change. 50 is used as a base degree day, so for each degree above 50 the temperature rises, so does the DD50. For example, a 70-degree day would have a DD50 of 20.

Entomologists have charted insects according to how many cumulative DD50s it takes for them to become active and develop into different life stages (egg, nymph, larva, and adult). For instance, it takes the birch leaf miner adult an average DD50 of 180 to emerge and start laying eggs in the tissue of birch leaves, while the larva needs 262 DD50s to become active.

By using this information, we can better track and control undesirable insects by applying treatments when they are the most vulnerable—usually when they are in the nymph stage, just after egg hatch. Many insects become active between 100 and 200 DD50—that is usually the end of April to the beginning of May. But how do we tell when? Most of us are too busy to sit down and do the math, and every landscape is different. You might have several different DD50s in one yard, depending on microclimates and exposure to the sun.

Phenological indicators

The solution is simple. We use phenological indicators to tell us when a certain DD50 has been reached in an area. These are signals that nature gives us in the landscape. Since both plants and insects need a certain DD50 to become active, we can match them together to tell when an insect is active, based on which flowers are in bloom or when a plant leafs out. There are thousands of these indicators out there and they are pretty easy to learn once you know what to look for.

A common one is the lilac. When it blooms, the birch leaf miner is beginning to lay its eggs in the leaf tissue of birch. So when you see the lilac flowers, you need to check your birch for signs of infestation and treat if necessary.

There are many phenological indicator lists available from your county extension service and various gardening sources, or you can make your own. The next time you see a problem insect in your garden, look around and see what plant is coming into bloom or going through any other noticeable change—then make note of it. Next year, when you see the plant going through the same change, you will know that it is time to check for those same insects in your garden. These indicators are very accurate and do not change from year to year, only the date will vary,depending on the weather.

The tracking of phenological indicators is considered an accurate gauge to our changing climate. Scientists and volunteers all over the globe are recording them to help understand how our world is transforming due to climate change. In Europe, there is a huge network that tracks the first leaf, full leaf, and first bloom of many plants. In some areas they have data going back hundreds of years.

In the U.S., there is a group called The USA National Phenology Network that tracks a multitude of species (www.usanpn.org) and publishes the data every year.Volunteers can report to the site; the information you need is online. Scientists use this data to help predict changes in weather patterns and the effect they have on different plants and insects. This also impacts other animal environments, such as bird migrations and fish spawning.

These indicators are all linked together and can help explain why certain plants no longer grow in areas where they once flourished. It also explains why some springflowers reemerge in the fall—a late season cold snap sends the plant into dormancy and effectively “resets” its DD50. Then a warm fall accumulates enough DD50s to force the plant into growth.

By increasing our knowledge in this area, we begin to see the whole picture of our environment a little clearer. As a result, we can respond more effectively to the signs that nature gives us.

April and May are great months to try out your observation skills and find some good indicators in your own yard. Have fun!

Steve Turner, Certified Arborist, is from Arboricultural Services in Fenton, MI.

Filed Under: Tree Tips

Growing roses in your “up north” garden

February 15, 2024   •   Leave a Comment

One of the most time-honored Michigan traditions is traveling “up north” to spend idyllic weeks in the sunshine, water and woods. Some of us have cottages or second homes up north. While we don’t want to turn a cottage into just another suburban home, many cottage dwellers like to plant a few ornamental plants to enjoy flowers. Often, roses are rejected as being too fussy for up north. Nothing could be further from the truth.

The growing conditions up north are indeed different than a typical suburban garden. The most obvious difference is the weather. That’s a big reason we trek up north—it’s cooler, both in the summer and in the winter. Those winter lows can create challenges for roses. Up north gardens often contend with much more wind than in suburbia, especially if the cottage sports a lakefront vista. The sandy soil up north is inviting to clay-challenged suburban gardeners because it is easier to dig. However, that same soil doesn’t hold water or nutrients as well as the familiar subdivision clay soil.

Further, cottage dwellers aren’t able to provide their up north gardens with consistent care. Cottages often are empty for days or even weeks during the growing season, while residents earn their living in the big city. That means that plants aren’t watered regularly and there’s little time for spraying pesticides. Besides, who wants to apply toxic chemicals in the natural, up north environment? Seasonal cottages are often shut down in late September. The dock is pulled from the lake and the plumbing is drained and turned off. That’s a little too early to winter-protect tender roses, yet it may be the last time the owners visit the cottage before spring.

Even with all these challenges, roses can thrive up north with just a few special “tricks.”

Select winter-hardy roses and plant them in a sunny spot

This simple advice goes a long way in guaranteeing success with up north roses. There’s no getting around it: roses are sun lovers—the more sun the better. Roses convert sunlight to energy and energized roses are better able to survive winter chill, drought and pests. Plant a winter-hardy rose in a sunny spot and you’ll be rewarded with decades of bloom, even up north.

Some of my favorite up north roses include the hardy, fragrant rugosas and Canadian-bred Explorer and Morden Parkland roses. If you’d like a rose for cutting, consider the many bred by Dr. Griffith Buck at Iowa State University, known fondly as “Buck” roses. His pink and red roses are the most winter-hardy, while the white, yellow and apricot ones may need some extra winter mulch to survive up north.

Don’t overlook the once-a-year-blooming antique roses. They will create 3 to 4 weeks of show in mid-to-late June up north—exactly the time you will be visiting your cottage. After blooming, these hardy survivors turn into leafy, rounded shrubs, at home in a naturalistic setting. They’re reliably winter hardy and rarely bothered by insects and diseases. They’re survivors—that’s how they’ve lived to become antique roses! Several ancient rose varieties are native to Michigan, including prairie rose (Rosa setigera) and swamp rose (Rosa palustris).

This simple advice goes a long way in guaranteeing success with up north roses. There’s no getting around it: roses are sun lovers—the more sun the better. Roses convert sunlight to energy and energized roses are better able to survive winter chill, drought and pests.

Plant when you’re going to be at the cottage for a few weeks

Spend some time working organic amendments into the planting area. Put about 1/2 cup of bone meal at the bottom of the planting hole. This provides a good, very slow-release form of phosphorous, essential for root development.

Water heavily while planting and water newly-planted roses every day for several weeks; ideally a month. Water is the best “miracle chemical” to ensure success for a newly planted rose. It’s OK to use lake water on roses and may be better than mineral-rich well water. After a few weeks, reduce the frequency of watering, but plan to supplement nature’s rainfall during the first year, when roses need water 2 or 3 times weekly, especially in sandy soil. After the first year, roses are better able to withstand periods of drought.

Hold off fertilizing a newly planted rose for about a month. Check new roses frequently for animal damage. Critters seem to be attracted to freshly worked soil and could uproot your roses looking for the bone meal or tender roots to munch.

Once the roses are established, there are two treats that will bring them from so-so to spectacular: slow-release fertilizer and organic mulch.

Apply slow-release fertilizer in late spring or early summer

The plastic-coated, slow-release fertilizer pellets release nutrients slowly over 3 or 4 months. Roses are heavy feeders and, unfortunately, sandy soil doesn’t hold nutrients well. Organic fertilizers are good as well, but in sandy soils they must be used monthly from May through August. Compost is a good organic soil amendment that improves soil structure, but it doesn’t provide enough nutrients when used as the only fertilizer.

Several inches of organic mulch corrects many problems

Shredded pine bark mulch is readily available up north and is a wonderful top-dressing around your roses. It helps moderate soil temperature and moisture level, making your roses more forgiving if you must ignore them for weeks at a time. It smothers weeds and makes it easier to pull them. Over time, bark mulch decomposes, adding much needed organic matter to sandy soil. Spread a couple inches each year to replace the mulch that’s decomposed into the soil and to dress up your garden with a fresh look.

Heap some extra mulch around the crown for the first winter

Even the very winter-hardy varieties mentioned in this article aren’t fully established for their first winter. Their roots could frost heave and the tender new canes could attract rabbits. Heap 6 to 10 inches of extra mulch around the crown for the first winter. Hardy roses won’t need any special winter mulch in subsequent years, but you may need to ring them with mesh wire if the critters enjoy your winter garden.

Give your up north roses a little extra attention each May

Wait until the rose starts to leaf out, and then pull away leaf debris around the plant to create a little basin that helps collect water around the crown. Prune off any winter-damaged canes and shape the shrub, even if it means pruning some portions that are already pushing leaves. Apply slow-release fertilizer around the drip line of the plant and scratch it into the soil or mulch. You don’t have to bury the fertilizer, just get it in contact with the soil. Spread a couple inches of fresh organic mulch and water the plant very thoroughly to get the fertilizer’s nutrients to the roots. That’s it. Now enjoy hundreds of blooms from your lake-side hammock all summer!

Nancy Lindley was the co-owner of Great Lakes Roses in Belleville, MI.

RELATED: Simple steps to keep roses healthy for the summer

ELSEWHERE: Why are my roses changing color?

Filed Under: Raising Roses

Soil health should be number one priority

January 30, 2024   •   Leave a Comment

Building and managing a vegetable garden can be much simpler if we change our behavior considerably. In the “old days” we rototilled or “double dug” our patch every spring. We took soil tests to help us determine how much and what kind of fertilizer we should use each year. Watering was a real concern in the heat of the summer. We seldom caught up with the weeds. We had to always keep our eye out for any insect problem that might appear. We had to learn about disease for all the different vegetables we were growing. Some could be fixed and others required removing the plant from the garden. 

Does this sound pretty much the way you tend your vegetable garden? Don’t feel bad. Many Americans grow vegetables with all those concerns just like Grandmother did.

Vegetable gardening can be much simpler and easier to manage if we would begin to focus most of our attention on the condition of the soil in which we grow our plants. I mean really focus our attention. Soil health in the garden has typically gotten the short shrift. Pay more attention to your soil’s health and a whole lot of onerous gardening tasks will disappear. We now have to start paying attention to the needs of the “soil food web” for a change.

Do an Internet search on “soil food web” and you will get a lot of good basic information discussing this incredibly complex network of soil critters, from earthworms down to the smallest bacteria. There are millions of different micro-pals in a healthy soil. This network includes bacteria, fungi, protozoa, beneficial nematodes, beneficial mites, and many more.

I suspect most vegetable gardeners in Michigan have soil that is in bad condition—a low population of the soil food web. For example, if you rototill every year, don’t use raised beds, don’t use mulch all year round, and use quick-acting nitrogen fertilizer, I can assure you that the soil in which you are trying to grow food is essentially dead.

Most vegetable gardeners in Michigan have soil that is in bad condition—a low population of the soil food web.

Most vegetable gardeners in Michigan have soil that is in bad condition—a low population of the soil food web.

Here are basic steps that lead to a quality of vegetables that you could never before imagine:

Use raised beds

Plants grow better in permanent raised beds that are seldom walked on. The permanent paths in between get compacted enough to discourage weeds. Raised beds warm up earlier, drain better, and are easier to work in.

Use full-time mulch

Mulch is thought to be valuable because it will keep down weeds, slow down moisture evaporation, and cool the soil in the summer. Those are good things, but the real reason for using 2 to 3 inches of organic mulch 365 days a year is that it supplies critical food to the earthworms and the other billions of creatures that make up a healthy soil food web. No mulch, no food. No food, no soil food web.

Stop rototilling

After using organic mulch such as straw for 2 or 3 years, you can stop tilling the soil in the spring. The soil food web takes care of the tilling job.

After using these steps in your vegetable garden for 2 to 3 years, you will be amazed. You will need only half the fertilizer and half the water your neighbors need to use. Insect and disease problems will decrease. You will save the time you spent rototilling each spring as well as the time and stress spent fighting pest insects and disease. About the only problem this system creates is that you will never be able to use all the harvest yourself!

Jeff Ball has authored eight books on gardening, vegetables, and lawn care.

ELSEWHERE: Vegetable Gardening

RELATED: Soil Basics 101: From pH to microbes, learn about the lifeblood for your plants

Filed Under: Clippings

USDA releases new plant hardiness zone map

December 11, 2023   •   Leave a Comment

The 2023 plant hardiness zone map is based on 30-year averages (from 1991 to 2020) of the lowest annual winter temperatures at specific locations. It is divided into 10-degree Fahrenheit zones and further divided into 5-degree Fahrenheit half-zones. The 2023 map incorporates data from 13,412 weather stations compared to the 7,983 that were used for the 2012 map.

Plant hardiness zone designations represent the “average annual extreme minimum temperature” at a given location during a particular time period (30 years, in this instance). Put another way, the designations do not reflect the coldest it has ever been or ever will be at a specific location, but simply the average lowest winter temperature for the location over a specified time. Low temperature during the winter is a crucial factor in the survival of plants.

USDA 2023 Plant Hardiness Zone Map

As with the 2012 map, the new version has 13 zones across the United States and its territories. Each zone is broken into half zones, designated as “A” and “B.” For example, zone 6 is divided into 6a and 6b half zones. When compared to the 2012 map, the 2023 version reveals that about half of the country shifted to the next warmer half zone, and the other half of the country remained in the same half zone. That shift to the next warmer half zone means those areas warmed somewhere in the range of 0 to 5 degrees Fahrenheit. However, some locations experienced warming in the range of 0 to 5 degrees Fahrenheit without moving to another half zone.

The annual extreme minimum temperature represents the coldest night of the year, which can be highly variable from year to year, depending on local weather patterns. Some changes in zonal boundaries are also the result of using increasingly sophisticated mapping methods and the inclusion of data from more weather stations.  

Temperature updates to plant hardiness zones are not necessarily reflective of global climate change because of the highly variable nature of the extreme minimum temperature of the year, as well as the use of increasingly sophisticated mapping methods and the inclusion of data from more weather stations.  Consequently, map developers involved in the project cautioned against attributing temperature updates made to some zones as reliable and accurate indicators of global climate change (which is usually based on trends in overall average temperatures recorded over long time periods).

https://planthardiness.ars.usda.gov/

ELSEWHERE: How plants survive a Michigan winter

Filed Under: Clippings Tagged With: Michigan, tool, USDA, USDA releases new plant hardiness zone map, winter

The life and garden of a plant breeder

September 5, 2023   •   Leave a Comment

Chris Hansen is a plant hybridizer by trade, and he tests his creations in his superbly colorful home garden

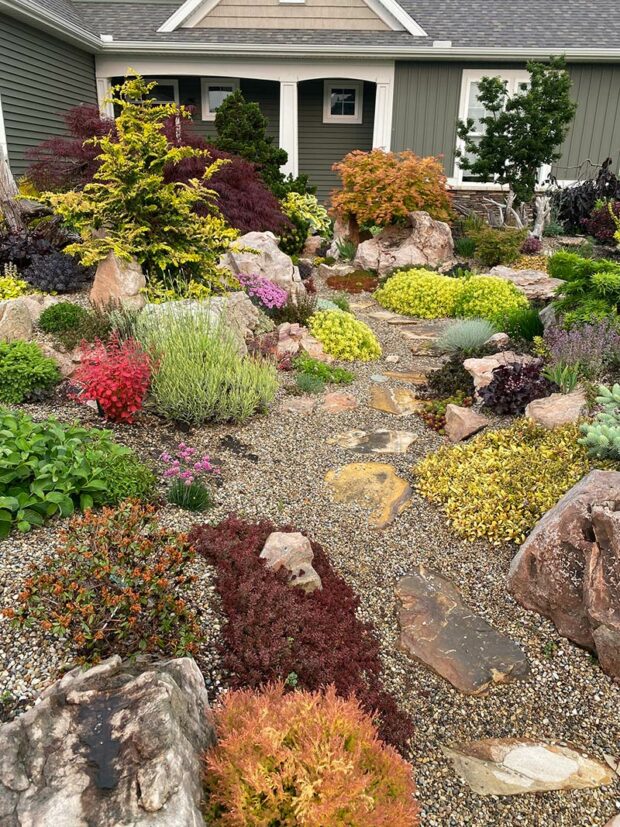
Chris Hansen displays an abundance of color in his garden using predominantly the foliage of perennials, conifers, trees, and shrubs.

by Lisa Steinkopf / Photographs by Chris Hansen

To meet and spend time with plant hybridizer Chris Hansen is an adventure and one I will not soon forget. Chris is one of the most plant (and life in general) passionate people I’ve ever met. His enthusiasm for plants is second to none—it makes you want to rush out and buy some!

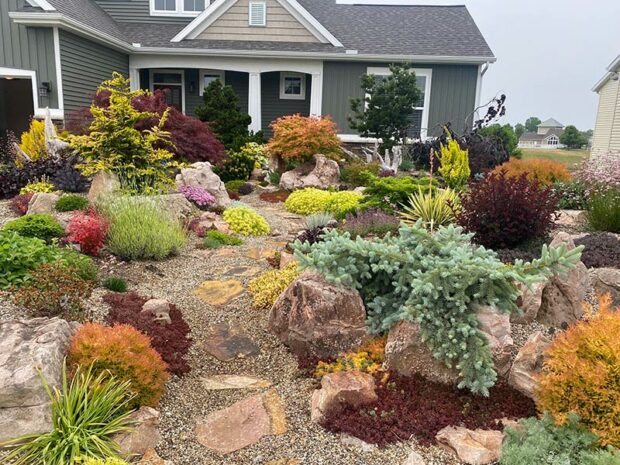
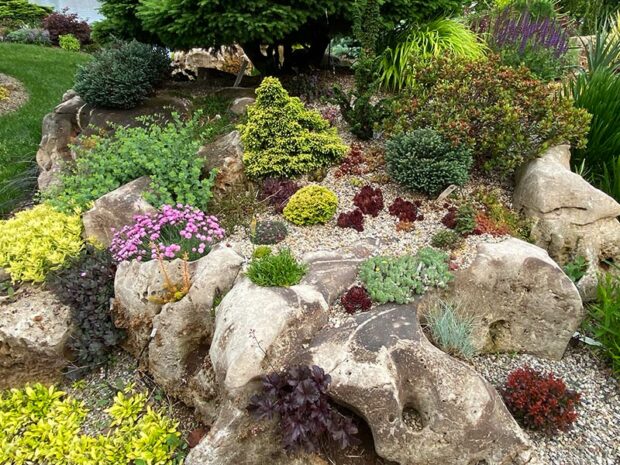
His home garden in western Michigan is not a particularly old one, but if you were to drive through his newish subdivision, his landscape looks like it’s been there for years. His property stands out—you know a serious plant lover is in residence. Chris says that his garden, filled with colorful succulents, conifers, and Japanese maples has motivated the neighbors to landscape their own yards.

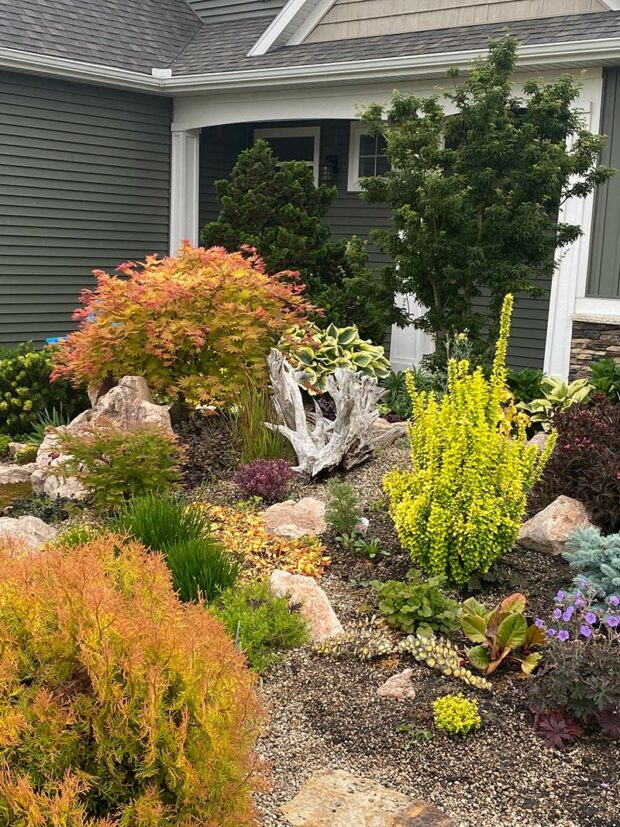
An Asian maple, barberry, and arborvitae deliver bursts of yellow and light orange.

Building the garden

You won’t find typical foundation plantings in Chris’ relatively young garden. The photos accompanying this article were taken when it was roughly five years old. When Chris moved in, the house was newly built and the land was a blank canvas on which he could paint his garden.

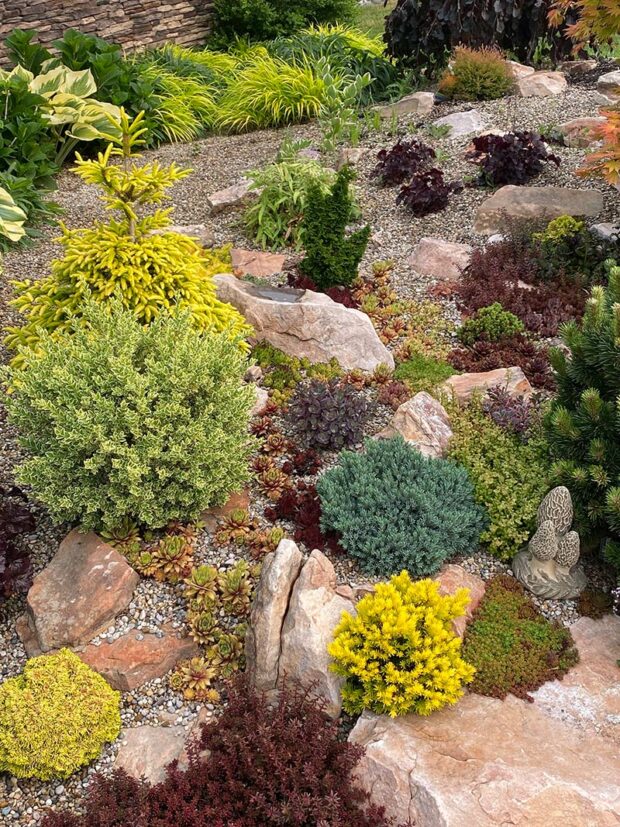
The property is filled with garden beds that have been formed around strategically placed boulders. These rocks are a type of sandstone whose buff tan color is a perfect neutral background for plants. They were shipped to Michigan from Kansas and Colorado. Chris chose them because they also have countless holes and crevices in which to tuck succulents and other diminutive plants. These boulders arrived on three large semi-truck beds and took a massive amount of work and major machinery to get them placed around the property.

As a collector, Chris plants in numbers of one or three, which allows him to add as many varieties as possible to his garden.
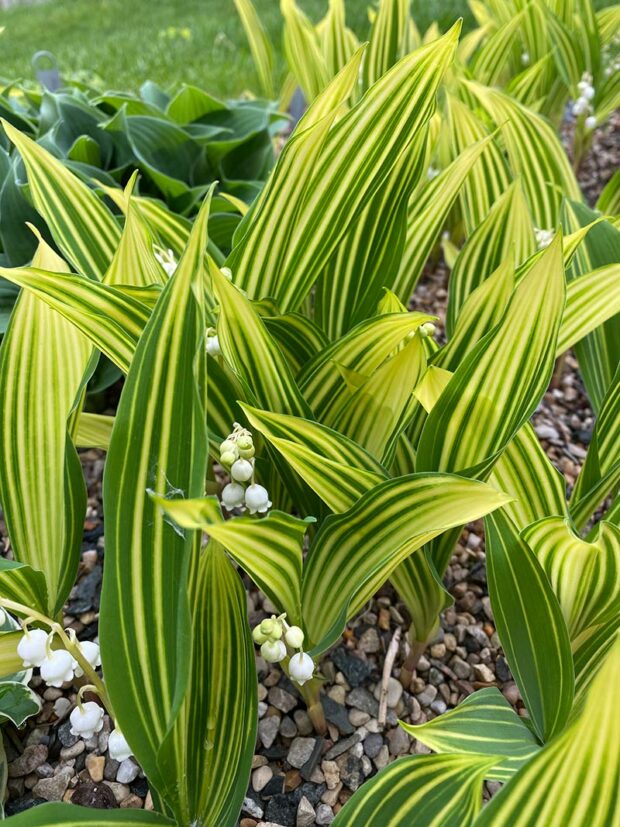
Variegated lily of the valley.
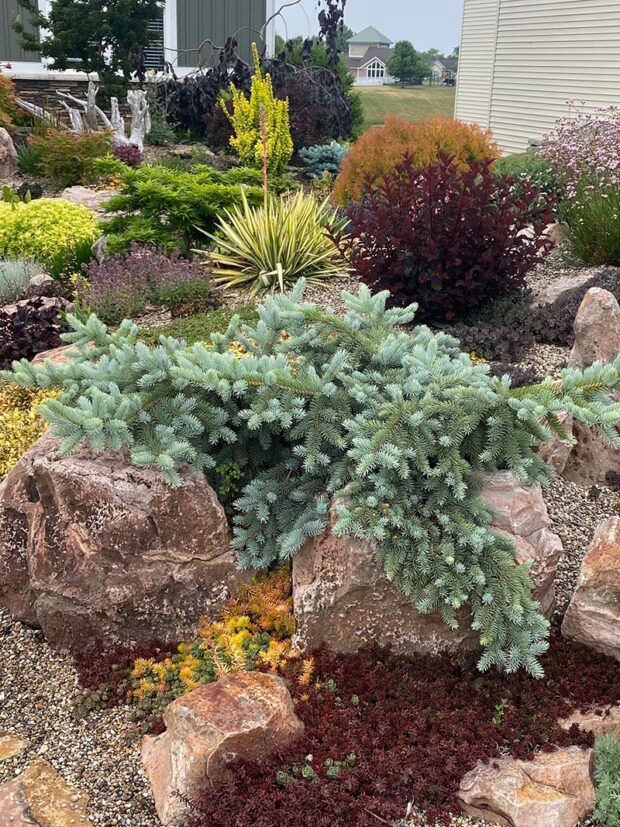
Colorful conifers complement the perennials and succulents, plus they add interest during long, western Michigan winters.

The main obstacle in the boulder placement was the fact that Chris’ house is situated on a slope and the subdivision’s houses are quite close to each other. Some of the boulders were enormous. In fact, one of the stunning boulders in the back garden weighs over 9,000 pounds! How do you move something like that, you may ask? Between two houses, down a hill… I wondered as well. Chris explained that two front-end-loaders were used. They faced each other with the boulder balanced between them on the two buckets. One loader backed down the hill, with the other facing it. Imagine taking a refrigerator down a staircase and you are the one going backwards. A few of the largest boulders were placed in the backyard using this slow, painstaking process.

After the boulders were placed, the beds were created. Then the planting began and still goes on to this day. After all, Chris is a true gardener, and gardening is a process that is ever evolving. Because he is a collector, he plants in odd numbers of one or three. If you plant in a grouping of 5 or 7, you lose too much space for other plants! His goal is to showcase good genetics in his garden; it is a test garden for many of the plants that he has hybridized—more on that later. One thing you will not find is annuals or anything with thorns. Chris wants to find out how much color he can display using only perennials, conifers, trees, and shrubs. He has done a masterful job. His garden is a plethora of color in well-designed beds. The conifers ensure he has winter interest as well. The west side of Michigan has long, white winters; colorful evergreens make the white expanse much more palatable during the long barren season.

The hybridizer

Though his garden is stunning, Chris’ claim to fame is his plant hybridizing. He spends his time developing new plants that have proven to be widely popular. If you have seen a Chick Charm sempervivum (hens and chicks), that is one of Chris’ plant brands. My favorite is the award-winning ‘Gold Nugget.’ This cultivar changes colors throughout the year and is the most golden in cooler weather.

Chris hybridizes sedums and sempervivums (hens and chicks). In his home garden he tests many of the plants he has developed.
Chris hybridizes sedums and sempervivums (hens and chicks). In his home garden he tests many of the plants he has developed.
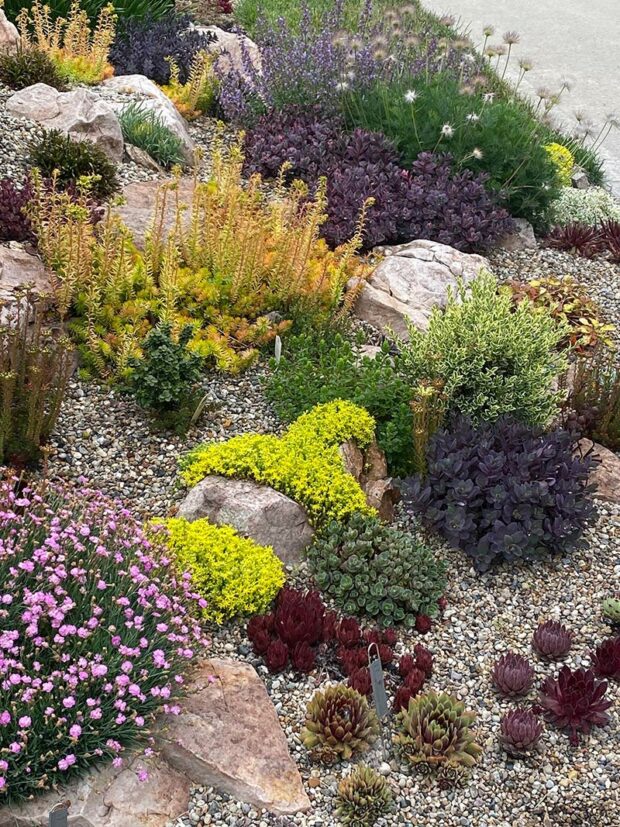
Chipped stone mulch helps keep the plant crowns dry.

How did Chris get started in the plant industry? It all began at age five in kindergarten. His teacher was growing a spider plant and snipped off a baby plant for Chris to take home. Who would have ever thought the ubiquitous spider plant would be the catalyst for a long horticulture career? Around that same time, after Chris’ request, his childhood neighbors gave him a paper bag full of hens and chicks that were growing in a huge, tractor-tire planter in their garden.

Fast forward to college in his home state—Chris received his bachelor’s degree in horticulture from Iowa State University. He then moved to South Carolina to work for Wayside Gardens as director of horticulture. He traveled all over the world buying plants from hybridizers to fill the Wayside catalog with the newest varieties. Chris was also the photographer for the catalog. After 10 years, he moved across the country to Portland, Oregon to work for Terra Nova Nurseries. After a few years there, he landed in west Michigan to start a new company where he began hybridizing hellebores (Lenten roses). Since those bloom in winter, he also worked on hybridizing summer bloomers and developed Sunsparkler sedums.

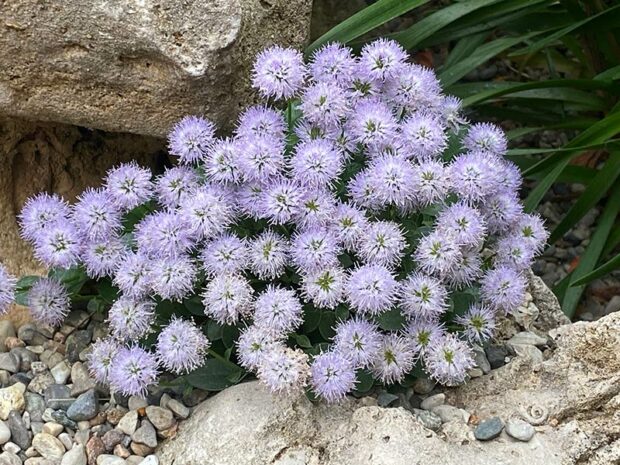
Globe daisy (Globularia) is an uncommon little alpine plant, with soft lavender-blue flowers. It enjoys full sun and dry, very well-drained soil.

This career journey led him back to his love for sempervivums and his next obsession was hatched: Chick Charms. Remember the childhood curiosity that started with the bag of chicks from his neighbors? He now has 22 varieties and sells over 1.5 million each year nationwide. What is his latest plant? How about a groundcover ajuga in different shapes and colors? The Feathered Friends ajuga series is now available in garden centers.

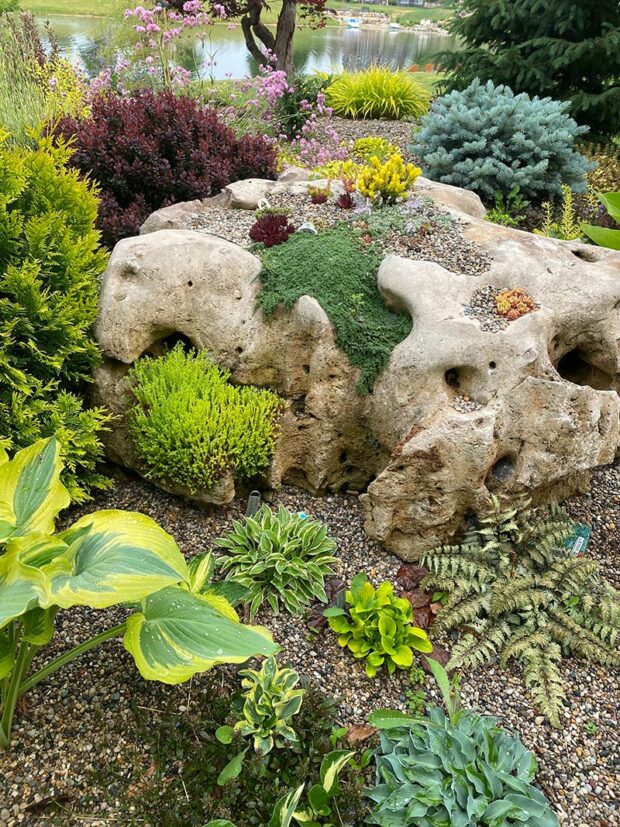
The garden's boulders are a type of sandstone whose buff tan color is a perfect neutral background for plants.
The garden’s boulders are a type of sandstone whose buff tan color is a perfect neutral background for plants.
The boulders also have countless holes and crevices in which to tuck succulents and other diminutive plants.
The boulders also have countless holes and crevices in which to tuck succulents and other diminutive plants.

Chris goes to work every day to not only hybridize amazing new plants, but to care for his three mini donkeys and flock of chickens. He keeps them at work so he can visit any time during the day. Plus, the homeowner’s association might frown upon them at home. Along with the office cats, the animals bring him and his employees joy. When I visited his greenhouses, I was happy to meet not only the plants but the pets too.

It is so interesting to know a bit about where popular plants originate. Chris likes to pass that joy of plants on to others, especially children. One recent spring, he invited his neighbors over for a succulent potting party. Two hundred pots of succulents later, the neighborhood children, along with their parents, were ecstatically happy. The love for plants can start from a young age, so let’s get those kids out there in the garden. You never know where it will take them—maybe a successful hybridizing career!

A lot of color going on in this photo, and only one plant is in flower!

Lisa Steinkopf is The Houseplant Guru. Check out her newly updated website and blog at www.thehouseplantguru.com. Contact Lisa to speak at your next club meeting or event (houseplantgurulisa@gmail.com or 734-748-1241). Follow her on Facebook (Facebook.com/HouseplantGuru), Twitter (@houseplantguru), and Instagram (houseplantguru).

Filed Under: Profile Tagged With: breeder, chris hansen, plant breeder, profile, western michigan

  • 1
  • 2
  • 3
  • …
  • 43
  • Next Page »

Copyright 1996-2025 Michigan Gardener. All rights reserved.