Michigan Gardener

SIGN UP to stay in touch!
We will send you occasional e-mails with gardening tips and information!


Digital Editions

Click on the cover to read now!

  • Home
  • Departments
    • Ask MG
    • Books
    • Clippings
    • Garden Snapshots
    • MG in the News
    • Janet’s Journal
    • Plant Focus
    • Profile
    • Raising Roses
    • Thyme for Herbs
    • Tools and Techniques
    • Tree Tips
  • Garden Event Calendar
  • Resources
    • Alternatives to Impatiens
    • Garden Help
    • Soil and Mulch Calculator
    • Public Gardens
  • Web Extras
  • About
    • About Us
    • Editorial Content
    • Privacy Policy
    • Contact Us

PLEASE NOTE: In the autumn of 1995, we hatched the idea for a free, local gardening publication. The following spring, we published the first issue of Michigan Gardener magazine. Advertisers, readers, and distribution sites embraced our vision. Thus began an exciting journey of helping our local gardening community grow and prosper.
After 27 years, nearly 200 issues published, and millions of copies printed, we have decided it is time to end the publication of our Print Magazine and E-Newsletter.

The numbers: A closer look at America’s green thumb

October 9, 2011   •   

dailyinfographic.comdailyinfographic.com:

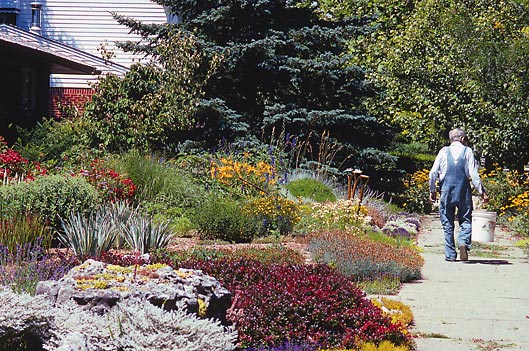
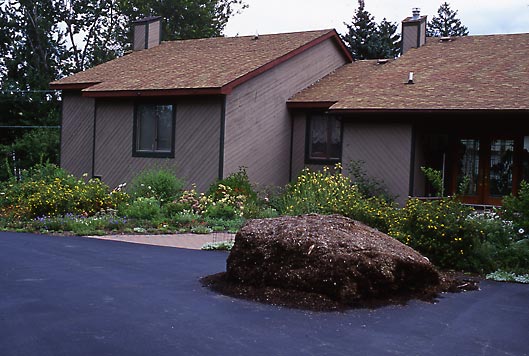
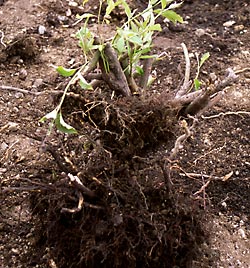
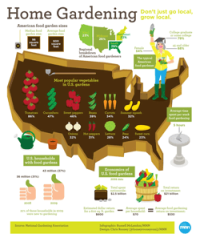
Today I was making a sandwich for lunch, I scoured my fridge for tomatoes but none were around. I did some quick thinking, walked out back and plucked a tomato. No trip to the store, no unwanted chemicals, no cash exchanged hands, but I still got a slick of tomato on my sandwich. That story isn’t true, but it could be for very little cost and everyone knows nothing beats a fresh tomato.

Check out the story and full-size graphic here…

Filed Under: Clippings

Real life stories of farmers growing in Detroit

October 7, 2011   •   

NPR:

Detroit is a surprisingly green landscape during the spring and summer months. The site of many houses that are crumbling, boarded up or missing altogether is tempered by community gardens and even some urban farms.

There are some serious urban gardeners in this country, but few can match the agricultural output of Paul Weertz.

“I farm about 10 acres in the city, and alfalfa’s my thing. I bale about a thousand bales a year,” he says.

Read or listen to the rest of the story…

Filed Under: Clippings

Cultivating Murphy’s Law

September 30, 2011   •   

My friend Curt grew up on a “hard scrabble” farm in Kentucky early in the last century, an inquisitive boy who enjoyed the company of older farmers who repaid the interest by teaching him many old and secret ways. Agricultural college and then a degree and career in engineering put a fine edge on all he’d learned. When he said to me one day late in his life, “Janet, I think I’ve figured it out,” I took my notebook from my pocket in anticipation of revelation. What he said, in proof of a key tenet of Murphology known as Groya’s Law, was “I have looked and studied all these years and now I know I am never going to have any good idea what’s going on in this garden!” by Janet Macunovich
Photographs by Steven Nikkila

30 years ago, writer Arthur Bloch presented us with Murphy’s Law and a collection of other undeniable ironies. I’m basically an optimist and an opportunist, even a follower of philosophies such as “open your mind and the universe will provide.” Yet I found myself smiling wryly and even agreeing with what Bloch assembled to advance that basic tenet, “If anything can go wrong, it will.”

Over the years bits from that book would come back to me as I gardened. Situations I encountered while digging, planting or designing would strike me as spin-offs from Murphy’s Law and I would think, “There should be Murphy’s Laws of Gardening.”

Once you embrace Corollary #2 of Murphy’s Law (Everything takes longer than you think it will) you know you should never have mulch dumped in front of the garage door unless you’re willing to park on the street for days and even weeks. Recently I reacquainted myself with Bloch’s collection, in Murphy’s Law: The 26th Anniversary Edition (Penguin Group, 2003). I saw that although I recognized the proofs of Murphy’s Law I’d been cultivating, many other dictums in that book were also well established in my gardens. It made me laugh—which is a good thing to do on a day when Murphy’s Law pops up in your garden.

Despite the aggravation they can cause, there’s much to be learned from Murphy’s Law situations. Here’s a redtwig dogwood we dug from the bed that had been first covered with rock and then, when that mulch became unsightly, buried under a second layer of plastic and rock. If I hadn’t seen it I wouldn’t have imagined what tenacity a shrub can have. This one was growing a whole new root system above its original root ball. The lower roots were atrophying, oxygen starved at the unnatural depth. The new roots were more lively, growing into the organic debris that had accumulated in the uppermost layer of rock. Here are some of those rules and observations from Bloch’s compilation, with examples of where I’ve found them lurking in the garden. Perhaps given these connections, you won’t feel frustrated or critical of yourself the next time you encounter such circumstances. You can shrug off the effects and join me in saying, “Ah well, there’s nothing to be done. It’s all Murphy’s Law!”

Murphy’s Law and its first three corollaries

The Law: If anything can go wrong, it will. Its first corollary: Nothing is as easy as it looks.

One busy spring, I agreed to re-do a condominium entrance bed. It seemed a straightforward job—remove a layer of misbegotten egg rock and plastic, improve the soil and then plant flowers.

Various earlier projects ran long, pushing this make-over into Memorial Day weekend. Hoping to finish the work yet still have a bit of holiday time, we arrived at dawn to begin.

Murphy got there first. We saw the proof after we removed two truckloads of rock and peeled back the underlying plastic. Lying there was Corollary #1 in the form of an additional layer of egg rock and plastic.

Which simultaneously proved Corollary #2: Everything takes longer than you think it will. This bed renovation was going to go way over estimate.

With elegant simplicity, the situation moved right along to Corollary #3: Whenever you set out to do something, something else must be done first. What that meant in this case was that because the landfill closed early on holiday weekends, anything dug after noon this day was going to remain in my truck to complicate the beginning of my next project.

One of the worst things man can do to a tree is to stack mulch against the trunk. Moisture build-up and fungus join forces to rot the bark and destroy first the bark and then the vital cambium layer, maiming or killing the tree. The effect is the same whether that tree is a sapling or a forest giant. So why do we do it? Because someone working in a public place did it and others followed suit!New solution—new problem

Sometimes proofs take longer to develop. Such was the case the first time I recognized the garden variety of Corollary #4: Every solution breeds new problems.

It began one fall when I decided to repel bulb-digging squirrels with predator urine. At the garden center I considered my choices—fox, coyote or bobcat urine. Knowing there was a fox that visited the target area regularly, it seemed unlikely the local squirrels would find fox scent repulsive. At the other end of the scale, bobcat urine seemed like overkill. Thus I bought and used the coyote product.

That night, strange warbling noises woke the owners of those urine-marked gardens. Through the window they saw the fox, pacing back and forth along the marked beds, keening and yodeling.

For years we watched squirrels like this dig and eat our bulbs. Yet what we did to solve that problem led to greater headaches, proving the statement: Every solution breeds new problems (Murphy’s Law Corollary #4).Curious about the fox’s behavior, I cracked my books and came across reports that foxes will not share territory with coyotes. No wonder our fox was upset. He thought a coyote had moved in.

The true level of upset wasn’t apparent until late the next summer. Then, I’d been dealing with two first-ever situations for that garden—a plague of voles and an influx of rabbits. As I baited a live trap for rabbit, I mused “Why now?”

An answer leapt full blown into my head, the sum of a year’s worth of not-seeing.

“Have you seen the fox at all this year?” I began asking everyone who watched that garden. As more voices tolled the negative, my conviction grew more firm: With that bulb-protecting coyote urine we had repelled our resident rodent- and rabbit-control agent.

Not nice to fool Mother Nature

I thought I’d learned all I needed to learn from this episode but another lesson remained. Slow to germinate but full of certainty, Corollary #5 of Murphy’s Law completed the picture: Mother Nature is a bitch.

Snider’s Law: Nothing can be done in one trip.When a new fox finally filled our vacancy several years later, we called all the neighbors to come see his tracks across a late spring snow. Maybe if we hadn’t shared the news the good feeling would have lasted longer. But just a few weeks later the reports began to add up. This new fox was one that preferred raiding garbage cans to earning an honest living nabbing voles and rabbits.

An assortment of other laws and their gardening proofs

Let’s see if you can smile too, about what goes wrong in your garden. Think about these other laws, precepts and axioms as they relate to garden snafus.

Leahy’s Law states: If something is done wrong often enough, it becomes right. This is the complete and only explanation for volcano mulching.

Sodd’s Second Law is: Sooner or later, the worst possible set of circumstances is bound to occur. Sodd grins “Gotcha!” when you find yourself volunteered to a committee to landscape the church front entry and the majority of the other volunteers have never grown anything except opinions. And when you learn the soil in the entry area is not only brick hard but full of buried wires and pipes. And the budget for plants is suitable only for seeds. And the pastor informs you that the Sunday School classes should be allowed to help in planting.

Those who know and heed the “Unspeakable Law” know that saying, “Aren’t those hawthorn berries gorgeous? I hope they last the winter!” is to invite a flock of cedar waxwings to descend and strip the tree the next day.Consider Commoner’s Law of Ecology: Nothing ever goes away. This is not just law but religion among members of the species Canada thistle, scouring rush and bindweed.

Help yourself by helping others recognize the Unspeakable Law: As soon as you mention something, if it’s good, it goes away. If it’s bad, it happens. Watch and listen for this before your next backyard party. Keep a gag at hand, ready for use when an uninitiated person looks out over your garden and unwittingly begins the charm that calls this law into play, “Oh, how pretty! People will love those tall blue flowers! I hope it doesn’t rain.”

At work one day measuring a property for design, I stumbled upon a haphazard jumble of pots in a shrub-choked ravine. These pots still contained potting soil, still sported tags bearing the names of desirable exotics, and in some cases still held plant remnants. Peering up toward the house through bramble branches I saw this pile was an easy sidearm toss away from the deck and recognized its existence as proof of Fahnstock’s rule for failure: If at first you don’t succeed, destroy all evidence that you tried.

Likewise, those in the know are ready to shush the person who looks at your perfectly matched and says, “Oh, those look great together. You’re so lucky you don’t have rabbits and groundhogs eating your asters like I do.” Irene’s Law is: There is no right way to do the wrong thing. It’s so simple that any transgressions can be dumbfounding. Such was the case when a man who had sold his house to my friend Sue returned the next year at “just the right time” to give her a pruning lesson. His intent: to be sure she knew the right way to prune the flowering dogwood to maintain its perfectly round lollipop figure.

Cooke’s Law (It is always hard to notice what isn’t there) is actually pretty handy: I’ve seen it employed when two parties have joint ownership of an overplanted landscape or crowded woodlot. One party embraces the premise “something has to go” while the other stands on vague principle in objection to any removals. If the party in favor of reduction recognizes the applicability of this law, he or she might look for an opportunity in the form of the other party’s next business trip or out-of-town retreat. Should tree cutters or landscapers come then, it may be months before the objector even notices any change.

Philo’s Law has comforted me when I find myself dealing with people who don’t “get it.” It is: To learn from your mistakes you must first realize that you are making mistakes. Most recently, it came to mind as I exchanged emails with a gardener who had asked, “What can I use to get rid of powdery mildew? I’ve lived here about twelve years. I spray the garden every week with an insecticide-fungicide-fertilizer mix, but I can’t seem to beat the mildew.”

Sidebar: Rainy day reading

  • Ready to solo as a lawyer of Murphology? On a day when it rains and you’re a bit of weary of plant catalogs, resurrect this magazine. Find your own examples of these last few laws in your garden, and smile.
  • Barber’s Rule: Anything worth doing is worth doing to excess.
  • Snider’s Law: Nothing can be done in one trip.
  • Ducharme’s Precept: Opportunity always knocks at the least opportune moment.
  • Jong’s Law: Advice is what we ask for when we already know the answer but wish we didn’t.
  • The Principle of Design Inertia: Any change looks terrible at first.
  • Beach’s Law: No two identical parts are alike.
  • Imbesi’s Law of the Conservation of Filth: In order for something to become clean, something else must become dirty.
  • Milliken’s Maxim: Insanity is doing the same thing the same way and expecting different results.
  • Melnick’s Law: If at first you do succeed, try not to look too astonished.
  • Groya’s Law of Epistemology: What we learn after we know it all is what counts.

Janet Macunovich is a professional gardener and author of “Designing Your Gardens and Landscape” and “Caring for Perennials.” Read more from Janet in her newsletter available by writing to WhatsComingUp@gmail.com.

Filed Under: Janet’s Journal

How to properly handle construction projects near established trees

September 28, 2011   •   

Post-construction damage to mature trees is common, whether it is from a new home, new addition, or smaller projects like patios, driveways and even irrigation systems. They all can impact the health of mature trees by disturbing or damaging their root systems, as a result of digging and compacting the soil around them.

The important thing to remember with mature trees is that rarely will the signs of damage show up immediately after it has happened, unless it is very severe. It can take years to surface, and when it does, people don’t often associate it with the real cause. I have seen old oaks that have been holding on for fifteen or twenty years after the damage was done.

The reason for this is that large trees have tremendous ability to store food for tough times such as drought or early frost damage to new leaves. When this occurs the tree will turn to its reserves for the food it needs. If a tree’s root system is damaged, the tree must turn to those same reserves to survive until it can repair and replace the damaged roots to get nutrient and water uptake back to normal. If growing conditions are good and environmental pressures are low, it should recover without many problems, depending on how severe the original damage was. If the tree was in bad shape to begin with or has too many environmental pressures like drought, insects or disease, the odds of long-term survival decrease after construction.

The species of tree also plays an important role in determining a plan of action to ensure success during and after construction. Some trees, like oaks, elms and locust are quite tolerant of disruption, but other trees such as beech and cherry can be very sensitive to even moderate change.

Too often an arborist is called in after construction to try and “fix the trees” after the damage was done, and the process of trying to get an accurate account of activity around the tree begins. What was the original grade level of the soil? Where were trenches dug for utilities? What time of year did this take place? Where were heavy pieces of equipment, bricks and other building supplies placed? And the list goes on.

Once all the information is collected and sorted out, a determination can be made as to the tree’s chances for long-term survival or if the owner will just be delaying the inevitable. If the only option is to temporarily extend the life of the tree, the owner needs to determine for how long and if the money spent to do so is worth the end results. Out of desperation, many homeowners will unfortunately spend more money after the damage has been done “to save the tree” than they would have if they contacted someone in advance qualified to help plan out the construction project before it started. Many homeowners have had greater success in preserving trees through the inclusion of incentives in the building contract for the protection of their trees. Educating and informing all of the building employees on the site and enforcement of the agreed upon rules will go a long way to help ensure tree survival.

You need to determine how to keep disruption to the root zone to a minimum. The 3 most important factors are soil compaction, trenching, and grade changes.

If you need to trench near a tree for a foundation, a minimum of 4 to 5 feet is required from the base of the tree and if it is possible, bridging the foundation with an I-beam near the tree is an option. When trenching for utilities, try to have all of them placed in the same area as far away from the base of the trees as possible. If you can’t avoid the placement near the trunk then boring under the root zone is an option that will greatly decrease the damage to the roots. This is important even during the installation of irrigation systems.

Grade changes are common but can be minimized to avoid burying the roots or scraping them away when removing soil. Removing soil is much more damaging than adding it. Most of a tree’s root system is found in the first 12 inches of soil, with the majority of the feeder roots in the top 6 inches. These are the roots that absorb water and nutrients. The myth that trees have these massive root systems that go down as deep as the tree is tall is false. They do have anchor roots and tap roots that can go relatively deep, but by far the majority of the roots are near the surface. Removing as little as 6 inches of soil over a large area of the root system can cause a lot of damage. Adding soil can be just as bad, but it tends to be less of a shock because the change takes longer to impact the tree. If more than 12 inches of soil must be placed over the root system, a tree well and ventilation system should be installed at the existing grade before adding soil. The deeper the soil, the more ventilation will be needed. Many people install the wells, but neglect the ventilation system that will buy time and aid in the development of new roots in the new soil. By allowing air and water to get down to the original grade and gases to get out, you give the tree a big advantage for long-term survival. To minimize stress, try to keep added soil to a depth of less than 6 inches if possible.

Soil compaction is still the most common construction problem around trees in our area. Our heavy clay soil can easily be compressed (especially when wet) so that most of the air pockets are eliminated. When it hardens, it is like cement, making root growth and water absorption next to impossible. It takes a long time for the soil to recover and a lot of trees will run out of reserves before the soil improves. There are some things that can be done to lessen the compaction after construction, but preventing it in the beginning is the key to keeping your plants healthy. Keep heavy equipment and supplies away from root zones and make the areas of activity around the site large enough to get the job done, but keep disruption to a minimum. Examples of this would be establishing a zone to store supplies, setting a path for equipment and trucks to enter and leave the property, placing fencing around root zones, and mulching the root zones heavily. If a root zone cannot be avoided, then using old tires, plywood and a foot or two of mulch to minimize the compacting in that area is a great solution.

The time of the year can be important also – winter is the ideal time for construction to proceed around sensitive plants, while spring and early summer are the worst times.

Some quick do’s and don’ts to remember: Do repair all damaged roots by making clean cuts that will heal quicker than jagged, torn roots. Don’t allow the cement out of trucks and equipment to be rinsed on site near the root zones of trees – cement is very alkaline and when leached into the soil, can cause pH shock in many plants. Don’t allow trucks to be parked under the trees. Do consult a certified tree care professional prior to construction. Don’t fertilize construction-damaged trees the first year.

There are many variables to these recommendations and there are always exceptions to the rules, such as time of year, health, species, and the size of the tree affected. For example, smaller trees adapt easier than large trees, and this becomes crucial in deciding which trees to try to preserve and which to remove before construction.

Hopefully, I have made you more aware of the limitations trees have when it comes to construction around them and, in turn, helped save a few trees from demise. Just because they are alive when the construction is finished does not mean they will stay that way in the long haul. Be wise and plan ahead!

Filed Under: Tree Tips

Tips on propagating Coleus and Plectranthus

September 24, 2011   •   

I successfully took cuttings of Coleus and Plectranthus last year. I took approximately a 6-inch cutting. If I took a 12- to 18-inch cutting this fall, would I be that much further ahead toward having larger and bushier plants next spring and summer?

The answer to this question is an easy one. You say, “I successfully took cuttings of Coleus and Plectranthus last year.” It is hard for any gardener to improve on success with our plants, as hard as we may try. Sometimes we just need to leave well enough alone and enjoy our success and the fruits of our labors. Softwood stem cuttings taken in the fall from these plants (prior to a killing frost) can be enjoyed indoors all winter long. Then in March or April, again take several more cuttings and cultivate them to be planted in the garden when the weather warms. Use a sharp, clean knife to cut the stem just below a leaf node. Remove the lowest leaves, dip the cut end into a rooting hormone and insert into fresh, sterile potting soil. These cuttings will be ready to use in the garden by early June. A 4- to 6-inch cutting is a good size and any longer would be too long to successfully plant upright and could become a leggy plant. Both Coleus and Plectranthus should be pinched often to maintain their bushy habit.

Filed Under: Ask MG Tagged With: coleus, cuttings, plectranthus

Soil Basics 101: From pH to microbes, learn about the lifeblood for your plants

September 22, 2011   •   

by Steve Turner

All of us who deal with plants – big or small, annual or perennial, flowers or foliage – have one thing in common. Working with the soil in which they grow. It is often the most overlooked aspect of the garden for new gardeners and the most cherished aspect for seasoned gardeners, who have grown to appreciate the value of good soil. It quite simply is the difference between success and failure for many gardens and can be the difference between the pleasure of gardening and the tediousness of work.

Many of you are familiar with terms like soil structure, pH, humus, etc. But what do these terms really mean and how do they effect our efforts to improve or maintain our soil’s fertility?

Let’s start by looking at pH. Most people understand it as whether the soil is acidic (less than 7.0), alkaline (more than 7.0), or neutral (7.0), and that different plants prefer different ranges, but why? In different pH’s, nutrients move at different rates through the soil. The more acidic the soil, the faster the rate. If a plant is acid-loving and is in alkaline soil, it will not get nutrients at a fast enough rate. Fertilizer in this situation would have no effect because it is not a matter of whether the nutrients are present, it is the rate at which they are available to the plant.

Now, if you need to raise or lower the soil pH for a particular plant, you will need to understand cations and how they affect your ability to change the soil. Cations are positive-charged nutrients in the soil. The most common, in order, are calcium, magnesium, potash, sodium and hydrogen. Calcium is the most important nutrient in your soil and its proper balance to all others is vital since it helps regulate the soil’s pH. Here is why. All nutrients either have a positive or negative charge, and in nature the normal flow of electrical charge is from positive to negative. All clay and humus particles carry a negative charge on their surface which attracts desirable and/or undesirable positive-charged nutrients or minerals to them. If in proper balance to calcium, the clay and humus will keep these nutrients loosely held in a soil solution, which means the nutrients are readily available to the plants’ negative-charged root tips. The measurement of this exchange is called the Cation Exchange Capacity or CEC of the soil, and is measured on most soil tests.

CEC is important in determining how easy it will or won’t be to change your soil pH. A high CEC will make it difficult to change. In a poor soil, for example, as soon as you obtain the proper pH, you then increase the CEC by adding organic matter or humus to the soil. This will increase the amount of negative-charged particles in the soil and help “lock in place” the pH by making it more difficult to change. So, if you are preparing a new soil area, your first concern is the pH. It is critical that you make all adjustments to the pH prior to adding organic matter.

While organic matter raises the CEC, salts in the soil are the enemy to proper CEC. All commercial or synthetic fertilizers contain salt; this is how they bind the nutrients together. Every time you add one of these to your soil, you are adding salt, which in turn lowers the CEC. They lower it by using up all the negative-charged particles in the soil and, as a result, the positive-charged nutrients just leach away. This increases the need for more frequent fertilizing, which in turn adds more salts to the soil, and thus begins a vicious circle that many gardeners fall into. This is why the use of organic fertilizers is beneficial. While it is true that plants cannot tell an organic nutrient from a synthetic one, the soil can. The additives in synthetic fertilizers cause problems for the soil as a whole and a lowered CEC is just one of them.

If you have a poor CEC and lots of salts in the soil, then odds are you have compaction also, which limits root growth and the flow of water and air through the soil. This decreases the activity of beneficial soil microbes and increases the activity of pathogens in the soil, which in turn causes diseases and so the vicious circle continues. 

Humus is one of the keys to breaking this cycle. Humus (or “finished compost”) is organic matter that has been broken down by soil microbes as much as possible. These microbes in turn produce ideal nutrient storage for our plants. Humus can hold 3 to 4 times more water and nutrients than clay alone. It helps store water in the soil for drought periods as well as nutrients that plants can readily absorb as they need them. This holding capacity will help reduce the leaching of nutrients out of the soil and lessen the need for additional fertilizers.

Humus also helps reduce soil erosion. For example, an acre of soil with only 1 percent humus can only hold less than 1/2 inch of water; any more rain than that will simply erode the soil. However, if the humus content is increased to 6 percent, that acre will easily hold over two inches of rain in the same soil. For those of you having drainage problems, this is something to consider.

Soil microbes are the keys to producing humus – if they are not present in sufficient numbers, then all organic matter in the soils stays in its original form or takes much longer to break down into humus. It takes many different types of microbes to accomplish this and they do so in a very systematic fashion. To get an idea of how many organisms there are in the soil, at a depth of 1 to 3 inches in good garden soil, there will be on average 9,750,000 types of bacteria, 2,080,000 types of Actinomycetes (organisms classified between bacteria and fungi), 119,000 fungi, and 25,000 algae in a single gram of soil (Microbiology: An Introduction, 4th edition). These numbers drop rapidly as you go deeper in the soil, but remain pretty high until about 18 inches in depth.

If you live in a newer subdivision, most of the beneficial microbes left with the topsoil that was probably scraped off the land before construction started, and the remaining ones were severely reduced by the soil compaction that followed during construction. This is a problem for many gardeners and up until recent times most of the research was focused on nutrients and soil structure alone. In the last 10 to 20 years, the focus has shifted to the beneficial organisms that make up a living soil.

By getting back to soil basics, we can be much more successful in our gardening pursuits by increasing our soil’s fertility. To correct problems we need to focus on the soil as a whole and stop looking for that one “miracle solution” that will supposedly give us healthier plants. The soil is a vastly complex environment. It can be, and often is, damaged in many ways that need different solutions to help correct each of the individual problems. The terms we discussed should help put you on the right track. Start by doing a soil test to determine your soil’s pH and CEC. Then adjust the pH as necessary, add humus to raise the CEC, reduce or eliminate the use of synthetic fertilizers, and fine tune from there. Good luck!

Steve Turner, Certified Arborist, is from Arboricultural Services in Fenton, MI.

Filed Under: Tree Tips

Revisiting the role of weeds and non-natives

September 21, 2011   •   

We just spotted this summer story from Ira Flatow’s Science Friday on NPR:

Currently, in the United States and in most parts of the world, the term invasive is supposed to be used – or is typically used to refer to a non-native species that is causing harm of some sort. And that could be human health harm, it could be economic harm, it could be ecological harm. The catch is, is that the term invasive is often used not too discriminately.

Read the transcript or listen to the story here…

Filed Under: Clippings

Step-by-step guide to planting trees and shrubs

September 16, 2011   •   

by Steve Turner

Spring and fall are both great seasons for planting trees and shrubs. I know you have all read the pamphlets and have probably done it a few times, but it never hurts for a little review. If I had a dollar for all the improperly planted trees I have seen over the years, I would be rich!

First, dig the hole as deep as the root ball and at least twice as wide. Be sure to not dig too deep; a good way to prevent this is to measure the root ball against the shovel handle and check it often when digging. If you do dig too deep, remember to pack the soil firmly under the ball to prevent settling once the plant is in place. This is more important for trees than shrubs. On the other hand, if the hole is not deep enough, keep digging. Don’t make the mistake of planting high and then mounding soil up the root ball, even in clay soils. One exception is a compacted clay subsoil, which can be found in new subdivisions. If you can’t dig deep enough, then add a lot of topsoil around the top of the root ball to make a gradual decline down to the grade level.

After the tree is in the hole, cut and remove as much of the wire cage (if present) as possible. Any part that you can’t remove should be cut and bent down. Untie the twine around the trunk and pull down the burlap. If the burlap is in good condition, push it to the bottom or cut it out. If it is old and roots are growing through, then leave it and make several vertical slices instead. If you are planting potted shrubs, carefully remove them from their pots and make several vertical slices down the root ball. Grab the bottom of the roots and pull them back up like peeling a banana and set them in the hole with the cut sections pointing out. Next, begin to backfill using the same soil that came out of the hole, making sure to break up any large chunks of soil. Stop and firm the soil as you go. Stop about 6 inches from the top and add fertilizer to the remaining fill, preferably either slow release or organic fertilizer that is low in nitrogen. Complete backfilling to grade level.

When planting trees or large shrubs, do not mix soil amendments such as sand, peat, or topsoil to the fill. These work better as top dressings. They actually create a false environment within the planting hole and do not encourage outward growth of the roots. Instead, the roots tend to wind around in the hole, which can eventually lead to girdling roots. Also, drainage can be a problem with dissimilar soils. Water will not move from one soil type to another until the first is completely saturated. This is why it is important to check the soil of the root ball before you buy the plant. Ideally, you should not plant trees grown in sand in clay soils and vice versa. It will only cause problems in the future. Now that the plant is in the ground, water well and keep the soil moist for several weeks, but do not overwater. Before watering, move aside the mulch and feel the soil to verify it isn’t too wet before adding more water. Keep the mulch away from the base of the plant and do not add too much mulch — 3 to 4 inches is fine.

Filed Under: Tree Tips

Don’t waste those green tomatoes!

September 11, 2011   •   

NPR:

Most Americans are familiar with fried green tomatoes, where the under-ripe fruits are dredged in a flour or cornmeal coating and pan-fried to a delicious crisp. But there are only so many fried green tomatoes one can (or, likely, should) eat. Luckily, there is a trove of recipes, from Indian chutneys to American pickles, that make good use of the garden’s detritus.

Read the full story here…

Filed Under: Clippings

Mint Charlatans: Discover herbs that smell and taste like mint without its bad habits

September 9, 2011   •   

costmary-bible-leafPhotos by Jean and Roxanne Riggs
Costmary, also known as bible leaf.
Ah, mint! Mint is one of the plant families that divide gardeners into beginners, intermediates and advanced classifications. Beginners are excited to grow the plants that are labeled “easy-to-grow” at the nursery and buy quantities of them for their first herb garden, or accept free plants from friends. We always tell people to beware of someone bearing free plants—there is some reason that they are trying to get rid of them.

Intermediates have realized just exactly what is meant by “easy-to-grow” or “free” and have cleared every trace of mint from their gardens, and if possible, from their lives. They use every trick available to them from pulling the plants to mowing the plants to using herbicides (sometimes undiluted) to rototilling the mint bed (don’t they know that rototilling in a mint bed is the same thing as thinning, transplanting and encouraging mint roots?).

The advanced gardener knows that mint is indispensable in an herb garden and has found ways to control its desire to take over the world, from planting it in pots or hanging baskets to cutting the bottom out of a large coffee can and setting the whole can into the ground, leaving only an inch or two above the ground, with the mint plant securely planted in the center of the can.

Anise-hyssopAnise hyssopThe more advanced and serious gardeners also learn that there are plants that smell or taste like mint, but do not have mint’s naughty growth habits and are therefore welcome additions to the garden or windowsill. It is important to realize that not all true mints (Mentha) smell and taste like the familiar peppermint or spearmint. Some of them, like pennyroyal (Mentha pulegium), smell more of caraway and are commonly used as insect or mouse repellants. Sometimes they smell fruity like banana mint (Mentha arvensis ‘Banana’) or sweet and flowery like heliotrope (Mentha arvensis subsp. haplocalyx). And in Michigan some mints are grown as annuals since they are not hardy this far north.

We are going to talk about just some of the plants that are mint “wannabes.” One of our favorites is costmary (Tanacetum balsamita). This is a large plant that can get four feet tall, and is hardy. The leaves used to be pressed in bibles where they were supposed to repel insects, and the leaves were used as fragrant fans during long church services, perhaps to help keep ladies in tight corsets from fainting. It also makes a fine bookmark for any book. The yellow clusters of flowers dry to a fragrant, pretty gold and are used in wreaths and other craft projects.

Another favorite is mountain mint (Pycnanthemum pilosum). This is used as a mint substitute in the kitchen where the leaves and flowers are used to flavor soups and other dishes, and to make a minty tea. The flowers are dried for a number of crafts and for their fragrance in potpourri. It is hardy in Michigan.

Did you know that there is a mint marigold (Tagetes minuta) that is used mainly as an insect repellant? It grows tall, up to four feet or more, is an annual, has lacy foliage, and rarely flowers in Michigan. It is also known as Mexican marigold or weedkiller plant. It destroys noxious weeds like bindweed and ground ivy, and is supposed to be good at mosquito control. It is used in the kitchen to flavor meats and vegetables.

peppermint-geranium-mint-rose-geraniumPeppermint geranium, left, and mint rose geranium both smell like mint and provide a great scent for the windowsill.There are nice houseplants called St. John’s mint (Micromeria brownei) and Jamaican peppermint (Satureja viminea). St. John’s mint is used in Jamaica, where it grows naturally, to flavor herb tea. Jamaican peppermint (sometimes listed as Micromeria viminea) is used for upset tummies in Costa Rica and to flavor meat in Trinidad. It grows like a small shrub, to three feet tall. Neither of these plants is hardy in Michigan, thus they are grown indoors.

One that has been hardy in our gardens is the mint shrub (Elsholtzia stauntonii). It blooms with lavender-colored flower spikes in late summer until frost, and frequently entertains butterflies. It has an anise-mint fragrance and has woody canes that winter over. The flowers dry for crafts and potpourri, and the leaves are used for flavoring, more commonly in the Far East.

Short-lived perennials called anise mint or anise hyssop (Agastache foeniculum) and its close relative called Korean mint (Agastache rugosa) self-sow in our gardens and come up in other places, thanks in some part, probably, to the goldfinches that like the seeds and decorate the gardens in autumn. As you can tell by the Latin names, these are neither anise nor hyssop, although they both have a strong anise-mint fragrance and flavor. The flowers are edible and the leaves are used to flavor herb tea, meat dishes and salads.

There is also a mint thyme (Thymus ‘Mint’). It has a creeping habit with tight foliage and a mild mint fragrance, and would be nice planted among paving stones in a walk. It is perennial in Michigan.

And there is a eucalyptus tree called Australian peppermint (Eucalyptus dives) that smells like a good peppermint. It is used in liquid soaps and disinfectants, and in vaporizers for colds. It is a 50- to 70-foot tree, although it can be grown for a while in a pot in Michigan. It is not hardy.

And we haven’t even started on the scented geraniums. The most common of the peppermint geraniums is Pelargonium tomentosum, which has velvety leaves and a sprawling growth habit that does especially well in hanging baskets. These leaves are used as a poultice for bruises, and as a flavoring in teas, desserts, jellies and chocolate cakes. These plants are not frost hardy, but they make nice houseplants in the winter. There is an upright version called pungent peppermint (Pelargonium tomentosum ‘Pungent Peppermint’) that has the same fragrance and is a bit tidier on the windowsill. There are others too, including ‘Peppermint Lace’ with deeply cut leaves, and ‘Peppermint Spice’ with very deeply cut leaves and a spicy peppermint fragrance. One of our favorites, ‘Variegated Mint Rose’ (Pelargonium x asperum ‘Variegatum’), combines the fragrances of mint and rose in a very pretty plant. Even ‘Chocolate Mint’ (Pelargonium quercifolium ‘Chocolate Mint’) has a good mint fragrance and some people say smells a bit like chocolate although the old herb books tell us that the chocolate in the name refers to the chocolate-colored marks on the leaves.

Each of these fake mints has its own uses and craft projects. Most of them can be substituted for mint in your projects. The fragrance may vary a bit, but probably no one but you will be the wiser. And if someone notices, they will just think of you as an expert!

Filed Under: Thyme for Herbs

  • « Previous Page
  • 1
  • 2
  • 3
  • 4
  • 5
  • …
  • 43
  • Next Page »

Copyright 1996-2025 Michigan Gardener. All rights reserved.